- Getting Started with Your Do It Yourself Cold Plunge Tub
- Why a DIY Approach Beats Store-Bought Models
- Comparing Your Options: Build from Scratch vs․ Bathtub Retrofit
- How to Turn Your Bathtub into a Professional Cold Plunge
- The Retrofit Process: From Warm Soaks to Ice Baths
- Step-by-Step: Building a Dedicated Cold Plunge Pool from a Stock Tank
- Assembly and Insulation Basics
- Chemical-Free Sanitation Options for Crystal Clear Water
- Ozone and UV-C: The Power of Natural Purification
- The Cheapest Way to Make Your Own Cold Plunge Tub
- Budget Hacks for the Frugal Biohacker
- Essential Home Cold Plunge Tub Safety Tips
- Protecting Yourself and Your Home
- Frequently Asked Questions
Getting Started with Your Do It Yourself Cold Plunge Tub
The surge in popularity of deliberate cold exposure has turned what was once a niche athletic recovery tool into a mainstream wellness staple․ While professional-grade units can easily command price tags between $5,000 and $15,000, the reality is that you can achieve the same physiological results with a do it yourself cold plunge tub for a fraction of the cost․ By sourcing your own components, you eliminate the massive retail markup and gain a deeper understanding of the filtration and cooling mechanics involved․
Building your own setup isn’t just about saving money; it is about creating a system that fits your specific recovery needs․ Whether you are looking to reduce systemic inflammation after high-intensity training or you want the dopamine-boosting effects of a morning freeze, a custom build allows you to control water purity and temperature precision․ Transitioning from expensive bags of ice to a dedicated, chilled system is the ultimate upgrade for any home recovery lab․
Why a DIY Approach Beats Store-Bought Models
The primary driver for most builders is the staggering cost savings, often reaching up to 80% compared to luxury brands․ A high-end commercial tub often uses the same 1/2 HP chillers and centrifugal pumps that you can buy individually on the open market․ When you build your own cold plunge tub, you are essentially paying for the raw materials and your labor, rather than a sleek fiberglass shell and a lifestyle brand’s marketing budget․
Customization is the second major advantage of making a cold plunge tub at home․ Most commercial units are “one size fits all,” which can be problematic for taller athletes or those with limited floor space in a garage or patio․ A DIY build allows you to select a vessel—be it a vertical stock tank or a repurposed chest freezer—that matches your body dimensions and the specific footprint of your installation area․ Furthermore, the modular nature of a DIY system means you can start with a basic manual-fill setup and gradually upgrade to automated filtration and active chilling as your budget allows․
Comparing Your Options: Build from Scratch vs․ Bathtub Retrofit
Before you purchase a single fitting, you must decide which path fits your lifestyle and technical comfort level․ A retrofit is often the fastest way to get started, but a dedicated build offers superior long-term durability and temperature retention․
| Feature | Bathtub Retrofit | Stock Tank Build | Chest Freezer Conversion |
|---|---|---|---|
| Estimated Cost | $150 ー $600 | $800 ー $1,800 | $500 ⎻ $1,200 |
| Difficulty | Low | Medium | High (Sealing is critical) |
| Durability | Moderate | Extremely High | Moderate (Rust risk) |
| Insulation | Poor (Requires DIY wrap) | Excellent (If foam added) | Superior (Built-in) |
How to Turn Your Bathtub into a Professional Cold Plunge
If you have an underutilized guest bathroom or a freestanding tub, you are already halfway to a functional cryotherapy setup․ The challenge with a standard bathtub is that it is designed to hold heat, not repel it, and the shallow depth often leaves the torso exposed․ To successfully execute a bathtub cold plunge retrofit, you must address three pillars: depth, insulation, and external circulation․
Standard tubs feature an overflow drain that prevents the water from reaching the brim, which is counterproductive for full-body immersion․ By installing a simple silicone overflow cover, you can gain an extra 4 to 6 inches of depth, ensuring that your shoulders and upper chest are fully submerged․ This small modification is the most cost-effective way to improve the efficacy of your sessions without permanent plumbing changes․
The Retrofit Process: From Warm Soaks to Ice Baths
To move beyond dumping bags of ice, you need to create a closed-loop system․ This involves using a submersible pump placed inside the tub that pushes water out through a chiller and back into the tub via a return hose․ When learning how to make your bathtub a cold plunge, always use food-grade, non-kink tubing to ensure that the water flow remains consistent․ If your tub is freestanding, you can even drill professional bulkhead fittings into the side for a permanent, “factory-look” aesthetic․
Insulation is the silent hero of any cold plunge․ An uninsulated porcelain or acrylic tub will “sweat” as condensation forms on the exterior, potentially damaging your flooring․ I recommend applying a layer of 1/2-inch closed-cell foam insulation to the exterior walls of the tub, hidden behind a decorative skirt or within the wall cavity․ This prevents the chiller from working overtime and keeps your water at a steady 45°F even in a heated bathroom environment․
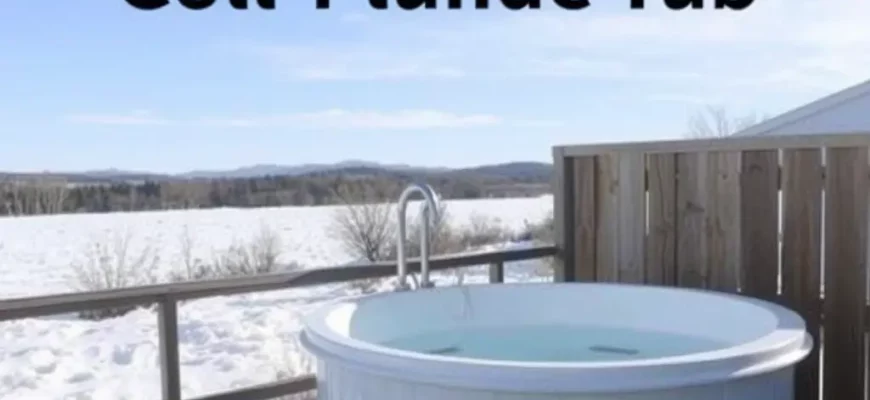
Step-by-Step: Building a Dedicated Cold Plunge Pool from a Stock Tank
The stock tank build is widely considered the gold standard for DIY enthusiasts․ These tanks are designed to withstand the elements and the weight of hundreds of gallons of water․ Whether you choose galvanized steel for a rustic look or heavy-duty plastic for better natural insulation, the build process follows a specific sequence to ensure a leak-proof experience․
- Select and Prep the Vessel: Choose a 100-gallon to 150-gallon tank․ If using galvanized steel, apply a marine-grade epoxy coating to the interior to prevent the zinc from reacting with any sanitation chemicals over time․
- Drill for Bulkheads: Use a hole saw to create two ports—one for the water intake (low on the tank) and one for the return (high on the tank)․ Ensure you deburr the edges of the holes to prevent the rubber gaskets from tearing․
- Install the Filtration Loop: Connect your pump to a 20-micron sediment filter before the water reaches the chiller․ This protects the delicate internal coils of the chiller from hair, skin cells, and debris․
- Apply External Insulation: Wrap the tank in Reflectix or spray foam․ If you want a premium look, build a cedar or pressure-treated wood frame around the tank, filling the gap with rockwool insulation․
- Final Seal and Test: Fill the tank halfway and check all threaded connections for drips․ Always use thread seal tape (Teflon tape) on every plastic-to-metal connection to prevent slow leaks․
Assembly and Insulation Basics
When you decide to make your own cold plunge tub, the choice of material impacts your maintenance schedule․ Plastic tanks are lighter and won’t rust, but they can bow under the pressure of the water if not properly supported․ Galvanized steel is structurally superior but requires a liner or epoxy coating if you plan on using salt-based or ozone-based sanitation systems․ Regardless of the material, elevating the tank on a pressure-treated 4×4 base allows for better airflow and prevents moisture from trapping against your garage or patio floor․
Insulation shouldn’t just be focused on the sides of the tank․ A massive amount of “thermal leakage” occurs through the surface of the water․ Creating a custom-fitted lid made of 2-inch rigid foam board is the single most effective way to reduce your chiller’s energy consumption․ Without a lid, your chiller may run 18 hours a day; with a lid, that can drop to 4 hours, significantly extending the lifespan of your equipment․
Chemical-Free Sanitation Options for Crystal Clear Water
Nobody wants to plunge into a soup of bacteria, but many people find the smell and skin-irritation of chlorine to be a dealbreaker․ Maintaining a home made cold plunge tub requires a proactive approach to sanitation․ Because the water is kept at low temperatures, bacterial growth is slower than in a hot tub, but it is not non-existent․ The goal is to achieve “potable-quality” water without the harsh chemical load․
The most effective chemical-free strategy involves a combination of mechanical filtration and active oxidation․ A high-flow submersible pump should circulate the entire volume of the tub at least 3 to 4 times per hour․ This constant movement prevents “dead zones” where algae can take hold․ By integrating an ozone generator or a UV-C sterilizer into your plumbing loop, you can neutralize 99․9% of pathogens without changing the pH of the water or leaving a chemical residue on your skin․
Ozone and UV-C: The Power of Natural Purification
Ozone (O3) is a powerful oxidizer that is injected into the water line via a venturi injector․ As the ozone bubbles travel through the water, they “burn up” organic matter like sweat and oils․ For a DIY setup, an ozone generator designed for small pools is ideal․ However, you must ensure the ozone is properly degassed or injected in small enough quantities that it doesn’t off-gas into a confined indoor space, as high concentrations of ozone can be an irritant․
UV-C light offers a secondary layer of protection․ As water passes through a specialized chamber, ultraviolet light disrupts the DNA of bacteria and viruses, rendering them harmless․ When combined with a 20-micron pleated filter, these systems allow you to keep the same water for up to three months․ Always shower before you plunge to remove lotions and deodorants; this simple habit reduces the load on your sanitation system by more than 50%․
The Cheapest Way to Make Your Own Cold Plunge Tub
If you are on a strict budget, you don’t need a $500 chiller or a $200 stock tank to get started․ The “Minimum Viable Product” for cold exposure is a vessel that holds water and some form of thermal mass․ For many beginners, the cheapest way to make your own cold plunge tub is to find a used chest freezer on local marketplaces․ These units are already insulated and designed to hold extreme temperatures․
- Used Chest Freezer: Often found for under $100․ Seal all internal seams with JB-Weld or food-grade silicone to make it watertight․
- Pond Liner: If you have a structural frame but no vessel, a 45-mil EPDM pond liner can turn any wooden box into a tub․
- Manual Ice Blocks: Instead of buying bags of ice, freeze water in 1-gallon plastic milk jugs or large Tupperware containers․ These reusable blocks last longer and don’t dilute the water․
- Simple Siphon: Use a basic garden hose and gravity to drain the water every few days if you aren’t using a filtration system․
Budget Hacks for the Frugal Biohacker
To maximize your savings when learning how to make a cold plunge tub at home, focus on the “thermal battery” concept․ If you cannot afford a chiller, insulate your vessel as heavily as possible․ A well-insulated tub will lose only 1-2 degrees of temperature over a 24-hour period․ By adding your reusable ice blocks the night before your plunge, you can reach target temperatures (sub-50°F) without any electrical cooling components․
Another budget-friendly tip is to source your plumbing fittings from irrigation suppliers rather than high-end pool stores․ Standard PVC and braided vinyl tubing are perfectly suitable for the low pressures found in a cold plunge system․ Avoid using “clear” tubing in areas exposed to sunlight, as this will encourage algae growth inside the lines․ Opaque black or blue tubing is a much better choice for maintaining water clarity on a budget․
Essential Home Cold Plunge Tub Safety Tips
Safety is the area where you should never look for a “shortcut․” Combining water and electricity is inherently dangerous, and the physiological stress of cold water requires respect․ When you are setting up your do it yourself cold plunge tub, the electrical configuration is your first priority․ You are not just building a tub; you are building a piece of electrical equipment that you will be submerged in․
CRITICAL WARNING: Never enter a DIY cold plunge tub while any electrical components (chillers, pumps, or heaters) are plugged into a power source․ Even with safety switches, the risk of a ground fault is not worth the convenience of leaving the system running․
Protecting Yourself and Your Home
The most important safety component is a GFCI (Ground Fault Circuit Interrupter) outlet or adapter․ This device monitors the flow of electricity and will trip the circuit in milliseconds if it detects a leak to ground․ Beyond electrical safety, you must manage the environment around the tub․ If your setup is in a garage, install a humidity-sensing exhaust fan to prevent the condensation from the cold tub from causing mold growth in your drywall or studs․
- DO: Use a thermometer to verify the temperature before entering; “guessing” can lead to unexpected cold shock․
- DO: Keep a phone or a “spotter” nearby if you are experimenting with temperatures below 40°F for the first time․
- DON’T: Plunge immediately after a heavy meal or while under the influence of alcohol, as these affect your body’s thermoregulation․
- DON’T: Use a chest freezer without completely disabling the locking mechanism, to prevent accidental entrapment․
- DO: Step out of the tub immediately if you experience “the “umbles”—stumbling, mumbling, or fumbling—as these are early signs of hypothermia․
In my professional experience building and consulting on high-performance recovery rooms, I have found that the most common failure point isn’t the tub itself, but the plumbing connections․ I always advise builders to over-spec their pumps․ A pump that is struggling to push water through a chiller will overheat and fail prematurely․ Aim for a pump rated for at least double the volume of your tub per hour․ Additionally, while the “DIY spirit” encourages saving money, never skimp on the sealant․ I only use marine-grade 3M 5200 adhesive for bulkheads; it is designed to stay submerged for decades without degrading․ Remember, the best cold plunge is the one that is easy to maintain․ If the water is hard to clean, you won’t use it․ Spend the extra $100 on a high-quality 20-micron filter housing—your skin and your sanity will thank you․
Frequently Asked Questions
The most efficient method is using a submersible utility pump with a standard garden hose attachment․ This allows you to drain a 100-gallon tank in under 10 minutes, directing the water to a nearby lawn or floor drain․ For filling, a simple garden hose is sufficient, but consider adding an inline charcoal filter to remove chlorine from the source water․
What is the best way to keep the water cold without a chiller?
Use “thermal mass” by freezing large blocks of ice in reusable 5-gallon buckets or silicone molds․ These large blocks have less surface area than ice cubes, meaning they melt slower and keep the water at a lower temperature for a longer duration․ Combine this with a 2-inch thick insulated lid to maintain the temperature between sessions․
Can I turn a soft tub or inflatable pool into a cold plunge?
Yes, but you will face significant challenges with insulation and structural integrity․ Inflatable tubs lack the rigid walls needed for secure bulkhead fittings․ If you use one, place it on a thick foam gym mat to insulate it from the ground and use a “drop-in” pump system rather than drilling through the vinyl walls․
How often should I change the water in a DIY cold plunge?
If you use a 20-micron filter combined with ozone or UV-C sanitation, you only need to change the water every 8 to 12 weeks․ Without any filtration or sanitation, the water should be dumped and the tub scrubbed every 3 to 5 days to prevent biofilm and bacterial buildup․
Is it safe to use a chest freezer for a DIY cold plunge?
It is safe only if you follow two non-negotiable rules: Seal all interior seams with a thick layer of marine-grade sealant to prevent water from reaching the electrical coils, and physically unplug the unit from the wall before your body touches the water․ Never rely on a power switch alone․
How do I prevent my bathtub from leaking when retrofitting?
The key is the bulkhead seal․ Always use silicone-based gaskets on both the interior and exterior of the tub wall․ When tightening the nut, go only a quarter-turn past hand-tight; over-tightening can crack the tub’s acrylic coating or deform the gasket, leading to a slow, persistent leak․