- Why a Rubbermaid Cold Plunge is the Smartest DIY Choice
- Benefits of Using a Rubbermaid Stock Tank for Cold Plunge Setups
- Choosing Your Size: 100 Gallon vs 150 Gallon Rubbermaid Cold Plunge
- Is the 100 Gallon Rubbermaid Cold Plunge Right for You?
- Stepping Up to the 150 Gallon Rubbermaid Cold Plunge
- Essential Steps to Set Up Your Rubbermaid Tub for Cold Plunge Use
- Placing and Leveling Your Stock Tank
- Managing Ice and Temperature with a Stock Tank Deicer
- How to Use a Stock Tank Deicer for Cold Plunge Maintenance
- The Resale Market: How to Sell Your Used Cold Plunge
- Maximizing Value When You Decide to Sell Your Used Cold Plunge
- Expert Perspective: Structural Foam and Safety Science
- Frequently Asked Questions
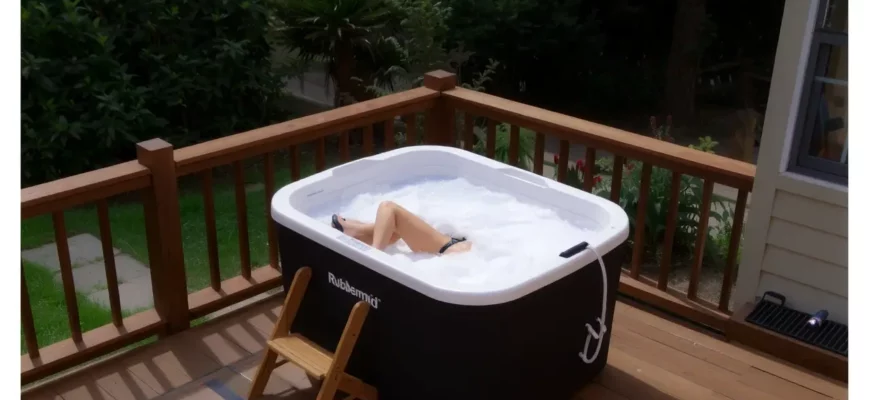
Why a Rubbermaid Cold Plunge is the Smartest DIY Choice
For enthusiasts looking to master how to reduce inflammation and accelerate recovery, the industrial stock tank has emerged as the premier vessel for home setups․ While high-end dedicated plunge brands charge thousands of dollars, a rubbermaid cold plunge offers the same physiological benefits at a fraction of the cost․ These tanks are engineered for the rigors of agricultural life, meaning they handle extreme weather and heavy water weight without the structural fatigue seen in cheaper inflatable alternatives․
The secret to their popularity lies in the material science of structural foam․ Unlike standard thin-walled plastic bins, these tanks are molded with a cellular core that provides a durable ice bath environment capable of withstanding years of UV exposure and freezing cycles․ This makes them a “buy it once” solution for anyone serious about a daily immersion practice․
Benefits of Using a Rubbermaid Stock Tank for Cold Plunge Setups
The primary advantage of these commercial-grade products is their extreme impact resistance․ Because they are designed to survive being bumped by livestock, they will not crack if you accidentally drop a heavy bag of ice or a filtration pump into the basin․ This ruggedness is essential for an outdoor setup where environmental debris and temperature fluctuations are constant variables․
Maintenance is simplified by the inclusion of a heavy-duty, built-in 1․5-inch drain plug․ Instead of siphoning water or using a submersible pump, you can attach a standard garden hose to the drain to direct greywater toward a garden or drain․ This keeps your patio dry and prevents the stagnant water buildup that often plagues DIY setups․
From a financial perspective, the cost-to-performance ratio is unmatched․ A dedicated cold plunge unit can easily exceed $5,000, whereas a high-quality stock tank costs a few hundred dollars․ This leaves more room in your budget for high-performance water chillers or premium filtration systems, allowing you to build a professional-grade recovery station without the “luxury brand” markup․
Choosing Your Size: 100 Gallon vs 150 Gallon Rubbermaid Cold Plunge
Selecting the right volume is the most critical decision in your build process, as it dictates both your comfort during the soak and the ongoing cost of cooling the water․ You must balance the physical footprint of the tub with the internal dimensions required for your specific body type to ensure a successful habit․ Synonyms like tub and tank are often used interchangeably, but the technical specifications of these specific models are distinct․
| Feature | 100 Gallon Model | 150 Gallon Model |
|---|---|---|
| Dimensions (Approx․) | 53″ L x 31″ W x 25″ H | 58″ L x 39″ W x 25″ H |
| Empty Weight | 34 lbs | 46 lbs |
| Filled Weight (Est․) | 860 lbs | 1,300 lbs |
| Best Fit For | Users under 6’0″ | Users 6’0″ to 6’6″ |
Is the 100 Gallon Rubbermaid Cold Plunge Right for You?
The 100 gallon rubbermaid cold plunge is the go-to choice for urban dwellers or those with limited outdoor space․ Its narrower profile allows it to fit through standard doorways and onto smaller balconies more easily than its larger counterpart․ Because it holds less water, it also reaches target temperatures much faster when using ice, making it a compact ice bath that is efficient for daily use․
However, users should be aware of the ergonomic trade-offs․ If you are over six feet tall, you will likely find that your knees must be significantly bent to achieve full chest submersion․ While this “seated soak” is perfectly effective for cold therapy, those who prefer to sprawl out may feel slightly cramped during a five-minute session․
Stepping Up to the 150 Gallon Rubbermaid Cold Plunge
For taller athletes or those who want a more immersive experience, the 150 gallon rubbermaid cold plunge is the superior option․ The extra width is the most noticeable difference, providing enough shoulder room to relax without touching the sides of the tub․ This large stock tank also boasts a higher thermal mass, which means once the water is cold, it stays cold for a longer duration, even in warmer ambient temperatures․
The downside to the 150-gallon model is the sheer weight when filled․ At approximately 1,300 pounds, it is not suitable for standard wooden decks without professional structural reinforcement․ You must ensure your placement surface is either a concrete pad or reinforced ground to prevent sinking or structural damage to your home over time․
Essential Steps to Set Up Your Rubbermaid Tub for Cold Plunge Use
Setting up your recovery station requires more than just a garden hose and a bag of ice․ A methodical approach ensures the longevity of the rubbermaid tub for cold plunge use and protects your property from water damage․ Before the first fill, you must address the manufacturing residues that can cloud your water or irritate the skin․
- Site Preparation: Clear a level area and remove all sharp rocks or debris that could cause pressure points on the bottom of the tank․
- Surface Leveling: Use a spirit level to ensure the ground is perfectly flat; even a two-degree slope can cause the water to put uneven stress on the structural foam walls․
- Factory Cleaning: Scrub the interior with a mild dish soap or a vinegar solution to remove the oily mold-release agents used during the manufacturing process․
- Plumbing Check: Hand-tighten the drain plug and consider applying a small amount of plumber’s tape to the threads to ensure a 100% watertight seal․
- Initial Fill: Fill the tank halfway and check for any leaks or settling before completing the fill to the desired immersion level․
Placing and Leveling Your Stock Tank
When setting up an ice bath, the foundation is everything․ If you are placing the tank on a patio, consider using a 3/4-inch thick rubber stall mat underneath․ This serves two purposes: it protects the bottom of the tank from abrasion and provides a layer of thermal insulation from the hot or cold ground, helping to maintain your water temperature more effectively․
Accessibility is the second factor in placement․ You must leave enough clearance around the drain plug to attach a hose for easy water changes․ Additionally, place the tub within reach of a GFCI-protected outlet if you plan to run a filtration pump or a stock tank deicer, as using standard extension cords near water creates a significant safety hazard․
Managing Ice and Temperature with a Stock Tank Deicer
Winter brings a unique challenge for outdoor cold plunges: preventing the water from turning into a solid block of ice․ While we want the water cold, a frozen tank can expand and potentially damage the structural foam or the drain plug assembly․ This is where a stock tank deicer for cold plunge maintenance becomes an essential tool for those living in northern climates․
- Do: Use a deicer with a built-in thermostat that only activates when temperatures drop below 35 degrees Fahrenheit․
- Do: Ensure the heating element is caged or shielded to prevent it from touching the plastic walls of the tank․
- Don’t: Ever enter the water while the deicer is plugged in; always completely disconnect the power source before your plunge․
- Don’t: Use a high-wattage heater designed for 1,000-gallon ponds, as this will raise the water temperature too much for effective cold therapy․
How to Use a Stock Tank Deicer for Cold Plunge Maintenance
The goal of winter cold plunge care is to maintain a liquid state, not to create a lukewarm bath․ Most deicers are designed to keep a small area of the surface open for livestock, but in a cold plunge, they can keep the entire volume around 38-40 degrees․ This is the “sweet spot” for cold immersion without the hassle of breaking through a thick layer of surface ice every morning․
For maximum safety and efficiency, mount the deicer near the surface rather than at the bottom․ Since ice forms from the top down, a floating deicer is often more effective at preventing a total freeze-over while using less electricity․ Always verify that your deicer is rated for use in plastic tanks, as some older “sinker” models can get hot enough to melt or deform the structural foam if they come into direct contact with the floor of the tub․
The Resale Market: How to Sell Your Used Cold Plunge
As your cold plunge practice evolves, you might find yourself wanting to upgrade to a larger tank or a fully integrated commercial system․ One of the best features of Rubbermaid products is their high resale value․ Because they are considered industrial equipment, there is a constant demand from both the fitness community and the agricultural sector for used stock tank value recovery․
When you decide it is time to sell my used cold plunge, a little bit of preparation can significantly increase your asking price․ A clean, well-maintained tank can often sell for 70-80% of its original retail price, especially in regions where shipping costs for new large items are high․ The “structural foam” branding is a major selling point that you should highlight in any listing․
Maximizing Value When You Decide to Sell Your Used Cold Plunge
Before listing your tub, perform a deep clean using a non-abrasive oxygen bleach or hydrogen peroxide solution to remove any mineral scaling or “biofilm” that may have developed․ Document the integrity of the drain plug and the lack of cracks in the rim with high-quality photos․ Buyers in the DIY fitness space are looking for equipment that is ready for immediate use without additional scrubbing․
The best places to list your equipment are local fitness groups, Facebook Marketplace, or specialized DIY cold plunge forums․ Emphasize that the tank has been used for “hydrotherapy” rather than livestock, as this implies a higher level of hygiene and care․ Mentioning that the tank was stored on a rubber mat or under a cover will further signal to the buyer that the material has been protected from unnecessary wear․
Expert Perspective: Structural Foam and Safety Science
In my professional experience, the primary mistake DIYers make is underestimating the insulative properties of structural foam․ Unlike galvanized metal tanks, which act as a thermal bridge and rapidly equalize with the outside air, the cellular core of the Rubbermaid tank provides a natural barrier․ I always advise users to pair their tank with a custom-cut 2-inch rigid foam lid; this simple addition can reduce ice consumption by nearly 40% in the summer months․
Furthermore, safety must extend beyond the tub․ I cannot stress enough the importance of monitoring for the “afterdrop” effect․ After you exit the water, your core temperature will continue to fall as cold blood from your extremities returns to your heart․ To stay safe, avoid immediate hot showers which can cause vasodilation and lead to fainting․ Instead, pat yourself dry, put on warm layers, and allow your body to thermoregulate naturally․
Frequently Asked Questions
Yes, for the majority of adults up to 6 feet tall, the 100-gallon tank is sufficient․ You will typically sit with your knees bent and your back against the side, which allows for full chest submersion for most body types․
How do I keep the water clean in my stock tank?
To maintain hygiene, use a tight-fitting cover to block debris and UV light․ I recommend adding 1/2 cup of food-grade hydrogen peroxide weekly and performing a full water change every 7 to 14 days depending on usage frequency․
Can I use an aquarium chiller with a Rubbermaid stock tank?
Yes, but it requires a modification․ You will need to install a submersible pump to move water from the tank through the chiller and back․ Many DIY enthusiasts drill the side walls to install permanent bulkhead fittings for a cleaner look․
Will the stock tank deicer make the water too warm?
No, standard stock tank deicers are thermostatic․ They are designed to turn on only when the water approaches 32°F and shut off once the water is safely above freezing․ They do not have the power to “heat” the water to comfortable bathing temperatures․
Does the Rubbermaid tank need to be insulated?
While the structural foam offers some insulation, it is not a cooler․ If you live in a very hot climate, wrapping the exterior in Reflectix insulation or building a wooden cedar surround can help keep your water at sub-50°F temperatures for longer periods․