- Maximizing Your Chill with the Right Cold Plunge Cube Strategy
- Why Size Matters: The Science of Large Ice Molds
- Calculating the Freeze: Using a Cold Plunge Ice Calculator
- How Many Pounds of Ice Do You Actually Need?
- Breaking the Ice Habit: Transitions to a Cold Plunge That Doesnt Need Ice
- The Benefits of Constant Cooling Systems
- Optimizing Your Cold Plunge Box for Thermal Retention
- Liners and Lids: The Secret to 24/7 Cold Water
- Common Mistakes When Chilling Your Home Setup
- Avoiding the Lukewarm Plunge
- Frequently Asked Questions
Maximizing Your Chill with the Right Cold Plunge Cube Strategy
The term cold plunge cube refers to two distinct but equally important elements of a high-performance recovery setup: the physical geometry of the ice you use and the structural integrity of the container itself․ While many beginners start by dumping standard kitchen ice into a tub, they quickly realize that small cubes vanish in minutes, leaving the water lukewarm and the recovery session ineffective․
To achieve a truly therapeutic temperature, you must prioritize thermal mass over surface area; Specialized large-scale molds create massive blocks that resist melting, providing a sustained cooling effect that standard ice simply cannot match․ By mastering the science of these larger “cubes,” you transform a frustrating chore into a streamlined, professional-grade wellness routine․
Why Size Matters: The Science of Large Ice Molds
Standard ice cubes from a refrigerator dispenser have a high surface-area-to-volume ratio, which is ideal for chilling a glass of water quickly but disastrous for a 100-gallon tank․ A single 5-pound block of ice has significantly less surface area exposed to the water than 5 pounds of small cubes, meaning the large block melts much slower and provides a consistent temperature drop throughout a 10-minute session․
Durability is the next major factor when selecting equipment for manual cooling․ Always opt for heavy-duty silicone ice trays over rigid plastic alternatives, as plastic becomes brittle and prone to cracking when subjected to the expansion of freezing water in sub-zero deep freezer environments․ High-quality silicone remains flexible, allowing you to pop out massive 10-inch blocks without damaging the mold or straining your hands․
Calculating the Freeze: Using a Cold Plunge Ice Calculator
Cooling water is a game of thermodynamics, and guessing how much ice you need usually leads to a lukewarm disappointment․ To lower the temperature of a large volume of water, you must account for the starting temperature, the ambient air temperature, and the specific heat capacity of the water itself․ Without a baseline calculation, you might waste 40 pounds of ice only to see a negligible 2-degree drop․
Quick Reference Guide: Ice Requirements for a 100-Gallon Tub
- Target: 5-Degree Drop: Approximately 25 to 30 lbs of ice (approx․ 5-6 large 5lb blocks)․
- Target: 10-Degree Drop: Approximately 55 to 60 lbs of ice (approx․ 11-12 large 5lb blocks)․
- Target: 15-Degree Drop: Approximately 85 to 90 lbs of ice (requires significant freezer space)․
- Variable Factor: If your tub is uninsulated and sitting in 80-degree sun, increase these estimates by 20% to compensate for environmental heat gain․
How Many Pounds of Ice Do You Actually Need?
The math changes based on your starting point; cooling water from 65°F to 50°F is far easier than pushing it from 50°F down to 40°F․ This is because the closer the water temperature gets to the ice temperature, the more energy is required to force that final drop․ For most users, aiming for a 10-15 degree reduction requires roughly 0․5 to 0․8 pounds of ice per gallon of water, depending on the insulation of your container․
Ambient air temperature acts as a constant “heater” against your cooling efforts․ If you are using a basic stock tank or a thin-walled plastic tub, the heat transfer from the surrounding air can neutralize your ice in real-time․ To maximize efficiency, always pre-chill your water by keeping the tub in a shaded area and ensuring your cold plunge box is elevated off the hot ground to prevent thermal conduction from the floor․
Breaking the Ice Habit: Transitions to a Cold Plunge That Doesnt Need Ice
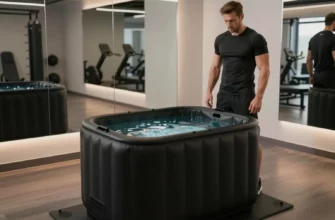
While ice molds are a fantastic entry point, the logistical “friction” of freezing, hauling, and dumping 60 pounds of ice every morning eventually leads to burnout for many enthusiasts․ Transitioning to an ice-free system involves a higher upfront cost but offers 24/7 readiness and precise temperature control․ This shift moves your practice from a labor-intensive chore to a seamless part of your morning routine․
| Feature | Manual Ice Molds | Dedicated Chiller System |
|---|---|---|
| Upfront Cost | Low ($30 ― $100) | High ($500 ⎻ $2,500) |
| Daily Effort | High (Freezing/Hauling) | Zero (Set and Forget) |
| Temp Precision | Variable/Guesswork | Digital Accuracy (+/- 1 degree) |
| Hygiene | Higher risk of stagnant water | Integrated filtration and ozone |
The Benefits of Constant Cooling Systems
The primary advantage of a refrigerated water system is the elimination of temperature “swings․” When you use ice, the water starts getting warmer the moment you step in, which can blunt the metabolic response of the session․ An active chiller unit maintains a steady thermal load, ensuring that the last minute of your plunge is just as cold as the first, which is critical for inducing a consistent norepinephrine and dopamine response․
Automated cooling also solves the hygiene problem․ Most high-end chillers include a recirculating pump and a 20-micron filter, which prevents the buildup of skin cells, oils, and bacteria․ If you rely on ice alone, you must drain and refill your tub much more frequently, as stagnant water becomes a breeding ground for biofilm without constant movement and filtration․
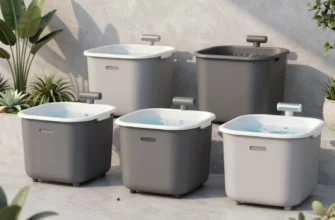
Optimizing Your Cold Plunge Box for Thermal Retention
If you are building a DIY setup, the quality of your insulation is the single most important factor in determining your energy bill or your ice usage․ A cold plunge box is essentially a giant thermos; if the walls are thin, you are effectively trying to cool the entire room rather than just the water․ Proper hardware upgrades can keep your water at 45°F for days without adding a single new cube of ice․
To prevent structural damage and leaks, always install a 20-gauge or thicker freezer liner if you are converting a chest freezer or building a wooden box․ These liners act as a waterproof barrier that protects the insulation and the outer frame from the corrosive effects of moisture and sanitizing chemicals like bromine or chlorine․ Without a proper liner, internal condensation will eventually rot your frame or short-circuit your electrical components․
Liners and Lids: The Secret to 24/7 Cold Water
Most of the heat gain in a cold plunge occurs at the surface of the water․ An open tub is a massive heat sink, drawing energy from the air and letting the cold evaporate away․ Investing in an R-10 rated insulated lid can reduce your chiller’s energy consumption by up to 70%, as it traps the “cold cap” of air directly above the water line and prevents the ambient environment from warming the tub․
For those using the ice mold method, a high-quality lid is even more vital․ A well-insulated lid can extend the life of your ice blocks by several hours, allowing you to prep the tub in the morning and have it remain at a therapeutic temperature until your afternoon recovery session․ Look for lids with a marine-grade vinyl exterior to resist UV damage if your setup is located outdoors․
Common Mistakes When Chilling Your Home Setup
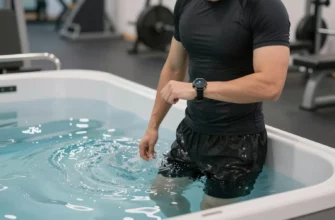
Many beginners fail because they treat their cold plunge like a standard bathtub rather than a specialized piece of thermal equipment․ One of the most frequent errors is underestimating the power of the “thermal mass” of the human body․ Your body heat can raise the temperature of 50 gallons of water by 2-3 degrees in a single 5-minute session, meaning you need a cooling strategy that accounts for your own biological heat output․
Warning: Never use a standard aquarium chiller for a cold plunge․ These units are designed to maintain 70-degree water for fish and lack the compressor power to pull water down to 40 degrees․ You will likely burn out the motor within a week of use․
Avoiding the Lukewarm Plunge
Relying on standard kitchen ice trays is the fastest way to kill your motivation․ It takes roughly 20 to 30 standard trays to equal the cooling power of just two large silicone blocks․ The labor involved in cracking dozens of small trays every day is unsustainable․ Instead, invest in at least four 5-lb molds so you can rotate them in and out of the freezer, ensuring a fresh supply of thermal mass is always ready․
Another critical mistake is failing to manage water flow․ In an ice-free system, if your pump is too weak, the water around the chiller’s heat exchanger will freeze into a block, while the water in the tub remains warm․ Ensure your pump is rated for at least 500 to 800 gallons per hour (GPH) to maintain the turbulent flow necessary for efficient heat transfer and to prevent the system from “short cycling․”
In my professional experience, the biggest hurdle for cold therapy practitioners isn’t the cold itself—it’s the friction of the setup․ From a physics standpoint, water has a very high specific heat capacity, meaning it takes a massive amount of energy to change its temperature․ I always advise clients to stop chasing the “lowest possible number” and focus instead on thermal consistency․ A steady 50°F plunge that you actually do every day is infinitely more beneficial for your nervous system than a 38°F plunge that you only manage once a week because the ice prep is too difficult․ If you are on a budget, use a hybrid approach: buy a small, affordable water chiller to keep the baseline at 55°F, and then use two large silicone “cubes” to drop it that final 5 degrees right before you jump in․ This reduces the strain on the machine and saves you from hauling 60 pounds of ice every morning․
Frequently Asked Questions
Because of the significant density and volume of 5-lb to 10-lb molds, it generally takes between 12 and 24 hours to fully solidify․ Always keep a rotating stock in your freezer so you are never waiting on a freeze cycle to start your session․
Can I use a regular refrigerator to keep my plunge cold?
While some DIYers attempt to use refrigerator coils, it is highly inefficient․ Refrigerator compressors are designed to cool air, not liquid․ A dedicated water chiller is significantly more effective for the high thermal load required to cool 100 gallons of water․
Are silicone ice trays better than plastic for cold plunges?
Yes, silicone is superior because it remains flexible at sub-zero temperatures․ Rigid plastic trays will eventually crack due to the repeated expansion and contraction of the ice, making silicone the more cost-effective long-term choice․
What is a cold plunge cooling lid and do I need one?
A cooling lid is a thick, insulated cover that prevents heat from the air from entering the water․ It is an essential component for anyone using a chiller or trying to maintain ice for more than an hour, as it prevents nearly 70% of thermal loss․
How do I calculate how much ice to add to my tub?
Use the basic formula: (Water Volume in Gallons x Desired Temp Drop) / 144․ For a simpler method, plan on 5 to 7 pounds of ice for every degree you want to drop 100 gallons of water․