- How to Choose the Best Inflatable Cold Plunge for Your Space
- Why Portability is Changing the Recovery Game
- Is an Inflatable Cold Plunge with Chiller Worth the Investment?
- The Hidden Costs: Ice vs. Electricity
- Inflatable vs. Non-Inflatable: Which Setup Wins?
- The Durability Myth: How Tough are Inflatables?
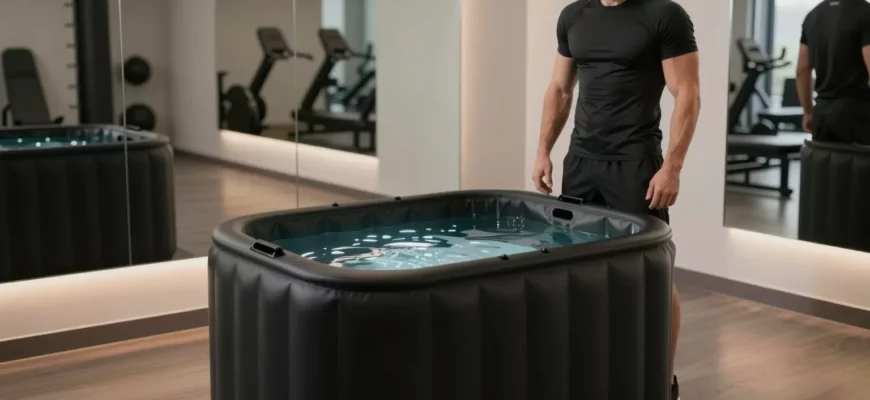
- Design Spotlight: The Solstice Cold Plunge Inflatable Recovery Barrel
- Vertical Immersion vs. Horizontal Soaking
- Essential Maintenance: Keeping Your Water Crystal Clear
- Filtration and Sanitation Basics
- Common Mistakes to Avoid with Your New Cold Plunge
- Expert Perspective: The Physics of Consistency
- Frequently Asked Questions
How to Choose the Best Inflatable Cold Plunge for Your Space
Selecting a recovery tool often feels like a trade-off between professional quality and practical home use. For years, the only way to achieve true cryotherapeutic temperatures at home was through expensive, permanent installations or DIY chest freezers that were difficult to clean and move. The shift toward high-pressure inflatable technology has leveled the playing field for home users.
Modern portable ice baths now utilize the same materials found in professional stand-up paddleboards, allowing them to withstand significant internal pressure. This means you can have a rock-solid tub that supports your weight during entry and exit, but can still disappear into a duffel bag when you need your garage or patio space back.
Why Portability is Changing the Recovery Game
The ability to pack a full-sized recovery station into a trunk is a massive advantage for competitive athletes. Whether you are traveling for a multi-day tournament or moving to a new apartment, your recovery routine does not have to be interrupted by logistics. Always ensure your chosen model includes a high-volume dual-action pump to reduce setup time from twenty minutes down to less than five.
Lowering the cost of entry is perhaps the most significant benefit of the inflatable market. While a custom-built cold room or a permanent acrylic plunge can cost upwards of $10,000, high-end inflatable setups provide nearly identical thermal performance for a fraction of that price. This accessibility allows hobbyist runners and weekend warriors to access the same inflammation-reduction benefits previously reserved for elite professionals.
Setting up a home gym often involves a constant battle for square footage. Inflatable tubs allow for a “seasonal” recovery approach. You can maintain a rigorous protocol during high-volume training blocks and reclaim your floor space during the off-season. Look for tubs with reinforced side-walls to ensure the unit doesn’t bow or lose shape if you lean against the edge while submerged.
Is an Inflatable Cold Plunge with Chiller Worth the Investment?
The honeymoon phase of cold plunging often ends when the reality of “the ice run” sets in. Lugging forty pounds of bagged ice from the grocery store every morning is not just a physical chore; it is a recurring expense that quickly eclipses the cost of the tub itself. An automated cooling system transforms the experience from a project into a habit.
Chillers provide a level of temperature precision that manual icing simply cannot match. When you dump ice into a tub, the temperature fluctuates wildly, often warming up before you have even finished your three-minute session. A dedicated cooling unit maintains a “set it and forget it” environment, ensuring the water is exactly 45°F (or your preferred temperature) the moment you wake up.
The Hidden Costs: Ice vs. Electricity
If you plunge four times a week and use three bags of ice per session, you are likely spending over $150 per month on ice alone. In contrast, a modern 0.5HP or 1HP chiller is remarkably energy-efficient once the water reaches its target temperature. To maximize energy savings, always use a thick, insulated thermal cover when the tub is not in use to prevent the chiller from working overtime against ambient heat.
Consistency is the most important factor in seeing long-term neurological and physical benefits from cold stress. If the barrier to entry—buying ice, hauling it, and waiting for it to melt—is too high, most people will eventually quit. Automated temperature control removes this friction entirely. You are paying for the convenience of immediate access, which directly correlates to how often you actually use the equipment.
- Consistent Baseline: Chillers allow you to track your progress by lowering the temperature by exactly one degree as you adapt.
- Constant Filtration: Most chiller units include a built-in 20-micron filter and ozone generator, keeping the water safe for weeks at a time.
- Cold Shock Management: Knowing the exact temperature helps you mentally prepare for the initial gasp reflex, making the practice safer and more controlled.
Inflatable vs. Non-Inflatable: Which Setup Wins?
The debate between “hard-shell” and inflatable designs often comes down to the perceived durability of the materials. However, the gap has closed significantly thanks to military-grade construction techniques. While an acrylic tub might look more “premium” in a high-end spa, the inflatable version offers a level of versatility and tactile comfort that hard tanks struggle to provide.
Inflatables are naturally more forgiving on the joints. When you are shivering and trying to find a comfortable position, the slight “give” of a PVC wall is much more pleasant than the unyielding edge of a metal stock tank or a fiberglass tub. Furthermore, the air trapped within the walls of an inflatable acts as a natural insulator, often outperforming uninsulated metal tanks in heat retention.
| Feature | Inflatable Drop-Stitch | Permanent Hard-Shell |
|---|---|---|
| Portability | High (fits in a backpack) | None (requires 2-3 people to move) |
| Setup Time | 5-10 minutes | Permanent installation |
| Comfort | Soft, air-cushioned walls | Hard, rigid surfaces |
| Durability | Puncture-resistant PVC | Chip-resistant acrylic/metal |
| Price Point | $500 ⎻ $1,500 (Tub only) | $4,000 ⎻ $15,000+ |
The Durability Myth: How Tough are Inflatables?
The term “inflatable” often conjures images of cheap pool toys, but professional cold plunges utilize drop-stitch technology. This process involves connecting two layers of heavy-duty PVC with tens of thousands of polyester threads. When inflated to 10-15 PSI, the tub becomes so rigid that it feels like a hard-shell boat. You should be able to sit on the edge of a fully inflated tub without it collapsing or losing air.
UV resistance is a critical factor for those planning an outdoor setup. High-quality inflatables are treated with coatings that prevent the PVC from becoming brittle or fading under direct sunlight. While a sharp object could technically cause a puncture, these units are surprisingly difficult to damage. If a leak does occur, most reputable brands provide a repair kit that allows for a permanent fix in under ten minutes, something that is much harder to achieve with a cracked acrylic or leaking metal seam.
Design Spotlight: The Solstice Cold Plunge Inflatable Recovery Barrel
The shape of your plunge dictates the “vibe” of your recovery session. While long tubs allow you to recline, vertical barrel designs have become the gold standard for many athletes due to their small footprint and immersion depth. The Solstice model is a prime example of how vertical designs maximize the benefits of hydrostatic pressure on the lower limbs.
Barrels are particularly effective for those with limited space, such as on an apartment balcony or in a crowded garage gym. Because you are sitting upright, the water weight is distributed vertically, which can feel more “enveloping.” This design also makes it easier to achieve full neck-deep immersion, which is vital for triggering the mammalian dive reflex and calming the nervous system.
Vertical Immersion vs. Horizontal Soaking
In a vertical barrel like the Solstice, your body remains in a compact, seated position. This minimizes the surface area of the water exposed to the air, which can improve thermal efficiency. When using a vertical barrel, ensure your feet are flat on the bottom to maintain stability, as the buoyancy can sometimes make you feel like you are “floating” out of the seated position.
The footprint of a recovery barrel is typically 30% to 40% smaller than a standard tub. This makes them the ideal choice for “dead space” in a home. Additionally, many users find that the upright position makes it easier to practice focused box-breathing during the plunge. Always check the height of the barrel before purchasing; taller athletes may need a unit that is at least 40 inches high to ensure their shoulders stay submerged.
Safety Warning: Because vertical barrels are deeper, they can be more difficult to exit if your muscles are stiff from the cold. Always ensure the area around the barrel is dry and use a non-slip mat to prevent falls when stepping out.
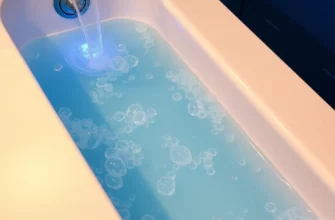
Essential Maintenance: Keeping Your Water Crystal Clear
Nothing ruins a recovery routine faster than murky, smelling water. Because cold plunges are kept at low temperatures, bacteria grow more slowly than in a hot tub, but biological contaminants like skin cells, oils, and sweat still accumulate. Proper maintenance is not just about aesthetics; it is about protecting your skin and the longevity of your chiller’s pump.
If you are not using a continuous filtration system, you should change the water every 3 to 5 days depending on usage. However, with a proper sanitation routine, you can keep the same water for 2 to 3 months. Before entering the plunge, always rinse off in a shower to remove lotions and deodorants, which are the primary causes of “scum lines” on the tub walls.
Filtration and Sanitation Basics
Maintaining a healthy environment in your plunge requires a multi-pronged approach. You need to address both physical debris and microscopic pathogens. Never use high concentrations of chlorine in an inflatable tub, as excessive chemicals can degrade the PVC liners and seals over time. Instead, opt for gentler alternatives like bromine or hydrogen peroxide-based sanitizers.
- Mechanical Filtration: Use a 20-micron pleated filter to catch hair and skin cells. Clean the filter once a week by spraying it with a hose.
- Ozone or UV: Many high-end chillers include an ozone generator. This helps break down organic matter without the need for heavy chemicals.
- pH Balancing: Keep your water between 7.2 and 7.8. If the water becomes too acidic, it can corrode the internal heat exchanger of your chiller.
- Skimming: Use a simple pool net to remove any leaves or bugs that fall in when the lid is open.
Common Mistakes to Avoid with Your New Cold Plunge
Owning a cold plunge is a learning curve. One of the most frequent errors is over-inflating the tub during the heat of the day. Air expands when it gets hot. If you pump your tub to its maximum PSI in the cool morning and leave it in the direct afternoon sun, the internal pressure can rise enough to stress the seams. Always leave a little “room” for expansion if the tub is outdoors.
Another mistake is ignoring the “Afterdrop” phenomenon. When you exit the cold water, your blood begins to recirculate from your cold extremities back to your warm core. This can actually cause your core temperature to continue dropping after you are out of the water. Avoid taking a hot shower immediately after a plunge; instead, pat yourself dry, put on warm layers, and let your body thermoregulate naturally.
Pro Tip: Do not leave the chiller running if the water level drops below the intake valve. Running a pump “dry” can burn out the motor in minutes. Always check your water levels after a particularly splashy session.
Expert Perspective: The Physics of Consistency
In my professional experience as a physical therapist, I have seen hundreds of athletes invest in expensive recovery gear only to let it collect dust. I always advise my clients that the best cold plunge is the one you actually use. If you have to spend 30 minutes prepping ice and cleaning a makeshift tank, you will eventually find excuses to skip your sessions. This is why inflatable tubs paired with automated chillers are the current gold standard. They eliminate the “friction of effort.” When the water is consistently cold and clean, you are far more likely to stick to the protocol long enough to see real changes in your systemic inflammation and HRV (Heart Rate Variability) levels.
Frequently Asked Questions
Most beginners should aim for 2 to 3 minutes. Research suggests that 11 minutes of total exposure per week, split into several sessions, is the “sweet spot” for metabolic benefits. Always listen to your body and exit if you begin to feel numb or lose dexterity.
Can I leave my inflatable cold plunge outside in the winter?
Yes, but you must prevent the water from freezing solid. If the water freezes, it can expand and burst the seams of the tub or crack the internal pipes of your chiller. Use a heater-enabled chiller or drain the unit if temperatures stay below freezing for extended periods.
Is an inflatable barrel better than a tub for tall people?
Generally, yes. Tall athletes often struggle to get their shoulders under the water in a standard horizontal tub without their knees sticking out. A vertical barrel allows you to sit with your knees tucked, making it much easier to submerge up to the chin.
How much electricity does a cold plunge chiller use?
A standard 0.5HP chiller typically pulls about 400-500 watts while actively cooling. Once the water reaches the target temperature, it cycles on and off. For most users, this adds roughly $15 to $30 to their monthly electric bill, which is significantly cheaper than buying ice.
Are inflatable cold plunges easy to puncture?
While they are made of durable, multi-layer PVC, they are not indestructible. However, they are built with the same “drop-stitch” technology as whitewater rafts. They can easily withstand dog claws or being set on gravel, but you should still keep sharp garden tools and glass away from the unit.