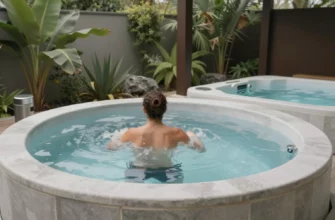
- Why a Cold Plunge at Home DIY Project is Your Best Recovery Investment
- The Science of Cold Exposure and Home Setup
- Choosing Your Foundation: Grizzly Cooler Cold Plunge DIY vs. Custom Wood Builds
- Why the Grizzly Cooler is a DIY Favorite
- Mastering the DIY Cold Plunge Plumbing and Pump Configuration
- The Ideal DIY Cold Plunge Plumbing Diagram
- Selecting the Right Valves and Plungers
- The Essentials of DIY Cold Plunge Insulation for Temperature Retention
- Materials for a DIY Insulated Cold Plunge
- Advanced Water Maintenance: DIY Cold Plunge Ozone and Filtration
- How to Circulate and Move Water for Maximum Purity
- Step-by-Step Instructions: Building Your Plunge System
- Niche Applications: The Hot Cold Plunge for Felting
- Dual-Purpose Plunge Systems
- Common Pitfalls in DIY Plunge Construction
- Frequently Asked Questions
Why a Cold Plunge at Home DIY Project is Your Best Recovery Investment
Building your own cold therapy rig is a transformative move for any serious athlete or biohacker looking to bypass the massive markups of commercial units. While high-end “plug-and-play” systems often retail for $5,000 to $15,000, a well-engineered DIY setup provides the same physiological benefits at a fraction of the cost.
By taking control of the build, you ensure that every component, from the pump’s flow rate to the thickness of the insulation, meets your specific recovery needs. This project is not just about saving money; it is about creating a permanent, 24/7 recovery station that fits your lifestyle and space requirements.
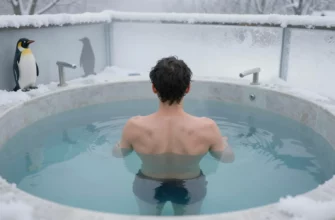
The Science of Cold Exposure and Home Setup
Consistent immersion in water below 55°F triggers a robust hormonal response, primarily through the release of norepinephrine and dopamine. To effectively manage systemic inflammation through consistent cold exposure, you need a setup that maintains a stable temperature regardless of the ambient environment.
Having a dedicated unit at home removes the friction of travel or high gym fees, making it easier to integrate a daily recovery routine into your schedule. This convenience ensures you never miss a session, allowing your body to adapt to the cold shock response and improve overall cardiovascular resilience.
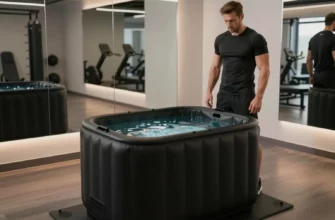
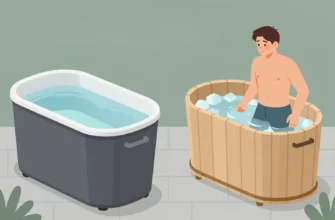
Choosing Your Foundation: Grizzly Cooler Cold Plunge DIY vs. Custom Wood Builds
Selecting the right vessel is the most critical decision in your build process, as it dictates your plumbing complexity and insulation needs. Most builders choose between the rugged portability of a high-end cooler or the aesthetic permanence of a custom timber-framed basin.
| Feature | Grizzly Cooler Build | Custom Wood Build |
|---|---|---|
| Initial Cost | Moderate ($400 ─ $800) | High ($1,000+) |
| Insulation | Excellent (Built-in foam) | Requires manual insulation layers |
| Durability | Extreme (Roto-molded plastic) | Dependent on wood type and sealant |
| Aesthetics | Functional/Industrial | High-end/Spa-like |
| Complexity | Low to Medium | High (Requires carpentry) |
Why the Grizzly Cooler is a DIY Favorite
The Grizzly cooler has become the gold standard for DIY enthusiasts because its roto-molded walls are already injected with high-density polyurethane foam. This means you do not have to worry about building an external frame or adding extra layers of foam to keep your water chilled.
Using an insulated basin option like this significantly reduces the workload on your water chiller, as the thermal mass of the water is protected by a 2-inch thick barrier. This efficiency translates directly to lower electricity bills and a longer lifespan for your cooling unit.
Mastering the DIY Cold Plunge Plumbing and Pump Configuration
The plumbing system is the circulatory system of your plunge, responsible for keeping the water moving, filtered, and chilled. A common mistake is using underpowered pumps that cannot push water through a 5-micron filter, leading to stagnant, dirty water.
To achieve professional-grade results, you must prioritize high-flow components and leak-proof connections. Using Schedule 40 PVC or reinforced braided tubing is essential to handle the pressure generated by high-performance pumps without bursting or sagging over time.
The Ideal DIY Cold Plunge Plumbing Diagram
A successful plumbing setup for a cold plunge system relies on a continuous loop: water exits the tub, passes through a debris strainer, enters the pump, moves through a sediment filter, passes the ozone injector, and finally returns to the tub. Always place your intake at the bottom of the tub and the return at the top to ensure proper thermal mixing and eliminate “dead zones” where bacteria can thrive.
Optimizing water flow is not just about cleanliness; it is about ensuring the chiller receives a steady stream of water to prevent the internal heat exchanger from freezing. Install a flow meter or a clear PVC section so you can visually confirm that your pump is operating at the correct capacity.
Selecting the Right Valves and Plungers
Control is everything when you are dealing with 100 gallons of pressurized water inside your home or garage. Incorporating a kohler cold water close valve with a plastic plunger allows you to isolate the pump and filter for maintenance without draining the entire basin.
To achieve total leak prevention, ensure all threaded joints are wrapped with at least five passes of high-quality Teflon tape and that plastic plungers are seated firmly against their gaskets. Using union valves instead of standard slip-on couplings will save you hours of frustration if you ever need to replace a damaged component in the future.
The Essentials of DIY Cold Plunge Insulation for Temperature Retention
Without proper thermal barriers, your chiller will run constantly, wasting energy and potentially burning out the compressor. Effective insulation acts as a shield, keeping the heat of the summer air out and the therapeutic cold of the water in.
If you are building a custom wood frame around a stock tank, you must fill every void with insulating material. Even the smallest gap can create a “thermal bridge” that allows heat to seep into your water, forcing your system to work twice as hard to maintain 45°F.
- Closed-Cell Spray Foam: Best for filling irregular gaps and providing a secondary moisture barrier.
- Rigid XPS Foam Boards: Ideal for lining the flat sides of custom wooden enclosures.
- Reflective Foil Barriers: Crucial for outdoor setups to bounce radiant heat away from the tub.
- Insulated Lid: Always prioritize a thick, gasketed lid, as over 70% of heat gain occurs through the water’s surface.
- Pipe Insulation: Wrap all external PVC runs in foam sleeves to prevent condensation and heat loss.
Materials for a DIY Insulated Cold Plunge
The choice between spray foam and rigid board often comes down to your structural design. Rigid boards offer a consistent R-value and are easier to work with in square frames, while spray foam is superior for sealing the curved edges of a stock tank or cooler.
To maximize energy efficiency for plunges, consider adding a layer of 1/2-inch rubber matting underneath the tub. This prevents the ground from acting as a giant heat sink, which is especially important if your plunge is sitting on a concrete garage floor.
Advanced Water Maintenance: DIY Cold Plunge Ozone and Filtration
Crystal clear water is the hallmark of a professional setup, and achieving it requires more than just a simple mesh filter. Implementing an ozone system allows you to oxidize organic contaminants like skin cells and oils without relying on harsh levels of chlorine or bromine.
Ozone (O3) is a powerful disinfectant that reverts back to oxygen, leaving no chemical residue on your skin. This is particularly beneficial for those with sensitive skin who want to avoid the “pool smell” while ensuring their water remains sanitary for months at a time.
How to Circulate and Move Water for Maximum Purity
Stagnant water is the enemy of hygiene, as it allows biofilm to accumulate on the walls of your tub. By using your pump to create a circular flow pattern, you ensure that every drop of water eventually passes through your filtration and sanitization cycles.
To keep water clean, run your pump and ozone generator for at least 4 to 6 hours a day, even if you are not using the plunge. This consistent movement prevents the “settling” of particulates and ensures that the ozone is thoroughly mixed with the entire volume of water.
Step-by-Step Instructions: Building Your Plunge System
Follow these steps carefully to ensure a durable and safe installation. Precision during the drilling and sealing phases will prevent catastrophic leaks later on.
- Drill the Bulkhead Ports: Use a high-quality hole saw to create the intake and outlet ports in your cooler or tank. Always de-burr the edges of the hole to ensure the bulkhead gasket can form a perfect seal.
- Install the Bulkheads: Apply a thin bead of marine-grade silicone to the gasket before tightening the nut. Do not over-tighten, as this can crack the plastic or deform the gasket.
- Dry-Fit the Plumbing: Cut your PVC pipes and assemble the entire loop without glue first. This allows you to verify that the pump, filter housing, and chiller are all aligned correctly.
- Glue and Seal: Use PVC primer and cement on all joints, holding each connection for 30 seconds to prevent “push-out.” Allow the glue to cure for a full 24 hours before introducing water.
- Electrical Integration: Mount your pump and chiller on a raised platform to protect them from potential floor leaks. Ensure all components are plugged into a GFCI-protected outlet for safety.
- Leak Testing: Fill the tub halfway and check all joints for “sweating” or drips. If clear, fill it completely and run the pump for two hours before turning on the chiller.
Niche Applications: The Hot Cold Plunge for Felting
While most people build these for recovery, there is a growing community using these systems for textile arts. The process of felting wool requires “shocking” the fibers with rapid temperature shifts to encourage the scales on the wool to lock together.
A DIY setup can be modified to serve this purpose by integrating a bypass valve that allows you to switch between a chiller and an inline water heater. This versatility makes the system a valuable tool for artisans who need precise control over their thermal cycles.
Dual-Purpose Plunge Systems
If you plan on using your system for felting, you must ensure your plumbing can handle higher temperatures (up to 180°F). Use CPVC instead of standard PVC, as regular PVC can soften and fail when exposed to extreme heat for extended periods.
Adjusting your DIY setup for heat also requires a pump that is rated for high-temperature liquids. Most standard pool pumps are only rated up to 104°F, so check the manufacturer specifications to avoid melting the internal impellers during a felting cycle.
Common Pitfalls in DIY Plunge Construction
Even experienced builders can run into trouble if they overlook the unique demands of a cold water environment. Issues like condensation and vibration can lead to long-term structural damage if not addressed during the initial build.
Critical Warning: Never operate your cold plunge without a Ground Fault Circuit Interrupter (GFCI). Water and electricity are a deadly combination, and a GFCI is your only protection against a short circuit in the pump or chiller.
- Neglecting the Condensation Barrier: Cold pipes in a warm room will drip. Always use closed-cell foam sleeves on all plumbing to prevent mold growth on your frame.
- Undersized Pumps: A pump that is too weak will struggle to push water through a dirty filter, leading to poor sanitation. Aim for a pump that can cycle the entire volume of your tub 3 to 4 times per hour.
- Poor Support for the Tub: 100 gallons of water weighs over 800 pounds. Ensure your flooring or deck is reinforced to handle this concentrated weight without sagging.
- Skipping the Strainer: Hair and skin flakes can quickly clog a fine sediment filter. Install a coarse pre-filter or “pump basket” to catch large debris before it reaches the main pump.
In my professional experience building custom recovery systems, the biggest failure point isn’t the chiller or the tub—it’s the electrical safety and moisture management. I always advise builders to treat their cold plunge like a miniature industrial plant. You are dealing with significant weight and constant moisture. Always mount your electrical components higher than the water line and use drip loops on all power cords. Furthermore, I’ve found that using a high-quality marine-grade sealant on every single screw hole in a wood frame is the only way to prevent internal rot over a five-year period. Don’t cut corners on the small stuff; the integrity of your build depends on it.
Frequently Asked Questions
Look for a magnetic-drive submersible or external pump rated for at least 500-1000 GPH. These pumps are designed for 24/7 operation and have no mechanical seals that can leak over time.
How do I prevent my DIY cold plunge from leaking at the plumbing joints?
Use marine-grade silicone on bulkheads and follow a strict “prime and cement” protocol for all PVC joints. Always let the cement cure for 24 hours before testing with pressurized water.
Is an ozone generator necessary for a home cold plunge?
While not strictly necessary, an ozone generator is the best way to maintain crystal clear water with minimal chemicals. It oxidizes bacteria and oils, drastically reducing the frequency of water changes.
Can I use a standard chest freezer instead of a cooler?
You can, but it requires extensive waterproofing with Pond Shield or similar liners. Freezers are not designed to hold water, and the risk of electrical shock is much higher compared to a cooler or stock tank setup.
How do I maintain the water temperature in a DIY insulated cold plunge during summer?
A dedicated 1/4 HP or 1/2 HP water chiller is the most effective method. Combined with thick insulation and a reflective cover, it can maintain 40°F even in triple-digit heat.
How much does it typically cost to build a cold plunge at home?
A basic setup using a stock tank and ice can cost $200. A professional-grade DIY system with a Grizzly cooler, pump, filtration, and chiller typically ranges from $800 to $1,500.