- Getting Started with a Cold Plunge at Home Bathtub Setup
- Is Your Standard Bathtub Deep Enough for Cold Plunging?
- Step-by-Step: How to Prepare Your Cold Water Plunge in the Bathtub
- Managing Temperature and Ice Ratios
- The Reddit Perspective: Real-World Hacks for Plunging in Your Bathtub
- Why Moving the Water Changes Everything
- Mastering Contrast Therapy: Transitioning from a Cold Plunge into a Hot Shower
- Should You Warm Up Immediately?
- Safety Protocols: How to Reduce Risks and Stay Safe After a Cold Plunge
- Listening to Your Body’s Signals
- Standard Tubs vs. Dedicated Units: Is it Time to Upgrade?
- The True Cost of Ice vs. Chiller Units
- Expert Perspective: Cold Exposure Consistency
- Frequently Asked Questions
Getting Started with a Cold Plunge at Home Bathtub Setup
You do not need a five-thousand-dollar insulated tank or a custom-built cedar tub to start reaping the benefits of cold thermogenesis. Your standard porcelain or acrylic bathtub is the most accessible gateway to a practice that builds mental resilience and speeds up post-workout recovery. Many beginners find that the psychological hurdle of stepping into a cold tub is far higher than the actual physical cost of the setup.
The immediate physiological response to cold water immersion involves a massive dopamine spike and the activation of the sympathetic nervous system. Using what you already have at home allows you to test your commitment to the practice before investing in high-end equipment. It turns a daily hygiene ritual into a high-performance recovery session without requiring extra square footage in your garage or backyard.
Is Your Standard Bathtub Deep Enough for Cold Plunging?
A common concern is whether a standard 60-inch tub provides enough space for effective water immersion. While you might not be able to float freely, the goal is to submerge as much of your torso and neck as possible to trigger the mammalian dive reflex and stimulate the vagus nerve. Maximizing your soak requires strategic positioning, often involving tucking your knees to your chest to ensure your vital organs are fully covered.
You must also account for water displacement when filling the tub. If you fill a tub to the brim before stepping in, you will end up with a flooded bathroom floor. Fill the tub roughly halfway to two-thirds full of cold water first, then add your ice, and only then enter the water slowly to gauge the rise in levels. This ensures that once you are seated, the water level reaches your collarbone without overflowing.
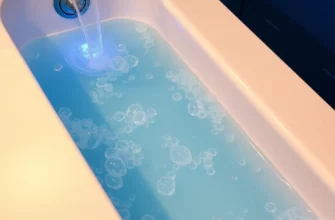
Step-by-Step: How to Prepare Your Cold Water Plunge in the Bathtub
Setting up a successful plunge is about more than just turning on the cold tap. You need a repeatable process that ensures the water reaches a therapeutic temperature range while maintaining safety. Consistency is the primary driver of circulatory health and brown fat activation, so your setup should be as frictionless as possible.
- Clean the Basin: Ensure your tub is free of soap scum or oils, as these can become slippery and unpleasant when the water is near freezing.
- Pre-Fill with Cold Tap: Turn on the cold water and let it run for a minute to ensure you are getting the lowest possible temperature from your pipes.
- Measure the Baseline: Use a dedicated water thermometer to check the initial temperature. Most tap water ranges from 55°F to 65°F depending on your climate and the season.
- Add the Cooling Agent: Introduce your ice or frozen water bottles. For a standard tub, aim for at least 20 to 40 pounds of ice to significantly move the needle if your tap water is on the warmer side.
- Stir and Wait: Swirl the water to distribute the cold. Let it sit for 5 to 10 minutes so the temperature stabilizes across the entire volume of the tub.
- Enter Slowly: Use the sides of the tub for support. Focus on controlled, deep exhales to manage the initial cold shock response.
Managing Temperature and Ice Ratios
Finding the “sweet spot” for ice bath temperature is essential for safety and efficacy. Most experts suggest a range between 50°F and 59°F (10°C to 15°C) for those just starting out. Lowering the temperature below 50°F is not necessarily “better” and significantly increases the risk of hypothermia for beginners.
If your tap water is already 55°F, you may only need a single bag of ice to reach your target. However, in summer months or warmer climates, you might find that the water warms up faster than you can cool it. Always keep a digital water thermometer floating in the tub so you can track the exact temperature and adjust your duration accordingly; colder water requires shorter immersion times.
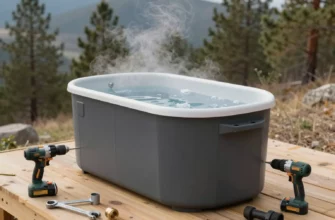
The Reddit Perspective: Real-World Hacks for Plunging in Your Bathtub
The DIY community on forums like Reddit has mastered the art of the “budget plunge.” One of the most frequent complaints is the ongoing cost of buying bags of ice, which can quickly exceed the cost of a professional chiller over several months. To combat this, many practitioners freeze large Tupperware blocks or gallon jugs of water to create reusable “ice bricks” that don’t dilute the water and can be tossed back in the freezer after use.
Another popular tip involves the “overflow drain hack.” Most bathtubs have an emergency overflow hole that prevents deep immersion. Using a simple silicone suction cover over the overflow drain can allow you to gain an extra three to four inches of water depth, which is often the difference between covering your shoulders and leaving them exposed to the air.
Why Moving the Water Changes Everything
When you sit perfectly still in a cold tub, your body heat warms a thin layer of water directly against your skin; This is known as the thermal bridge or thermal layer, and it acts as a buffer that makes the water feel warmer than it actually is. To maximize the intensity of the plunge, you must break this heat barrier by gently moving your limbs or swirling the water.
Community members often suggest “pedaling” your legs or moving your arms every 30 seconds. This ensures that fresh, cold water is constantly stripping heat away from your body, maintaining a high level of metabolic demand. Breaking the thermal layer is the easiest way to increase the challenge of a plunge without needing to add more ice.
Mastering Contrast Therapy: Transitioning from a Cold Plunge into a Hot Shower
Contrast therapy involves alternating between cold and hot environments to create a “pumping” action in the circulatory system. This rapid transition causes blood vessels to constrict (vasoconstriction) in the cold and dilate (vasodilation) in the heat. This process is highly effective for flushing metabolic waste from muscles and reducing delayed onset muscle soreness.
| Therapy Phase | Physiological Effect | Primary Benefit |
|---|---|---|
| Cold Immersion | Vasoconstriction | Reduces inflammation and triggers norepinephrine release. |
| Hot Transition | Vasodilation | Increases blood flow and relaxes tight muscle tissue. |
| The Transition | Circulatory Pumping | Enhances lymphatic drainage and accelerates recovery. |
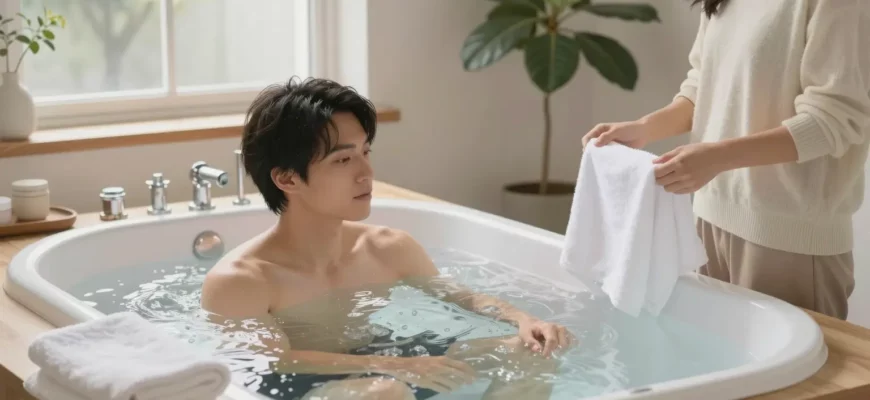
Should You Warm Up Immediately?
There is a debate among recovery experts about whether you should jump straight into a hot shower. Entering heat immediately after a plunge can feel incredible, but it may blunt some of the metabolic benefits associated with natural rewarming. Allowing your body to shiver slightly and warm itself up naturally for 10 minutes forces your system to work harder, burning more calories and strengthening your internal thermoregulation.
However, if you are shivering uncontrollably or feel lightheaded, a warm shower is a necessary safety measure. When using a hot shower for contrast, start with lukewarm water and gradually increase the temperature to avoid “afterdrop,” a condition where cold blood from your extremities rushes back to your core, causing your internal temperature to plummet even further after you’ve exited the tub.
Safety Protocols: How to Reduce Risks and Stay Safe After a Cold Plunge
Cold plunging is a powerful tool, but it carries inherent risks, especially for those with underlying cardiovascular conditions. The cold shock response can cause an immediate spike in heart rate and blood pressure. Never plunge alone if you have a history of heart issues or if you are trying a significantly lower temperature for the first time.
- Don’t Stay Too Long: More is not better; two to five minutes is usually sufficient to achieve maximum hormonal and recovery benefits.
- Avoid Deep Water Breathing: Do not practice hyperventilation or Wim Hof-style breathing while inside the water, as this increases the risk of passing out and drowning.
- Keep Your Hands Out: If you find the cold unbearable, keep your hands and feet out of the water; these extremities lose heat fastest and often signal the most pain.
- Exit Slowly: Your muscles may be stiff and your coordination slightly impaired; always use a non-slip mat outside the tub to prevent falls.
Listening to Your Body’s Signals
It is vital to distinguish between the “mental wall” and genuine physical distress. It is normal to feel a sense of panic in the first 30 seconds, but this should subside as you focus on your breath. If your skin turns unnaturally white or blue, or if you lose the ability to speak clearly, exit the water immediately. These are early signs that your body is struggling to maintain its core temperature;
Setting a physical timer is better than counting in your head. In the cold, your perception of time can become distorted. A waterproof kitchen timer or a phone placed safely on the vanity ensures you don’t overstay your welcome in the ice. Remember, the goal is a controlled stress response, not a test of survival.
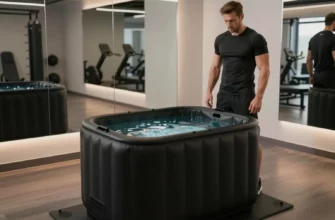
Standard Tubs vs. Dedicated Units: Is it Time to Upgrade?
While the bathtub is a great starting point, it has limitations regarding insulation and convenience. A standard tub loses heat rapidly, meaning you have to keep adding ice to maintain the temperature. Dedicated cold plunge units, often sourced from specialized manufacturers, feature thick insulation and powerful chillers that keep the water at a precise temperature 24/7.
| Feature | Standard Bathtub | Dedicated Cold Plunge Unit |
|---|---|---|
| Initial Cost | $0 (Already in home) | $1,000 ⎼ $5,000+ |
| Operating Effort | High (Buying/carrying ice) | Low (Set and forget) |
| Temperature Control | Inconsistent | Precise (Down to 37°F) |
| Water Filtration | None (Drain after use) | Built-in Ozone/UV/Filters |
The True Cost of Ice vs. Chiller Units
If you plunge three times a week and use $15 worth of ice each time, you are spending nearly $2,000 a year just on cooling. In this scenario, a dedicated chiller unit often pays for itself within 12 to 18 months. Furthermore, dedicated units offer water filtration, meaning you don’t have to scrub the tub after every session.
For most people, the bathtub remains the best way to build the habit. Once you have proven to yourself that you can maintain a consistent schedule for three to six months, then the investment in an insulated tub or a high-end chiller becomes justifiable. Focus on the discipline of the practice before the glamour of the gear.
Expert Perspective: Cold Exposure Consistency
In my professional experience, the biggest mistake people make is chasing the lowest possible temperature or the longest duration. I always advise clients to focus on the Minimum Effective Dose. You don’t need to sit in 34-degree water for ten minutes to see a change in your mental health or muscle recovery. In fact, the most profound benefits—like improved insulin sensitivity and increased mitochondrial density—come from regularity rather than intensity. I have found that plunging three times a week at 55 degrees is infinitely more beneficial than doing a single “heroic” plunge once a month at 40 degrees. The true value lies in the mental discipline required to step into that tub when you really don’t want to. That’s where the resilience is built, not in the price tag of your equipment.
Frequently Asked Questions
Aim for 2 to 5 minutes. Research suggests that the physiological benefits plateau after this window, and staying longer increases the risk of hypothermia without adding significant recovery value.
Can I do a cold plunge in a regular shower instead?
While cold showers are excellent for building mental toughness, they lack the hydrostatic pressure of full immersion. A bathtub plunge provides more uniform cooling and a stronger stimulus for the vagus nerve.
How much ice do I need to make a bathtub cold enough?
Depending on your tap water temperature, you generally need 20 to 40 pounds of ice. In colder climates during winter, your tap water may already be close to the therapeutic range of 55°F.
Is it safe to go from a cold plunge directly into a hot tub?
It is generally safe for healthy individuals, but the rapid change in blood pressure can cause lightheadedness. Always move slowly and consider a brief period of natural rewarming first.
How often should I cold plunge at home for the best results?
Practicing 2 to 4 times per week is the “sweet spot” for most. This frequency allows for metabolic adaptation and recovery benefits without overtaxing your central nervous system.