- Why You Need a Water Stabilizer for Cold Plunge Tubs
- The Science of Clean Cold Water
- Beat the Heat: Best Way to Cool Cold Plunge Water in Summer
- Sustainable Cooling with Reusable Ice for Cold Plunge
- Winter Protection: How to Keep Your Cold Plunge from Freezing
- Preventing Ice Buildup in Outdoor Tubs
- Enhancing the Soak: Adding Salt and Epsom Salt to Your Cold Plunge
- The Benefits of Magnesium and Salinity
- Logistics and Setup: How to Fill and Where to Put Your Cold Plunge
- Choosing the Optimal Location for Temperature Control
- The Master Maintenance Checklist for Crystal Clear Water
- Routine Care to Avoid Slimy Surfaces
- Frequently Asked Questions
Why You Need a Water Stabilizer for Cold Plunge Tubs
Maintaining a cold plunge is fundamentally different from managing a standard swimming pool or a hot tub. While heat typically accelerates bacterial growth, cold water presents its own set of challenges, particularly regarding biofilm accumulation and pH volatility. A water stabilizer acts as a foundational balancing agent that ensures your sanctuary remains hygienic without requiring massive doses of harsh oxidizing chemicals.
Using a dedicated conditioner or balancing agent helps neutralize the organic loads introduced by the human body, such as skin oils and sweat. Without these stabilizers, the water can quickly become abrasive to the skin or corrosive to the internal components of your chiller and pump. Adding a stabilizer immediately after a fresh fill creates a chemical buffer that prevents the rapid “crashing” of alkalinity levels.
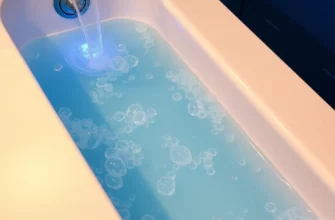
The Science of Clean Cold Water
Many users mistakenly believe that water at 40°F is sterile. In reality, certain psychrophilic bacteria can thrive in these temperatures, leading to a slippery film on the tub walls. By implementing a consistent treatment protocol, you can effectively how to treat cold plunge water to ensure it remains crystal clear for months rather than days. This chemical stability is what allows the water to stay “active” and safe for repeated exposure.
When you focus on how to maintain a cold plunge tub correctly, you are primarily managing the Total Dissolved Solids (TDS). A high-quality stabilizer prevents these solids from precipitating out of the solution and forming scale. Furthermore, a stabilized environment reduces skin irritation by keeping the pH in a neutral range of 7.2 to 7.6, which is essential for those with sensitive skin or eczema who use cold therapy for inflammation relief.
Beat the Heat: Best Way to Cool Cold Plunge Water in Summer
Summer presents the ultimate test for any cold therapy setup. As ambient temperatures rise, the thermal gradient between the air and your water increases, causing your tub to act like a giant heat sink. Keeping the water between 39°F and 50°F requires a combination of active cooling and aggressive thermal insulation to prevent your electricity bill from skyrocketing or your ice supply from vanishing in minutes.
| Cooling Method | Initial Cost | Daily Effort | Best For… |
|---|---|---|---|
| Electric Water Chiller | High ($800 ⎼ $2,500) | Low (Set and forget) | Daily users and permanent outdoor setups. |
| Reusable Ice Blocks | Low ($20 ⎻ $50) | Moderate (Swap every 12 hours) | Budget-conscious users with large freezer space. |
| Traditional Bagged Ice | Low (Initial) / High (Long-term) | High (Constant purchasing) | Occasional plungers or emergency cooling. |
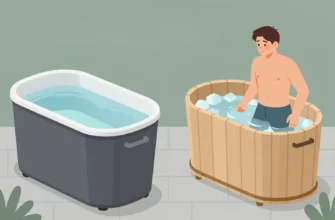
Sustainable Cooling with Reusable Ice for Cold Plunge
If an electric chiller is not in your current budget, the best way to make ice for cold plunge sessions involves large-scale DIY blocks. Instead of buying individual bags of ice that melt in minutes, use frozen one-gallon milk jugs or specialized silicone molds. These larger blocks have a much lower surface-area-to-volume ratio, meaning they absorb heat from the water significantly slower than small cubes, providing a more sustained temperature drop.
To master how to keep cold plunge water cold in summer, you must also address the “thermal leak” from the top of the tub. Most heat gain occurs at the water’s surface. Using a four-inch thick marine-grade insulated cover can reduce the cooling load by up to 70%. When learning how to chill water for cold plunge effectively, remember that the goal is to maintain a “thermal mass.” Once the water is cold, it is much easier to keep it there than it is to drop the temperature from 80°F to 40°F.
Winter Protection: How to Keep Your Cold Plunge from Freezing
When the mercury drops below 32°F, your cold plunge faces the risk of becoming a solid block of ice. This is not just a convenience issue; expanding ice can rupture PVC pipes, crack acrylic shells, and destroy expensive external chillers. Managing a plunge in the winter is about maintaining constant kinetic energy in the water and providing enough insulation to trap the earth’s residual heat or the heat generated by the pump’s motor.
The most critical rule for winter maintenance is to never let the water sit stagnant during a freeze warning. Moving water requires much lower temperatures to crystallize into ice. If your system does not have a built-in “freeze protection” mode, you should manually set your filtration pump to run 24/7 during cold snaps. A circulating pump is your first line of defense against structural damage caused by ice expansion.
Preventing Ice Buildup in Outdoor Tubs
For those in extreme climates, understanding how to keep my cold plunge from freezing in winter often requires supplemental hardware. A small, 500-watt submersible stock tank heater can be placed in the water to maintain a baseline temperature of 37°F. This ensures the water remains liquid and “plungeable” without warming it up to the point of losing the therapeutic benefits. It is a delicate balance of how to prevent cold plunge from freezing while keeping it cold enough for recovery.
Additionally, you can use reflective thermal wraps or “bubble” insulation around the exterior of the tub. This is particularly effective for stock tank setups that lack built-in insulation. When researching how to keep water from freezing in cold plunge units, many users forget the plumbing. Ensure all external hoses are wrapped in foam pipe insulation, as these are the first components to freeze and the most likely to burst under pressure.
Enhancing the Soak: Adding Salt and Epsom Salt to Your Cold Plunge
The addition of salts to a cold plunge is a popular technique for both therapeutic and practical reasons. Beyond the physical recovery benefits, salt changes the chemistry of the water in a way that benefits the equipment. Specifically, salt lowers the freezing point of water, which provides an extra layer of protection during mild winters. However, there is a distinct difference between using pool-grade sea salt and Epsom salt (magnesium sulfate).
Myth: Adding any amount of salt will immediately corrode your water chiller and pump.
Fact: Most modern chillers use titanium heat exchangers or 316-grade stainless steel, which are highly resistant to salt. As long as you maintain a salinity level below 2,500 ppm (parts per million), the risk of corrosion is negligible compared to the benefits of water stability.
The Benefits of Magnesium and Salinity
The practice of adding epsom salt to cold plunge tubs is primarily driven by the desire for transdermal magnesium absorption. Magnesium is a critical mineral for muscle relaxation and nervous system regulation. When you are adding salt to cold plunge water, you are also increasing the density of the water, which can change the sensory experience of the soak. This increased density can actually make the water feel “sharper” or colder, which is a common trick for those wondering how to make cold plunge colder without actually dropping the temperature.
It is important to note that Epsom salt is a fertilizer for certain types of algae if the water is not properly sanitized. If you choose to use magnesium sulfate, you must be even more diligent with your water stabilizer and filtration. Always dissolve the salt in a bucket of warm water before adding it to the plunge to ensure it doesn’t settle at the bottom and cause localized pitting on the tub floor.
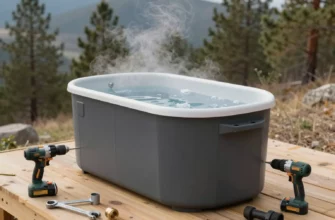
Logistics and Setup: How to Fill and Where to Put Your Cold Plunge
The physical placement of your tub dictates the ease of your maintenance routine for the next year. A poorly placed tub will collect more debris, heat up faster in the sun, and be a chore to drain and refill. Before you even look at how to fill cold plunge units, you must ensure the surface is perfectly level. A 100-gallon tub weighs approximately 830 pounds plus the weight of the occupant; any slight tilt can cause structural stress over time.
Proximity to a floor drain or a garden-accessible area is also vital. You will eventually need to change the water, and siphoning 100 gallons of water across a basement floor is a mistake you only make once. If you are placing the unit indoors, ensure the room has adequate ventilation or a dehumidifier, as the temperature differential between the cold water and a warm room will cause significant condensation on the exterior of the tub.
Choosing the Optimal Location for Temperature Control
When deciding where to put cold plunge equipment, shade is your best friend. Placing a tub in direct afternoon sunlight can increase the water temperature by 10 degrees in just a few hours, forcing your chiller to work twice as hard. If you must place it outdoors in a sunny area, consider building a small cedar enclosure or using a cantilever umbrella to provide permanent shade. This simple step can save hundreds of dollars in annual energy costs.
Consistency is the goal when learning how to maintain cold plunge water. An indoor setup provides the most stable environment but requires careful management of humidity. An outdoor setup offers the “true” nature experience but subjects the water to pollen, insects, and bird droppings. Always use a pre-filter on your garden hose when filling the tub to remove heavy metals and minerals before they ever enter your system.
The Master Maintenance Checklist for Crystal Clear Water
A “set it and forget it” mentality will lead to a slimy, smelly tub within two weeks. To keep your water pristine, you need a tiered approach to maintenance. This ensures that biofilm never gets a foothold and your filtration system doesn’t become a breeding ground for pathogens. Following a strict schedule is the best way to keep cold plunge cold and clean simultaneously.
- Daily: Skim the surface for floating debris like hair or skin flakes. Check the water temperature to ensure the chiller or insulation is performing correctly.
- Weekly: Test the pH and Alkalinity levels using high-quality test strips. Wipe down the “water line” with a microfiber cloth to remove any accumulated oils.
- Bi-Weekly: Remove and rinse the pleated paper filter. If the filter looks brown or grey, replace it immediately to prevent strain on the pump motor.
- Monthly: Add a dose of water stabilizer and conditioner. Check all hose connections for slow leaks that could lead to air entering the lines.
- Quarterly: Perform a “purge” using a pipe-cleaning flush, then drain and refill with fresh water. Always scrub the interior with a non-abrasive citric acid solution during the refill.
Routine Care to Avoid Slimy Surfaces
If you notice the walls of your tub feeling “slick,” you are likely dealing with the early stages of biofilm. This is your signal to how to treat cold plunge water with a slightly higher dose of sanitizer or a non-chlorine shock. Regular maintenance prevents the need for “nuking” the water with heavy chemicals, which can ruin the experience of the plunge.
By staying ahead of the chemistry, you ensure that the water remains inviting. Most users find that showering before entering the plunge significantly extends the life of the water. Even a quick 30-second rinse removes the majority of body oils and deodorants that typically clog filters and cause water cloudiness.
In my professional experience, the biggest mistake cold plunge owners make is underestimating biofilm. Because the water is cold, people assume it is “cleaner” than a hot tub. However, I have seen chillers fail prematurely because a thin layer of bacterial slime coated the internal heat exchanger, acting as an insulator and forcing the compressor to run indefinitely. I always advise my clients to use a specialized water stabilizer specifically formulated for cold water. Standard pool chemicals are designed to gassify at 80°F; in a 40°F plunge, they can linger in a way that is aggressive toward the skin and the rubber seals in your plumbing. Stick to stabilizers that focus on enzymes and mineral protection to ensure your equipment lasts as long as your health does.
Frequently Asked Questions
If you use a high-quality water stabilizer and a 20-micron filtration system, you only need to change the water every 3 to 4 months. Without any treatment or filtration, the water should be swapped weekly to prevent bacterial growth.
Will Epsom salt damage my cold plunge chiller?
Most modern chillers are built with titanium components that resist salt. However, you should always verify with your manufacturer. Magnesium sulfate is generally safe if fully dissolved and maintained at moderate concentrations.
Can I use chlorine in a cold plunge?
Yes, but it is often unnecessary. Because the water volume is small, many users prefer non-chlorine stabilizers or UV-C sanitizers to avoid the “pool smell” and the drying effect chlorine has on the skin in a cold environment.
What is the cheapest way to keep a cold plunge cold in the summer?
The most cost-effective method is using large reusable ice blocks (like frozen milk jugs) combined with a high-R-value insulated cover. Keeping the tub in a fully shaded area is the most important “free” cooling strategy.
How do I stop my outdoor cold plunge from turning into a block of ice?
Keep the water moving 24/7 with a circulating pump. For extreme cold, add a low-wattage stock tank heater and use a thermal blanket on top of the water to trap the heat generated by the pump’s motor.