- Exactly how much hydrogen peroxide to put in cold plunge setups for crystal clear water
- Calculating the perfect peroxide for cold plunge dosage
- Quick Reference Guide: Dosing and Safety Specs
- Peroxide‚ chlorine‚ or bromine for cold plunge: Which is better for your skin?
- Why many avoid chlorine and bromine in tight spaces
- Sanitation Comparison: Chemicals vs. Alternatives
- Solving the mystery of why your cold plunge water is cloudy
- How to fix a cloudy plunge without a full drain
- Common Mistakes in Cold Plunge Maintenance
- Ozone vs UV for cold plunge: Moving beyond liquid chemicals
- The pros and cons of secondary sanitation systems
- Cryo chamber vs cold plunge: Which recovery method is right for you?
- Comparing the physical sensations and benefits
- Expert Perspective: The Biofilm Challenge
- Frequently Asked Questions
Exactly how much hydrogen peroxide to put in cold plunge setups for crystal clear water
Maintaining a cold plunge requires a delicate balance between effective sanitation and skin safety. Unlike a swimming pool‚ a cold plunge is a small‚ concentrated body of water where temperature and organic load can fluctuate rapidly.
Hydrogen peroxide (H2O2) serves as a powerful oxidizer that breaks down organic contaminants without the harsh chemical odors associated with traditional sanitizers. To keep your water pristine‚ you must target a concentration of 50 to 100 parts per million (ppm)‚ which typically requires a specific dosing schedule based on your tub’s total water volume.
Calculating the perfect peroxide for cold plunge dosage
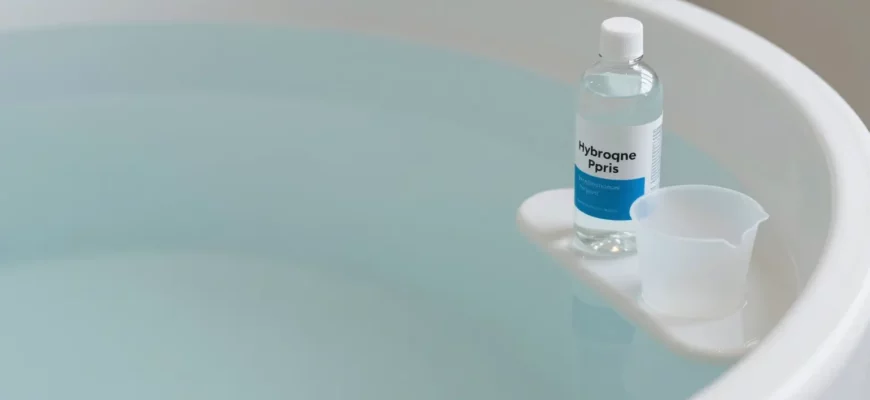
The industry standard for home cold therapy is 35% food-grade hydrogen peroxide. This concentration is significantly more potent than the 3% solution found in pharmacies and is the most cost-effective way to manage large volumes of water.
For a standard maintenance dose‚ add 1/2 cup (approximately 4 ounces) of 35% peroxide for every 100 gallons of water. If you are filling your tub for the first time or the water has become noticeably dull‚ you should perform an initial “shock dose.” This involves doubling the standard amount to 1 cup per 100 gallons to instantly neutralize any existing pathogens or minerals in the tap water.
Consistency is more important than quantity. You should add your maintenance dose once per week or after every 3 to 5 plunges‚ depending on your usage frequency and whether you shower before entering. Always run your filtration pump for at least 20 minutes after adding the solution to ensure it is evenly distributed throughout the system.
Quick Reference Guide: Dosing and Safety Specs
Handling high-concentration peroxide requires respect and precision. Below is a breakdown of the exact measurements needed for common tub sizes and the safety protocols you must follow.
| Tub Volume (Gallons) | Initial Shock Dose (35% H2O2) | Weekly Maintenance Dose | Target PPM Range |
|---|---|---|---|
| 50 Gallons | 1/2 Cup | 1/4 Cup | 50 ౼ 100 ppm |
| 100 Gallons | 1 Cup | 1/2 Cup | 50 — 100 ppm |
| 150 Gallons | 1.5 Cups | 3/4 Cup | 50 ౼ 100 ppm |
| 200 Gallons | 2 Cups | 1 Cup | 50 — 100 ppm |
- Always wear gloves and eye protection when handling 35% peroxide; it can cause instant chemical burns on contact with skin.
- Store your peroxide in a cool‚ dark place‚ as heat and sunlight cause the solution to degrade into plain water and oxygen.
- Never mix peroxide directly with chlorine or other chemicals‚ as this can cause a violent reaction or neutralize both sanitizers.
Peroxide‚ chlorine‚ or bromine for cold plunge: Which is better for your skin?
Choosing a sanitation method is a trade-off between convenience‚ cost‚ and how your skin feels after a three-minute soak. While chlorine is the king of the pool industry‚ it is often a poor fit for the enclosed‚ high-intensity environment of a cold plunge.
Hydrogen peroxide is the preferred choice for those with sensitive skin or respiratory issues. Because it breaks down into nothing but water and oxygen‚ it leaves no chemical residue on your body. This means you won’t experience the “pool smell” or the dry‚ itchy skin that often follows a chlorinated soak.
Why many avoid chlorine and bromine in tight spaces
Chlorine and bromine are highly effective at killing bacteria‚ but they produce byproducts known as chloramines. In a small‚ indoor cold plunge setup‚ these gases can accumulate‚ leading to strong chemical odors and potential lung irritation. If your plunge is located in a basement or a small spare room‚ peroxide provides a much more pleasant breathing environment.
Furthermore‚ chlorine is highly corrosive to metal. If your cold plunge features a stainless steel interior or an expensive external chiller with a titanium heat exchanger‚ high chlorine levels can lead to pitting and premature equipment failure. Peroxide‚ when maintained at the 50-100 ppm level‚ is far gentler on your plumbing‚ seals‚ and cooling components.
Sanitation Comparison: Chemicals vs. Alternatives
Understanding the landscape of water treatment helps you make an informed decision based on your lifestyle and your budget.
| Factor | Hydrogen Peroxide | Chlorine | Bromine | Ozone/UV |
|---|---|---|---|---|
| Skin Friendliness | Excellent (Natural feel) | Poor (Drying/Itchy) | Moderate | Excellent (No residue) |
| Operating Cost | Moderate | Low | Moderate | High Initial / Low Ongoing |
| Maintenance Needs | Weekly Dosing | Frequent Testing | Tablet Dispenser | Automated |
| Equipment Safety | High | Low (Corrosive) | Moderate | High |
Solving the mystery of why your cold plunge water is cloudy
Cloudy water is the most common complaint among cold plunge owners‚ and it usually happens just when you’re ready for a session. This “milky” appearance is rarely a sign of a broken chiller; instead‚ it is a signal that your oxidizer levels have been depleted by organic matter.
Every time you plunge‚ you introduce skin cells‚ sweat‚ and oils into the water. If your peroxide levels are too low‚ these particles remain suspended in the water column rather than being oxidized and filtered out. To fix this‚ you must address the biological load before simply dumping in more chemicals.
How to fix a cloudy plunge without a full drain
If you can still see the bottom of the tub but the water lacks its usual sparkle‚ you can likely save the batch. Start by cleaning or replacing your filter cartridge immediately. A clogged filter cannot trap the fine particles that cause cloudiness‚ no matter how much peroxide you add.
Next‚ perform a “shock” treatment. Increase your peroxide concentration to 150 ppm and run the pump continuously for 24 hours. If the water remains cloudy‚ you may have a “biofilm” issue where bacteria have created a protective slime layer on the walls of the tub. In this case‚ wipe down the sides with a soft cloth while the pump is running to knock the bacteria into the water where the peroxide can reach them.
Common Mistakes in Cold Plunge Maintenance
Avoid these frequent pitfalls to extend the life of your water and your equipment.
- Using 3% Pharmacy Peroxide: You would need gallons of this stuff to reach the proper ppm‚ which is both expensive and introduces too many stabilizers into your water. Stick to 35% food-grade solution for the best results.
- Skipping the Pre-Plunge Shower: Entering the water with lotions‚ deodorant‚ or cologne will instantly neutralize your sanitizer and lead to foaming or cloudiness;
- Neglecting the Filter: A filter is a physical trap for debris. If you don’t rinse it weekly‚ the bacteria trapped inside will consume your peroxide faster than you can add it. Always keep a spare filter on hand to rotate them out.
- Over-dosing the Water: More is not better. If you exceed 200 ppm‚ you may experience minor skin tingling or “white spots” on your skin‚ which are temporary oxygen burns. Always use test strips.
Ozone vs UV for cold plunge: Moving beyond liquid chemicals
If you want to reduce your reliance on liquid chemicals‚ high-tech hardware solutions like Ozone and UV-C are the gold standard. These systems are typically integrated into the chiller or the plumbing line and work silently in the background to keep the water safe.
Ozone generators work by creating O3 gas‚ which is an even more aggressive oxidizer than liquid peroxide. UV-C systems‚ on the other hand‚ use a specific wavelength of light to scramble the DNA of bacteria and viruses‚ rendering them unable to reproduce. While neither system completely replaces the need for an oxidizer‚ they can reduce your peroxide consumption by up to 80%.
The pros and cons of secondary sanitation systems
The primary benefit of an ozone or UV system is the reduction of “human error.” You don’t have to remember to dose the tub every single time you use it. However‚ Ozone is a gas that must be managed; if your generator runs too long in a small room‚ it can create a metallic smell and irritate your lungs. I recommend running an ozone generator for 30 to 60 minutes after each session rather than 24/7.
A hybrid approach is often the most effective. By using a UV-C light to kill pathogens and a small weekly dose of hydrogen peroxide to oxidize physical debris‚ you create a multi-layered defense system. This ensures the water is not only biologically safe but also visually clear and free of the “slimy” feel that occurs when organic matter builds up.
Cryo chamber vs cold plunge: Which recovery method is right for you?
When deciding between a cryotherapy chamber and a cold plunge‚ the maintenance of water chemistry is often a deciding factor. A cryo chamber uses liquid nitrogen or electricity to cool the air‚ meaning there is no water to balance‚ no filters to change‚ and no chemicals to buy.
However‚ the physiological effects are vastly different. In a cold plunge‚ the hydrostatic pressure of the water compresses the tissues‚ which can assist in lymphatic drainage and reducing edema in ways that cold air cannot. While a cryo chamber is “easier” to maintain‚ the cold plunge offers a more intense “cold shock” because water is 25 times more thermally conductive than air.
Comparing the physical sensations and benefits
A cold plunge is a commitment to a “living” system. You are managing a biome‚ whereas a cryo chamber is a piece of dry machinery. For many‚ the ritual of water maintenance is worth the benefit of the deep‚ penetrating cold that only a soak can provide.
If you have a high-traffic home gym or a commercial facility‚ a cryo chamber might be more efficient. But for the individual seeking the maximal metabolic and anti-inflammatory response‚ the cold plunge remains the superior modality‚ provided you are willing to spend ten minutes a week on your water chemistry.
Expert Perspective: The Biofilm Challenge
In my professional experience‚ the biggest mistake people make is relying solely on chemicals to keep water clean. I have found that biofilm—a microscopic layer of bacterial slime—is the true enemy of the cold plunge. Even if your peroxide levels are perfect‚ bacteria can hide behind this protective barrier on the walls of your tub and inside your plumbing. I always advise my clients to physically scrub the waterline and the interior of the tub once every two weeks with a soft brush. This physical agitation breaks the biofilm and allows your peroxide to actually do its job. Synergy between a 20-micron filter‚ regular H2O2 dosing‚ and physical cleaning is the only way to avoid that “slimy” tub feel.
Frequently Asked Questions
While safe‚ 3% peroxide is highly inefficient for a cold plunge. You would need to add roughly 12 times the volume compared to 35% food-grade‚ making it significantly more expensive and difficult to manage in the long run.
Can I use bleach in my cold plunge if I run out of peroxide?
I strongly advise against using bleach. Bleach (sodium hypochlorite) is highly alkaline and will cause your pH to skyrocket‚ potentially damaging your pump seals and causing skin irritation if not perfectly neutralized.
How often should I test the peroxide levels in my water?
You should test your water at least once a week using H2O2-specific test strips. Aim to maintain a steady range of 50-100 ppm to ensure the water stays sanitized without becoming irritating to your skin.
Will hydrogen peroxide damage my chiller unit?
No. At the recommended concentrations (50-100 ppm)‚ food-grade peroxide is much safer for the internal components of your chiller than chlorine or bromine‚ which can corrode heat exchangers over time.
Why does my cold plunge water smell like vinegar or gym socks?
These odors are caused by “spent” oxidizer and bacteria buildup. If you notice a smell‚ it means your peroxide levels have hit zero and you need to perform a shock dose and clean your filter immediately.
How long should I wait to plunge after adding peroxide?
You should wait at least 15 to 30 minutes after adding peroxide to allow it to circulate. This ensures the chemical is properly diluted‚ preventing localized high concentrations from stinging your skin.