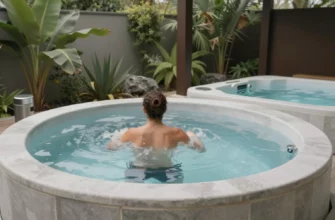
- Why the Penguin Chiller Cold Plunge is a Game Changer for Home Recovery
- Maintaining the Perfect Temperature Without the Hassle
- Protecting Your Extremities: The Essential Role of Cold Plunge Gloves and Socks
- Choosing the Right Cold Plunge Booties and Gloves for Comfort
- Comparing the Heavy Hitters: Penguin vs. Icebound Essentials Cold Plunge
- Which Setup Fits Your Lifestyle and Budget?
- The Logistics of Using Ice Bags for Cold Plunge Cooling
- Is the DIY Ice Method Sustainable for Long-Term Use?
- Exploring Alternatives: Chill Shark and Canadian Tire Options
- From Entry-Level to Pro-Grade: Finding Your Middle Ground
- Common Pitfalls to Avoid When Setting Up Your First Plunge
- Frequently Asked Questions
Why the Penguin Chiller Cold Plunge is a Game Changer for Home Recovery
The transition from casual cold showering to dedicated cold water immersion represents a significant leap in any recovery protocol. While many start with bags of ice in a bathtub, the Penguin Chiller system professionalizes the experience by removing the logistical friction that stops most people from being consistent. By integrating industrial-grade cooling technology with user-friendly setups, it creates a reliable environment for daily thermal recovery.
Consistency is the primary driver of the physiological benefits associated with cryotherapy, such as reduced systemic inflammation and improved metabolic health. A dedicated chiller ensures that your water is at the exact temperature required the moment you wake up, eliminating the twenty-minute preparation window that often leads to skipped sessions. This reliability transforms the practice from a chore into a seamless part of a morning routine.
Maintaining the Perfect Temperature Without the Hassle
One of the most significant barriers to long-term cold therapy is the fluctuating temperature of manual setups. When you rely on atmospheric cooling or ice, you rarely achieve the precise 45°F to 52°F range that triggers the most robust hormonal responses. An automatic water cooling system solves this by constantly monitoring the water and engaging the compressor only when necessary to maintain your set point.
By automating the process, you effectively remove the “ice tax”—the hidden cost and time spent driving to the store, lugging heavy bags, and waiting for the water to reach a therapeutic level. To maximize efficiency, always keep your tub covered with a high-R-value insulated lid when not in use; this reduces the workload on the chiller’s compressor and can lower your monthly electricity consumption by up to 30%.
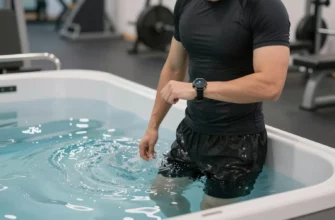
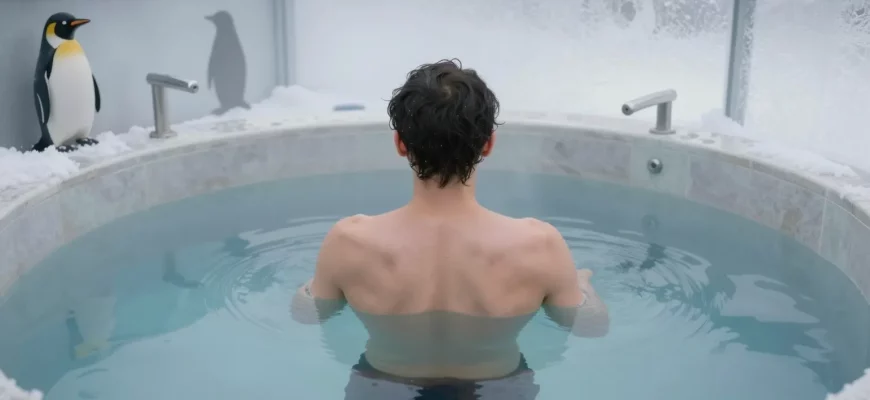
Protecting Your Extremities: The Essential Role of Cold Plunge Gloves and Socks
The initial shock of cold water immersion often manifests as a sharp, stinging sensation in the hands and feet. This occurs because the body naturally prioritizes core temperature, shunting blood flow away from the extremities through a process called peripheral vasoconstriction. For many practitioners, the pain in their toes becomes unbearable long before their core has actually reached the desired level of thermal stress.
Using neoprene booties and gloves is not a sign of weakness; it is a tactical adjustment that allows for longer, more productive sessions. By insulating these high-nerve-density areas, you can focus on controlled breathing and mental resilience rather than the distracting “bone-deep” ache of freezing fingers. This is particularly important for those looking to extend their sessions beyond the three-minute mark.
- Extended Duration: Thermal protection allows you to stay in the water longer, reaching the therapeutic window for deep muscle recovery.
- Pain Management: Reducing the “sting” in fingers and toes prevents the panic response that often triggers an early exit.
- Skin Safety: High-grade neoprene protects against direct contact with ice or sub-40°F water, which can be irritating for sensitive skin.
- Improved Grip: Neoprene gloves provide traction when entering or exiting the tub, which is a critical safety factor when limbs are numb.
Choosing the Right Cold Plunge Booties and Gloves for Comfort
When selecting gear, thickness is the most important metric to consider. A 3mm neoprene sock is usually sufficient for water temperatures above 50°F, but if you are pushing into the sub-40°F range, a 5mm or even 7mm thickness is recommended. The goal is to create a thin layer of water between your skin and the neoprene that your body heat can warm up, creating a thermal barrier.
Staying comfortable in freezing water requires a balance between protection and mobility. Ensure your gloves have a textured palm to maintain safety while climbing out of the tub. For the best results, put your gloves and socks on before your hands get wet and cold, as it is much harder to manipulate the material once your dexterity is compromised by the initial temperature drop.
Comparing the Heavy Hitters: Penguin vs. Icebound Essentials Cold Plunge
The market for home cold therapy has matured rapidly, with Penguin and Icebound emerging as two of the most respected names in the space. Penguin is often favored by those seeking a “set it and forget it” permanent installation, utilizing powerful compressors that can handle high ambient temperatures. Icebound Essentials, conversely, focuses on a balance between high-end insulation and a slightly more modular design that fits into smaller living spaces.
An objective Icebound essentials cold plunge review reveals that their tubs excel in thermal retention thanks to drop-stitch technology. This allows the tub to remain rigid like a hard-shell unit while still being portable enough to drain and move if necessary. Penguin units are frequently cited for their longevity and the ease of replacing individual components like pumps or filters, making them a favorite for those who view their plunge as a lifetime investment.
| Feature | Penguin Chiller System | Icebound Essentials |
|---|---|---|
| Cooling Speed | Fastest; uses high-BTU compressors. | Moderate; optimized for efficiency. |
| Portability | Low; best for permanent setups. | High; inflatable but rigid design. |
| Filtration | External, industrial-grade filters. | Integrated, compact filtration. |
| Price Point | Premium; higher upfront cost. | Mid-to-High; focused on value. |
Which Setup Fits Your Lifestyle and Budget?
If you have a dedicated space in a garage or a backyard patio, the Penguin Chiller is often the best cold plunge for home use due to its heavy-duty construction. It is designed to run 24/7 and can withstand the rigors of multiple users per day. However, if you live in an apartment or need a system that can be packed away during the off-season, the Icebound or similar portable models offer a more flexible entry point.
When comparing cold therapy brands, look closely at the warranty on the chiller unit itself. A high-quality chiller should last several years with basic maintenance. Always check the noise rating of the compressor if you plan to install the unit near a bedroom or in a quiet neighborhood; Penguin units are generally comparable to a standard air conditioner, whereas budget brands can be significantly louder and more disruptive.
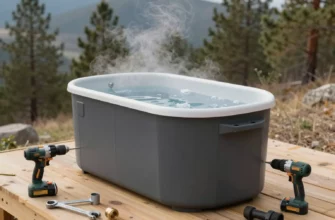
The Logistics of Using Ice Bags for Cold Plunge Cooling
Before investing thousands into a mechanical chiller, many people experiment with the manual method. This involves filling a stock tank or bathtub with water and adding anywhere from 40 to 100 pounds of ice to reach therapeutic temperatures. While this has a low barrier to entry, the logistical reality of buying and transporting hundreds of pounds of ice every week quickly becomes a deterrent for most users.
Using ice to lower water temperature is an effective way to test your commitment to the practice. However, the cost adds up faster than most realize. If you are plunging five times a week and spending $15 on ice each time, you will have spent enough to buy a mid-range chiller within the first six months. The manual method is a great proof-of-concept but a poor long-term strategy for those serious about recovery.
| Pros of Ice Bags | Cons of Ice Bags |
|---|---|
| Zero upfront equipment cost. | Extremely high recurring costs. |
| No electrical installation required. | Inconsistent temperature control. |
| Allows for testing the habit first. | Labor-intensive and time-consuming. |
Is the DIY Ice Method Sustainable for Long-Term Use?
From a sustainability standpoint, the DIY ice method is the most expensive and least efficient way to cold plunge. Beyond the financial cost, there is the environmental impact of plastic bag waste and the energy required to freeze and transport the ice. For those looking for the cheapest way to cold plunge, a used chest freezer conversion (often called a “freezer plunge”) is a more sustainable DIY route than buying bags of ice.
If you are currently using the ice method, invest in a high-quality floating thermometer to ensure you aren’t wasting ice. You might find that your water is already at 55°F, and you only need a few bags to hit your target, rather than dumping a dozen bags indiscriminately. This small step can save money while you save up for a dedicated chiller unit.
Exploring Alternatives: Chill Shark and Canadian Tire Options
As cold therapy moves into the mainstream, budget-friendly alternatives like the Chill Shark and retail-grade tubs from Canadian Tire have become popular. These options are often marketed toward the beginner who isn’t ready to commit to a professional Penguin setup. While they lack the sophisticated cooling power of a $2,000 chiller, they provide a structured environment that is far superior to a standard household bathtub.
The Canadian Tire cold plunge options typically consist of heavy-duty stock tanks or basic inflatable tubs. These are durable and hold water well but have zero insulation. This means the water will warm up rapidly in the sun, requiring more ice or a more powerful chiller to stay cold. They are excellent “shells” for a DIY project but require additional components to become a truly professional recovery station.
From Entry-Level to Pro-Grade: Finding Your Middle Ground
The Chill Shark model occupies a middle ground, offering a more complete package than a basic stock tank but at a lower price point than a Penguin. It is an affordable cold plunge option that usually includes a basic pump and filter. However, the cooling capacity is often lower, meaning it may take several hours to drop the temperature of the water significantly compared to the rapid cooling of higher-end units.
Buying a cold plunge locally at a store like Canadian Tire can save you on shipping costs, which are often substantial for large tubs. If you go this route, consider adding your own insulation by wrapping the tub in reflective foam or building a wooden enclosure filled with spray foam. This simple DIY upgrade can drastically improve the efficiency of even the most basic retail-grade tub.
Common Pitfalls to Avoid When Setting Up Your First Plunge
The excitement of starting a cold therapy routine often leads people to overlook the critical maintenance and safety aspects of the setup. Water that sits stagnant for even a few days can become a breeding ground for bacteria and algae, especially if the tub is kept outdoors. Without a proper filtration and sanitation schedule, you may find yourself draining and scrubbing the tub far more often than you are actually using it.
Safety is the other major concern. Combining water and high-voltage electrical equipment requires strict adherence to safety protocols. Many beginners also underestimate the “afterdrop” effect, where the core temperature continues to fall even after exiting the water. Being prepared for the minutes after the plunge is just as important as the plunge itself.
- Skipping the GFCI: Never plug a chiller or pump into a standard outlet. Always use a Ground Fault Circuit Interrupter (GFCI) to prevent the risk of electrocution.
- Poor Filtration: Using a chiller without a 20-micron or 5-micron filter will eventually clog the heat exchanger, leading to expensive repairs.
- Chemical Neglect: Even cold water needs sanitation. Use an ozone generator or small amounts of hydrogen peroxide to keep the water crystal clear.
- Plunging Alone: If you are a beginner, never plunge alone until you know how your body reacts to the cold shock response.
- Improper Drainage: Ensure your setup is near a drain or an area that can handle 100 gallons of water to avoid flooding your garage or damaging your home’s foundation.
In my professional experience, the people who stick with cold plunging for years aren’t the ones who jump into 38°F water on day one. I always advise my clients to start at a manageable 55°F and focus on their breath. The Penguin Chiller is the gold standard for temperature control, but the equipment is only as good as the habit it supports. I’ve found that using neoprene gloves and socks is the “secret weapon” for consistency; if your hands aren’t screaming in pain, you are much more likely to get back in the tub tomorrow. Build the habit first, then chase the lower temperatures.
Frequently Asked Questions
The unit produces a steady hum similar to a large refrigerator or a window air conditioning unit. In an outdoor setting, it is barely noticeable, but if installed in a small indoor room, you will hear the compressor cycle on and off to maintain the water temperature.
Do I really need cold plunge gloves and socks?
While not strictly mandatory, they are highly recommended because the hands and feet have the highest concentration of cold-sensitive nerves. Protecting them allows you to stay in the water longer, ensuring your core and large muscle groups receive the full benefit of the immersion.
How many ice bags do I need for a cold plunge if I dont have a chiller?
To drop a 100-gallon tub from 65°F to 50°F, you typically need 60 to 80 pounds of ice. This varies based on the ambient air temperature and how well your tub is insulated, but expect to use a significant amount for every session.
How does the Icebound essentials cold plunge compare to budget tubs?
The primary difference is the insulation and rigidity. Icebound uses high-pressure drop-stitch material that keeps the water cold for hours, whereas budget tubs are often thin plastic or uninsulated rubber that loses its “chill” almost immediately.
Can I leave my Penguin Chiller outside in the winter?
You must take precautions in freezing weather. If the water inside the heat exchanger freezes, it can crack the internal components. It is best to either keep the pump running constantly to prevent freezing or drain the unit entirely if temperatures stay below 32°F for extended periods.
Is the Canadian Tire cold plunge suitable for daily use?
Yes, retail-grade stock tanks are very durable, but they lack the features of a dedicated system. They are best used as a starting point for a DIY setup where you plan to add your own insulation and a third-party chiller later on.