- Evaluating the Best Cold Plunges on the Market for Home Use
- Premium Commercial Units vs. DIY Budget Solutions
- Buying vs. Building: Which Path Fits Your Recovery Goals?
- The Ultimate Chest Freezer Cold Plunge DIY Guide
- Choosing the Best Size Chest Freezer for Cold Plunge Success
- Waterproofing Secrets: Sealants and Bed Liners
- Step-by-Step: Converting Your Freezer into a Professional Recovery Tool
- Advanced Logistics: Chillers, Filters, and Water Maintenance
- Installing the Marineland Pump and Filtration System
- Sanitization 101: Chlorine and Water Chemistry
- Critical Safety Protocols and Common DIY Mistakes
- Maximizing Your Cold Plunge Experience
- Temperature and Duration: How Many Ice Cubes Do You Really Need?
- Frequently Asked Questions
Evaluating the Best Cold Plunges on the Market for Home Use
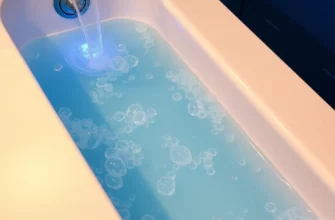
Cold water immersion has transitioned from a niche recovery tactic for elite athletes to a cornerstone of the modern home wellness spa. Whether you are chasing the cognitive boost of vagus nerve stimulation or the physical relief of reduced systemic inflammation, the setup you choose dictates your consistency. A high-quality tub must balance thermal efficiency with ease of maintenance, ensuring that the water is ready when your mental grit is at its peak.
Premium Commercial Units vs. DIY Budget Solutions
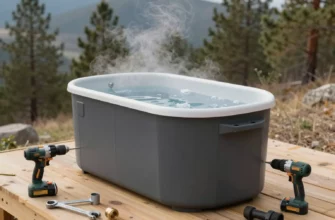
The market for dedicated cold plunges has exploded, offering everything from inflatable pods to high-end acrylic tubs with integrated filtration. Commercial units are designed for the “plug-and-play” enthusiast who prioritizes time over initial cost. These systems often include powerful 1/2 HP or 1 HP chillers capable of maintaining 39 degrees Fahrenheit even in a hot garage, a feat that simple ice-and-water setups struggle to achieve consistently. Investing in a professional unit typically eliminates the weekly chore of managing ice, making the habit significantly more sustainable for busy professionals.
On the other end of the spectrum, the DIY chest freezer conversion remains the gold standard for those who enjoy a weekend project. By repurposing a standard appliance, you can achieve professional-grade cooling at a fraction of the cost. While a commercial tub might run anywhere from $5,000 to $15,000, a well-built freezer setup can be completed for under $1,000. However, the trade-off is the labor required for waterproofing and the constant vigilance needed for electrical safety. For daily users, the long-term durability of a professional tub’s 304 stainless steel or acrylic interior often outweighs the budget savings of a painted metal freezer box.
Buying vs. Building: Which Path Fits Your Recovery Goals?
Choosing between a retail unit and a custom build requires an honest assessment of your technical skills and your recovery environment. A retail unit is an asset for your home, while a DIY project is a functional tool that requires active management.
| Feature | Commercial Cold Plunge | DIY Chest Freezer |
|---|---|---|
| Initial Cost | $4,500 – $12,000+ | $600 – $1,200 |
| Setup Time | 15–30 minutes | 10–20 hours (including curing) |
| Cooling Method | External Chiller (Active) | Freezer Coils (Passive/Integrated) |
| Maintenance | Low (Auto-filtration/Ozone) | Moderate (Manual cleaning/Sealing) |
| Est. Lifespan | 5–10 years | 2–5 years (corrosion risk) |
The Ultimate Chest Freezer Cold Plunge DIY Guide
Converting a chest freezer into a cold immersion vessel is a rite of passage in the biohacking community. It requires a blend of basic plumbing, electrical safety, and patience during the sealing phase. The goal is to create a leak-proof environment that can withstand the weight of 100+ gallons of water and the repetitive thermal shock of cooling cycles.
Choosing the Best Size Chest Freezer for Cold Plunge Success
Size selection is the most frequent mistake beginners make. A freezer that is too small will force your knees to your chest, preventing the full-body immersion necessary to trigger the mammalian dive reflex. The 14.8 cubic foot chest freezer is the industry favorite because it provides enough length for an adult up to 6’4″ to sit comfortably with their shoulders submerged. Models like the Frigidaire 14.8 cu. ft. are highly sought after because they feature a relatively flat bottom and robust compressor systems that can handle the thermal load of cooling large volumes of water.
Before purchasing, measure your intended space and account for at least 6 inches of clearance on all sides for ventilation. A freezer works by pulling heat out of the water and exhausting it through the external skin; blocking airflow will lead to premature compressor failure. If you are shorter than 5’8″, a 7 or 10 cubic foot model might suffice, but remember that water displacement is significant. Always calculate your “fill line” to be at least 8 inches below the rim to avoid overflowing when you enter the tub.
Waterproofing Secrets: Sealants and Bed Liners
The interior of a chest freezer is designed for dry air, not standing water. The seams where the floor meets the walls are the primary failure points. To prevent catastrophic leaks and the eventual rusting of the metal housing, you must apply a high-grade waterproof sealant. JB WaterWeld or marine-grade silicone should be applied to every single seam, including the drain plug and the corner joints. Allow these to cure for at least 24 to 48 hours in a low-humidity environment before proceeding to the next layer of protection.
Many builders opt for a secondary layer such as a spray-in bed liner or a specialized epoxy like Pond Shield. While bed liners provide a rugged, non-slip surface, they can be difficult to clean and may off-gas chemicals if not fully cured. A more modern and reliable solution is the installation of a custom vinyl chest freezer liner. These liners act like a pool bag, providing a seamless barrier that eliminates the risk of pinhole leaks in the sealant. If you choose epoxy, ensure you scuff the factory paint with 80-grit sandpaper first, or the epoxy will peel away from the smooth surface after just a few cold cycles.
Step-by-Step: Converting Your Freezer into a Professional Recovery Tool
Transforming your appliance into a recovery tool requires a logical progression to ensure the structural integrity of the build and the safety of the user.
- Clean and Prep: Wipe down the interior with denatured alcohol to remove any factory oils. Scuff the surfaces if you plan to use epoxy or bed liner.
- Seal the Seams: Apply marine-grade silicone to all joints. Pay extra attention to the four bottom corners, as these bear the most pressure.
- Apply Primary Coating: If using Pond Shield or bed liner, apply in thin, even coats. Allow a full 72 hours for the chemical bond to reach maximum strength.
- Install the Temperature Controller: Plug the freezer into an external controller (like an Inkbird). Place the probe in the water to regulate the temperature and prevent the water from freezing solid.
- Set Up Filtration: Mount your pump and filter system. Ensure hoses are secured with stainless steel clamps to prevent them from popping off under pressure.
- The Leak Test: Fill the tub only one-third of the way and let it sit for 12 hours. Check the exterior for any signs of moisture before filling completely.
- Final Electrical Check: Ensure all components are plugged into a GFCI-protected circuit.
Advanced Logistics: Chillers, Filters, and Water Maintenance
Once your tub is holding water, the challenge shifts to hygiene. Cold water doesn’t kill bacteria; it merely slows its growth. Without a filtration system, the water will become cloudy and develop a biofilm within days. Integrating a mechanical filter and a chemical or ozone sanitizer is the only way to avoid the wasteful process of draining and refilling 100 gallons of water every week.
Installing the Marineland Pump and Filtration System
The Marineland Magniflow canister filter is a favorite among DIYers for its high flow rate and multi-stage filtration capabilities. By using a combination of foam pads for mechanical filtration and ceramic rings for biological filtration, you can keep the water crystal clear for months. Position the intake and output hoses on opposite ends of the freezer to create a circular flow pattern. This prevents “thermal layering,” where the water near the cooling coils is freezing while the center of the tub remains warm.
When selecting a pump, aim for a unit that can cycle the entire volume of the tub at least 3 to 4 times per hour. If your freezer is kept in a high-ambient temperature environment, such as a garage in summer, the internal compressor may struggle. In these cases, plumbing an external 1/4 HP chiller into the Marineland loop can provide the extra cooling power needed to reach those sub-50-degree targets without overworking the freezer’s motor.
Sanitization 101: Chlorine and Water Chemistry
Maintaining proper water chemistry is non-negotiable for skin health and equipment longevity. While you might want to avoid chemicals, a completely “natural” cold plunge is a breeding ground for pathogens. A low dose of chlorine (roughly 1-3 ppm) is usually sufficient for a single-user tub. Always test the pH levels weekly; water that is too acidic will eat through your sealants and corrode the pump’s internal components, while water that is too alkaline will lead to calcium scaling.
For those sensitive to chlorine, an ozone generator is a powerful alternative. Ozone (O3) is a gas that oxidizes organic matter on contact and then dissipates back into oxygen, leaving no chemical residue. However, ozone must be used in conjunction with a fine-particle filter to remove the oxidized debris. Regardless of the method, always shower before entering the plunge to remove body oils and sweat, which are the primary food sources for bacteria.
Critical Safety Protocols and Common DIY Mistakes
The combination of water and electricity is inherently dangerous. In a DIY setup, you are responsible for your own safety standards. Failing to respect these boundaries can result in equipment damage or severe personal injury.
The Golden Rule of DIY Plunging: Never, under any circumstances, enter the water while the freezer or the pump is plugged into a power source. Even with a GFCI outlet, the risk of a short circuit through the water is a reality you must respect.
- GFCI Protection: Every component (freezer, pump, light, chiller) must be plugged into a Ground Fault Circuit Interrupter. If your outlet doesn’t have one, use a portable GFCI adapter.
- The Unplug Rule: Install a heavy-duty power strip with a physical “Off” switch or, better yet, physically pull the plugs before stepping into the tub.
- Avoid Ice Overload: If you use the freezer’s internal cooling, do not let an ice crust form more than an inch thick. The expanding ice can put immense pressure on the walls, cracking your waterproof seal.
- Ventilation: Do not wrap the exterior of the freezer in insulation or wood paneling without leaving the compressor vents open. Heat buildup will kill the unit in weeks.
Maximizing Your Cold Plunge Experience
Possessing the equipment is only half the battle; the real benefits come from how you use it. Cold water immersion is a stressor, and like any training stimulus, it requires a progressive approach to avoid overwhelming the nervous system.
Temperature and Duration: How Many Ice Cubes Do You Really Need?
There is a common misconception that the water needs to be near freezing to be effective. In reality, most of the metabolic and recovery benefits occur between 45 and 55 degrees Fahrenheit. Pushing the temperature down to 33 degrees significantly increases the risk of cold shock and afterdrop without providing a proportional increase in health benefits. For most people, a 3-minute dip at 50 degrees is the “minimum effective dose” for mood enhancement and reduced muscle soreness.
If you are using a non-chilled tub and relying on bags of ice, you will need approximately 40 to 60 pounds of ice to drop 100 gallons of water by 10 degrees. This is why the DIY freezer conversion is so superior to a standard bathtub; the integrated cooling coils do the heavy lifting for you, allowing you to focus on your breathwork rather than hauling ice bags from the grocery store. Start with 1 minute and gradually increase your duration as your body adapts to the thermal challenge.
In my professional experience building and consulting on recovery spaces, the “Unplug Rule” is the single most ignored safety protocol, and it’s the one that keeps me up at night. I always advise clients that a GFCI is a backup, not a primary safety strategy. You are sitting in a grounded metal box filled with a conductive liquid; treat it with the same respect you would a high-voltage industrial site. Furthermore, to avoid the ‘afterdrop’ effect—where your core temperature continues to plummet after you exit the water—I recommend a light 5-minute movement flow or a warm (not hot) beverage immediately post-plunge. Never jump straight into a hot shower, as this can cause vasodilation that sends cold blood rushing back to your heart too quickly, leading to dizziness or fainting.
Frequently Asked Questions
The Frigidaire 14.8 cu. ft. chest freezer is widely considered the gold standard due to its dimensions, which allow most adults to submerge fully, and its reliable compressor design.
How do I seal the seams of my DIY cold plunge?
Use JB WaterWeld or a high-quality marine-grade silicone. Apply it generously to all internal joints and the drain plug, ensuring a 24-hour cure time before adding water.
Do I need to add chlorine to my chest freezer cold plunge?
Yes, or an alternative like ozone. Without a sanitizer, bacteria will proliferate quickly. A small dose of chlorine or an ozone generator is essential for maintaining hygiene.
How long should I stay in a cold plunge for recovery?
Optimal results are typically found between 2 to 5 minutes. Staying in longer than 10 minutes increases the risk of hypothermia without adding significant recovery value.
Is a bed liner or a vinyl liner better for waterproofing?
A vinyl liner is easier to install and more reliable for leak prevention, while a bed liner (like Pond Shield) is more permanent but requires meticulous surface preparation to prevent peeling.
Can I use a Marineland filter in a chest freezer setup?
The Marineland Magniflow canister filter is highly effective; It provides multi-stage filtration that keeps the water clear and reduces the frequency of water changes.