- The Essentials of How to Build a Cold Plunge That Actually Lasts
- What to Look for in a Cold Plunge Tub Foundation
- Comparing DIY Cold Plunge Methods: From Cheap Hacks to Pro Setups
- The Cheapest Way to Do Cold Plunge at Home
- Step-by-Step Instructions: Converting a Chest Freezer into an Ice Bath
- Sealing and Waterproofing Your DIY Setup
- Designing a DIY Cold Plunge Frame for Aesthetics and Insulation
- Indoor Cold Plunge Setup vs. Outdoor Considerations
- How Much Does it Cost to Build a Cold Plunge? A Budget Breakdown
- Hidden Costs: Filtration‚ Sanitation‚ and Electricity
- Common Mistakes to Avoid When Making Your Own Ice Bath
- Why You Must Use a GFCI Outlet and Proper Grounding
- Expert Perspective: Thermal Management and Safety
- Frequently Asked Questions
The Essentials of How to Build a Cold Plunge That Actually Lasts
The rise of cold water immersion has transformed from a niche athletic recovery tactic into a mainstream wellness staple. While commercial units often carry price tags exceeding five thousand dollars‚ building your own setup allows for better customization and significantly higher quality components at a fraction of the cost.
A successful DIY build is not just about holding cold water; it is about managing the physics of thermal mass and the biology of stagnant water. To build a unit that survives more than one season‚ you must prioritize structural integrity and the chemical balance of your water source from day one.
What to Look for in a Cold Plunge Tub Foundation
The vessel you choose dictates the complexity of your entire filtration and cooling system. Plastic stock tanks‚ often made of high-density polyethylene (HDPE)‚ are favored for their impact resistance and natural insulating properties‚ whereas galvanized steel tanks offer a classic aesthetic but require rigorous sealing to prevent rust and corrosion over time;
When choosing the right vessel‚ always measure your internal shoulder width and leg length while in a seated position to ensure you can achieve full submersion up to the clavicle. A tub that is too short forces you to leave your upper chest exposed‚ which negates many of the autonomic nervous system benefits associated with the “cold shock” response.
Thermal efficiency is the third pillar of a good foundation. An uninsulated metal tank will cause your chiller unit to work twice as hard‚ leading to premature motor failure. If you opt for a thin-walled vessel‚ plan to add at least two inches of closed-cell spray foam or rigid foam board around the exterior to maintain a consistent submersion depth temperature without skyrocketing your electric bill.
Comparing DIY Cold Plunge Methods: From Cheap Hacks to Pro Setups
Choosing a build path depends entirely on your technical skill level and how much you value convenience over cost; Some users prefer the manual labor of hauling ice‚ while others want a “set it and forget it” system that stays at a crisp 39 degrees Fahrenheit year-round;
| Method | Estimated Cost | Effort Level | Temperature Control |
|---|---|---|---|
| Stock Tank (Manual Ice) | $150 ౼ $400 | High (Manual) | Inconsistent |
| Chest Freezer Conversion | $500 ౼ $900 | Medium | Excellent (Internal Stat) |
| Custom Framed + Chiller | $1‚500 ౼ $3‚000 | High (Technical) | Professional Grade |
- The Budget Path: Uses existing structures like bathtubs or basic rubber troughs. This is the entry point for most‚ but the recurring cost of ice often exceeds the cost of a chiller within six months.
- The Intermediate Path: Converting a chest freezer provides built-in insulation and a lid‚ which is the single most important factor for energy retention.
- The Professional Path: Involves a dedicated external chiller‚ a powerful pump‚ and a high-micron water filtration system‚ usually housed within a custom wooden enclosure.
The Cheapest Way to Do Cold Plunge at Home
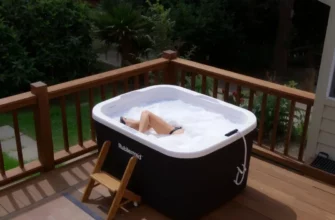
If you are looking for the absolute cheapest way to make a cold plunge‚ the strategy is to eliminate the mechanical cooling element. A 100-gallon Rubbermaid stock tank or a reinforced plastic storage bin is the gold standard for entry-level builds. These are UV-resistant and can handle the weight of roughly 800 pounds of water without bowing.
While doing a cold plunge in a regular bathtub is possible‚ it is rarely a long-term solution. Standard home tubs are typically too shallow for a full grown adult to submerge their torso fully‚ and the lack of insulation means you will need 40 to 60 pounds of ice just to drop the temperature by ten degrees. For a more permanent but low-cost setup‚ focus on a dedicated outdoor vessel where you can manage drainage without worrying about bathroom floor flooding.
Step-by-Step Instructions: Converting a Chest Freezer into an Ice Bath
The chest freezer conversion is the “holy grail” of DIY cold therapy because the appliance is literally designed to keep its contents cold. However‚ because these units are designed to hold air‚ not 100 gallons of heavy water‚ the conversion process requires specific technical steps to prevent catastrophic leaks or electrical shorts.
- Clean and Prep: Thoroughly scrub the interior with denatured alcohol to remove any factory oils or residues that would prevent sealants from bonding.
- Seal the Seams: Use a high-quality marine-grade sealant or JB WaterWeld on every internal corner and seam. Do not skip the drain plug area‚ as this is the most common point of failure.
- Apply the Primary Barrier: Once the seam sealant is cured‚ apply a dedicated pond liner or three coats of food-grade epoxy. This creates a secondary waterproof shell that protects the metal walls from rusting.
- Install the Thermostat: Plug the freezer into an external temperature controller (like an Inkbird). Place the probe inside the water to ensure the freezer only kicks on when the temperature rises above your set point.
- Safety Grounding: Ensure the unit is plugged into a GFCI outlet. Always unplug the freezer before stepping into the water to eliminate any risk of electrical leakage.
Sealing and Waterproofing Your DIY Setup
When you are learning how to make your own cold plunge‚ waterproofing is where most people fail. A freezer’s internal liner is often made of thin aluminum or plastic that can develop micro-fractures under the weight of water. To prevent leaks‚ you must treat the vessel as a hydraulic tank rather than a kitchen appliance.
If you choose to use an epoxy coating‚ ensure the ambient temperature is between 70 and 80 degrees during application to allow for proper chemical cross-linking. If the epoxy is applied in a cold garage‚ it may remain tacky or brittle‚ leading to delamination after just a few plunges. For those using a pond liner‚ make sure to fold the corners neatly rather than cutting them; every cut is a potential leak point that is nearly impossible to fix once the tank is full.
Designing a DIY Cold Plunge Frame for Aesthetics and Insulation
An external housing frame serves two purposes: it hides the unsightly plumbing of a chiller unit and provides a secondary layer of thermal protection. A well-built frame can transform a plastic tub into a centerpiece of a home gym‚ while also protecting the sensitive electronics of your pump and filtration system from the elements.
When designing your diy cold plunge frame‚ use pressure-treated lumber or cedar for the skeleton. Cedar is naturally rot-resistant and handles the high-moisture environment of a plunge area better than pine. Leave an access panel in your design; you will need to reach the pump and filter every few weeks for routine maintenance‚ and nothing is more frustrating than having to deconstruct your frame just to change a $10 filter cartridge.
Indoor Cold Plunge Setup vs. Outdoor Considerations
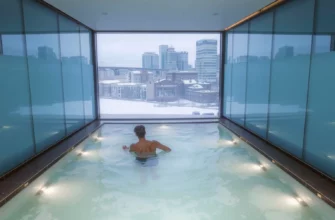
Deciding where to place your unit involves more than just aesthetics. An indoor cold plunge setup requires a floor that can support significant weight. A 100-gallon tank plus the weight of a person can exceed 1‚000 pounds. Always verify that your subfloor is rated for this point-load‚ especially if you are placing the unit on a second floor or over a crawlspace.
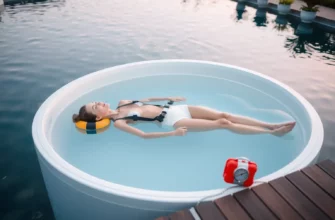
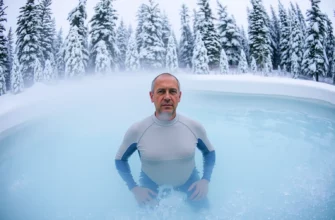
For backyard ice bath ideas‚ the focus shifts to UV protection and winterization. If you live in a climate where the air temperature drops below freezing‚ your plumbing lines are at risk. Wrap all external PVC pipes in foam insulation sleeves and consider a small pond heater or a continuous circulation pump to prevent the water from turning into a solid block of ice‚ which can crack even the strongest steel tanks.
How Much Does it Cost to Build a Cold Plunge? A Budget Breakdown
The cost of building a cold plunge varies wildly based on whether you are buying new or used components. A basic stock tank build can be done for under $200‚ whereas a high-end setup with a dedicated 1/2 HP chiller and ozone sanitation will quickly climb into the thousands.
- Budget Build ($150 — $400): Includes a 100-gallon plastic stock tank‚ a heavy-duty cover‚ and a thermometer. This budget assumes you are using manual ice or frozen water bottles.
- The Mid-Range Freezer Build ($500 — $1‚100): Includes a used chest freezer ($200)‚ marine sealant ($50)‚ an Inkbird controller ($35)‚ and a small internal pond filter ($60).
- The Pro DIY Setup ($1‚800, $3‚000+): Includes a high-quality tub ($500)‚ a dedicated 1/2 HP water chiller ($800-$1‚200)‚ an external pump and canister filter ($250)‚ and custom wood framing ($300).
Hidden Costs: Filtration‚ Sanitation‚ and Electricity
The sticker price of the tub is only the beginning. To avoid draining and refilling 100 gallons of water every three days‚ you must invest in a sanitization protocol. A small ozone generator or a UV-C clarifier is highly recommended to kill bacteria and viruses without the harsh smell of high-concentration chlorine.
Electricity is another factor often overlooked. While a well-insulated chest freezer may only cost $5 to $10 a month to run‚ an uninsulated stock tank paired with an active chiller in a hot garage can easily add $40 to your monthly utility bill. Replacing 20-micron pleated filters every 4 weeks is also a mandatory expense; running a clogged filter will put back-pressure on your pump‚ leading to a much more expensive mechanical failure down the road.
Common Mistakes to Avoid When Making Your Own Ice Bath
The most dangerous mistake in DIY cold plunging is ignoring the relationship between water and electricity. Because you are creating a high-moisture environment‚ often with DIY-wired components‚ the risk of a ground fault is real. Never assume a standard outlet is safe; use a dedicated GFCI adapter for every single component plugged into the wall.
Critical Warning: Never enter a DIY cold plunge that is actively plugged into a power source. Even with GFCI protection‚ the safest protocol is to use a “kill switch” or simply unplug the unit before your skin touches the water.
- Poor Drainage: Failing to plan for where 100 gallons of water will go when you need to clean the tank. Always install a high-flow ball valve at the lowest point of the tub.
- Inadequate Insulation: Trying to cool an uninsulated metal tank in a 90-degree garage. This will burn out your chiller’s compressor within months.
- Chemical Neglect: Assuming cold water stays clean. Bio-film and skin cells accumulate quickly‚ creating a breeding ground for bacteria if not treated with hydrogen peroxide or ozone.
Why You Must Use a GFCI Outlet and Proper Grounding
When you are building your own setup‚ you are essentially the manufacturer. This means you are responsible for the safety of the electrical loop. A Ground Fault Circuit Interrupter (GFCI) is non-negotiable because it detects imbalances in electrical current and shuts off the power in as little as 1/40th of a second.
Beyond the outlet‚ ensure all your equipment is properly grounded to the chassis of the freezer or the frame. If you notice a “tingling” sensation when touching the water or the frame‚ exit immediately and disconnect the power. This is often a sign of a stray current caused by a failing pump seal or a nicked wire in your temperature controller probe. Regular testing of your GFCI buttons should be part of your monthly maintenance checklist.
Expert Perspective: Thermal Management and Safety
In my professional experience‚ the most overlooked aspect of DIY cold plunges is the “thermal inertia” of the system. I always advise builders to focus on the total thermal mass—meaning‚ it is much easier to keep 100 gallons cold than it is to cool it down from room temperature. This is why secondary containment‚ like a framed enclosure with thick rockwool or spray foam insulation‚ is vital. Not only does it protect the chilling unit from overheating by providing proper ventilation gaps‚ but it also creates a thermal buffer that reduces the duty cycle of your compressor. If your chiller is running more than 30% of the day‚ your insulation is insufficient. Furthermore‚ from a safety standpoint‚ the frame acts as a physical barrier that prevents condensation from dripping onto electrical components‚ which is the leading cause of short circuits in home-built units.
Frequently Asked Questions
The most cost-effective entry point is purchasing a 100-gallon structural foam stock tank and using manual ice. It requires no electrical work and allows you to test your commitment to cold therapy before investing in expensive chillers or freezer conversions.
Can I use a regular bathtub for a permanent cold plunge setup?
While possible for occasional use‚ standard bathtubs lack the insulation needed to maintain low temperatures efficiently. Additionally‚ the constant condensation can lead to mold growth behind your bathroom walls and damage to flooring that isn’t rated for constant moisture.
How do I keep the water clean in a DIY cold plunge?
To maintain water clarity‚ use a combination of a 20-micron sediment filter and a sanitization agent like food-grade hydrogen peroxide or an ozone generator. This prevents the buildup of bio-film and reduces the frequency of full water changes.
Is it safe to leave a DIY cold plunge running 24/7?
Yes‚ provided you use a dedicated thermostat like an Inkbird to regulate the temperature. This prevents the water from freezing solid—which could expand and crack your tank—and ensures the unit only consumes power when necessary to maintain your target temperature.
Which commercial brands are often used for DIY retrofits?
Rubbermaid Commercial stock tanks are the industry standard for plastic builds due to their durability. For those looking for high-end insulation without a freezer‚ Grizzly or Yeti-style rotomolded coolers are frequently retrofitted with bulkheads for chiller lines.
How long does it take to build a framed cold plunge?
A basic setup can be functional in an afternoon‚ but a fully framed and insulated unit with integrated plumbing typically requires 1 to 2 weekends. This allows for proper curing time for sealants and precision cutting of the cabinetry and aesthetic cladding.