- The Reality of Cooking Up a Weighted Blanket at Home
- Is it Possible to Make My Own Weighted Blanket Safely?
- Choosing Your Weight: A Comparison of Filler Materials
- Natural Fillers: Making a Weighted Blanket with Rice, Beans, or Barley
- Professional Fillers: Making a Weighted Blanket with Glass Beads
- Step-by-Step Instructions: How to Make Your Own Weighted Blanket
- From Scratch or Upcycled: Can You Make a Weighted Blanket from an Existing Blanket?
- No-Sew Solutions: Making a Weighted Blanket Without Pellets or Stitching
- Alternative Stuffing for Weighted Blankets
- Specialized Designs: Kids, Dogs, and Chronic Pain
- DIY Weighted Blankets for Dogs and Kids
- Staying Cool: DIY Weighted Blankets for Hot Weather
- Working with Bamboo and Natural Materials
- Expert Perspective: Senior Textile Specialist
- Frequently Asked Questions
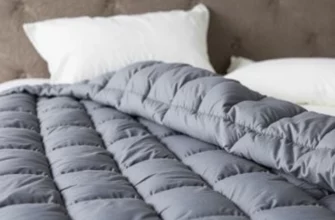
The Reality of Cooking Up a Weighted Blanket at Home
The term “cooking” often pops up when enthusiasts discuss the recipe for a perfect DIY weighted blanket. While you aren’t literally putting fabric in an oven, the process of preparing materials—especially natural fillers like rice or flaxseed—requires a similar level of precision and “ingredients” management. Making your own therapeutic bedding is a high-reward project that can save you upwards of $150 compared to high-end retail brands.
Beyond the financial savings, a homemade project allows for total customization of sensory input. You control the exact weight, the texture of the fabric against your skin, and the specific type of filler used to provide that grounding sensation. Whether you are looking for a heavy throw for anxiety relief or a specialized tool for sensory processing, the “DIY recipe” ensures the final product meets your unique physiological needs.
Is it Possible to Make My Own Weighted Blanket Safely?
If you have basic sewing skills, you can absolutely construct a safe and effective weighted blanket at home. The primary challenge for beginners is not the complexity of the stitch, but the management of the weight as the project grows. As you add fillers, the blanket becomes cumbersome to move under a standard sewing machine, requiring a large workspace and potentially a walking foot attachment to keep layers moving evenly.
Safety centers almost entirely on even weight distribution across the body. If the filler shifts to one side or bunches in a single corner, it can create uneven pressure that is uncomfortable or, in the case of pediatric use, potentially restrictive. To ensure safety, you must master the grid system—sewing individual pockets that lock a specific amount of weight into a 3×3 or 4×4 inch square, preventing any dangerous shifting or “pooling” of materials.
Choosing Your Weight: A Comparison of Filler Materials
The filler is the heart of your project, determining not only the weight but also the “drape,” the sound, and the washability of the finished piece. Choosing between a natural organic filler and a synthetic professional-grade pellet changes the entire lifecycle of the blanket. You must decide if you want a blanket that can survive a heavy-duty washing machine or one that serves as a heated, aromatic comfort tool.
| Filler Material | Durability & Washability | Noise Level | Best Use Case |
|---|---|---|---|
| Glass Micro-beads | High / Machine Washable | Silent | Professional, low-profile blankets for adults. |
| Plastic Poly Pellets | High / Machine Washable | Moderate (Crunchy) | Budget-friendly DIY projects for kids. |
| Rice or Dried Beans | Low / Non-Washable | Quiet | Microwavable heating pads or temporary tools. |
| Steel Shot Beads | Very High / Washable | Noisy | Extremely heavy blankets (25 lbs+) for large frames. |
| Pea Gravel | Moderate / Hand Wash | High | Outdoor or “rustic” heavy blankets on a strict budget. |
Natural Fillers: Making a Weighted Blanket with Rice, Beans, or Barley
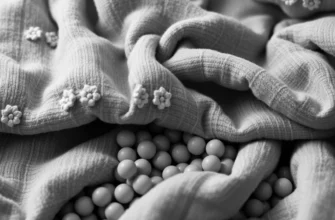
Using organic materials like rice or pearl barley is the fastest way to get a project off the ground because these items are likely already in your pantry. These fillers offer a lovely, soft “thud” and can be used to create a microwavable heating element, providing soothing warmth alongside deep pressure. However, these materials are technically biodegradable and highly sensitive to the environment.
The major drawback to food-based fillers is their lack of longevity. Organic fillers cannot be submerged in water, as moisture will cause rice or beans to swell, ferment, or develop mold. Furthermore, if the blanket is stored in a damp area, it can attract pests. If you choose this route, always use a removable duvet cover so you can wash the exterior without ruining the internal organic “engine” of the blanket.
Professional Fillers: Making a Weighted Blanket with Glass Beads
For those seeking a high-end feel, fine glass beads are the industry gold standard. These micro-beads are roughly the size of grains of sand or salt, which gives the blanket a fluid, liquid-like drape that contours perfectly to the body. Unlike plastic pellets, glass is much denser, meaning you can achieve a 15-pound weight without the blanket looking bulky or oversized.
When working with glass beads, always use a funnel for precise measurement into your fabric channels. Because the beads are so small, your sewing machine needles must be in perfect condition; a dull needle can strike a bead and shatter, or create a hole large enough for the “sand” to leak out. The result is a silent, hypoallergenic, and fully washable therapeutic tool that rivals $200 retail versions.
Step-by-Step Instructions: How to Make Your Own Weighted Blanket
The secret to a successful weighted blanket is the internal grid. Without a grid, the weight will simply slide to the bottom, turning your blanket into a heavy, useless bag of beads. This process requires patience and a significant amount of floor space for marking your lines before you ever touch the sewing machine.
- Calculate your weight: Aim for 10% of the user’s body weight plus one pound. Divide this total weight by the number of grid squares you plan to sew (e.g., a 40-square grid for a 10lb blanket means 4 ounces of filler per square).
- Prepare your fabric: Use two pieces of heavy-duty cotton or flannel. Sew three sides together (right sides facing), flip it right-side out, and topstitch the edges for extra reinforcement.
- Mark the grid: Use a fabric marker to draw vertical columns and horizontal rows. Space them about 4 to 5 inches apart.
- Sew the vertical channels: Stitch along the vertical lines from the bottom of the blanket to the top, creating long, open “tubes.”
- Fill the first row: Use a funnel to pour the calculated amount of filler into each vertical channel so it settles at the bottom.
- Stitch the horizontal row: Pin the filler down so it stays at the bottom, then sew your first horizontal line across all channels to lock the filler into its individual squares.
- Repeat: Continue filling and sewing row by row until you reach the top.
- Seal the deal: Fold the top edges inward and double-stitch the final opening to ensure no beads can escape during use.
From Scratch or Upcycled: Can You Make a Weighted Blanket from an Existing Blanket?
If the thought of sewing an entire blanket from scratch is daunting, you can upcycle a pre-made duvet cover or two thick fleece throws. This method saves you the time of measuring and cutting large fabric panels. By sewing the grid directly into an existing structure, you ensure the edges are already professionally finished, which reduces the risk of seam failure under the stress of the added weight.
When using an existing blanket, check the thread strength of the original seams. Most decorative throws are not designed to hold 15 pounds of concentrated pressure. You should run a reinforcing straight stitch along all outer edges before adding your filler. If you are using a duvet cover, you can create a “weighted insert” that ties into the corners, allowing you to remove the heavy part for easier laundering of the cover.
No-Sew Solutions: Making a Weighted Blanket Without Pellets or Stitching
Not everyone has access to a sewing machine or the patience for a 40-square grid project. For a quick sensory fix, you can utilize the “tie-knot” method typically used for fleece blankets. By creating small pouches or using pre-weighted bean bags tucked between two layers of knotted fleece, you can create a functional weighted tool in a single afternoon without a single needle and thread.
Another “no-sew” approach involves using a specialized compression sheet or “sensory sock,” which provides deep pressure through elastic resistance rather than physical mass. However, if you strictly want weight, look into using heavy industrial-grade washers or flat stones placed inside small socks, which are then tied or safety-pinned (with heavy-duty locking pins) into the interior of a thick comforter. This is a “hack” method that works well for testing if a weighted blanket is right for you before committing to a permanent build.
Alternative Stuffing for Weighted Blankets
If you don’t want to deal with the potential mess of tiny pellets, consider “bulk weight” materials. Layering several high-GSM (grams per square meter) cotton towels or heavy denim scraps can add significant poundage without the risk of leaks. While this makes the blanket much thicker, it provides a different kind of sensory input that some users find more “cushioned” and less “granular.”
For a more rustic, natural feel, buckwheat hulls or clean pea gravel can be used. Buckwheat is particularly popular because it is exceptionally breathable and has a pleasant, earthy scent. When using pea gravel, ensure the stones are smooth and have been thoroughly washed and dried to remove any dust. These larger materials are much easier to manage in a no-sew environment because they can be tied into larger sections of fabric without shifting as much as micro-beads.
Specialized Designs: Kids, Dogs, and Chronic Pain
Designing for specific needs requires a shift in your “recipe.” A blanket for an adult with general anxiety is built very differently than one designed for a child with ADHD or a dog with thunderstorm phobia. For those living with Ehlers-Danlos Syndrome (EDS), the blanket’s weight must be carefully calibrated to provide joint stability without causing subluxations or putting too much pressure on fragile connective tissue.
- DO: Follow the 10% body weight rule strictly for children to prevent respiratory restriction.
- DON’T: Use weighted blankets for infants or any individual who cannot independently remove the blanket.
- DO: Use 100% breathable cotton for EDS patients, as they often struggle with temperature regulation.
- DON’T: Use large, heavy stones as filler for pets; instead, use soft poly-pellets to avoid bruising.
- DO: Include a “fidget” texture, like Minky fabric, on one side for additional sensory grounding.
DIY Weighted Blankets for Dogs and Kids
For children, the tactile experience is just as important as the weight. Using “fidget” fabrics like sensory dimple plush or satin borders can provide secondary calming inputs. When constructing for a child, always use non-toxic, BPA-free plastic pellets or glass beads. Avoid any natural fillers that could harbor bacteria if the child spills a drink on the blanket, as pediatric blankets require frequent sanitization.
For dogs, the design usually takes the form of a “weighted vest” or a small lap pad rather than a full-body blanket. These are particularly effective for dogs with separation anxiety or noise phobias. Ensure the weight is concentrated over the shoulders and ribcage, avoiding the lower back and hips. A dog-specific weighted tool should rarely exceed 2-5 pounds, depending on the breed’s size and musculoskeletal health.
Staying Cool: DIY Weighted Blankets for Hot Weather
The most common complaint about weighted blankets is that they act like a furnace. Because weight usually requires density, and density traps heat, many users wake up sweating. To combat this, you must focus on the thermodynamics of your materials. The goal is to facilitate airflow through the filler and use fabrics that actively wick moisture away from the skin.
Avoid synthetic fleeces or heavy polyesters if you are a “hot sleeper.” Instead, look for open-weave cotton or linen. These fabrics have larger gaps between the fibers, allowing body heat to escape even when the blanket is weighted down. Additionally, glass beads are better for cooling than plastic pellets because glass does not retain heat as efficiently as petroleum-based plastics.
Working with Bamboo and Natural Materials
Bamboo Lyocell or Viscose is the “holy grail” fabric for a cooling weighted blanket. Bamboo is naturally three times more breathable than cotton and has a “cool-to-the-touch” sensation that lasts throughout the night. When sewing with bamboo, be aware that it is a very “shifty” and slippery fabric; you will need to use plenty of pins or fabric glue sticks to keep your grid lines straight during the sewing process.
Pairing a bamboo shell with a natural mineral filler like ceramic beads or glass micro-beads creates a thermal-regulating powerhouse. Ceramic beads, in particular, are excellent at absorbing excess body heat and dissipating it. If you are “cooking” up a summer-weight blanket, keep the grid squares slightly larger (5-6 inches) to allow for more fabric flexibility and better air circulation between the weighted pockets.
Expert Perspective: Senior Textile Specialist
In my professional experience, the single biggest mistake DIYers make is underestimating the shear stress on the seams. A standard straight stitch is often insufficient for a 15-pound load. I always advise using a heavy-duty polyester thread and a triple-stitch (stretch stitch) for the vertical channels. This ensures that even if the blanket is dragged across the floor or bunched up, the internal grid won’t rupture. Furthermore, if you are making this for someone with joint hypermobility or EDS, I recommend a slightly lower weight ratio (roughly 7-8%) to provide the “hug” sensation without risking joint displacement during sleep.
Frequently Asked Questions
Yes, but these are best for temporary or dry-use items. They cannot be washed, and moisture will cause them to rot or mold over time.
What is the best material for a cooling weighted blanket?
Use bamboo or high-quality linen for the exterior and fine glass micro-beads for the filler to ensure maximum breathability and heat dissipation.
How do I calculate the weight for a child’s blanket?
The standard formula is 10% of the child’s body weight plus one pound. Always ensure the child can easily push the blanket off their body.
Can you wash a DIY weighted blanket?
Only if you use synthetic fillers like glass beads or plastic pellets. Natural fillers like rice or corn will be destroyed in a washing machine.
Is a no-sew weighted blanket as effective as a sewn one?
It provides the same weight, but lacks the precise weight distribution of a sewn grid, which can lead to uncomfortable pressure points.