- Why a Dedicated Water Chiller for Cold Plunge is Better Than Ice
- Consistent Temperatures for Maximum Health Benefits
- Comparing the Best Cold Plunge Chillers for 2026
- Professional Grade: Nuvio and Plunge Crafters Pro Reviews
- How to Build a DIY Cold Plunge with a Water Chiller
- The Active Aqua Advantage for DIY Enthusiasts
- Plumbing Essentials: PVC vs. Braided Tubing
- Finding a Reliable Cold Plunge Chiller Under $600
- Budget Hacks: Aquarium Chillers and Used Equipment
- Technical Setup and Safety: From UL Ratings to GFCI
- Outdoor Use and Weatherproofing Your Setup
- Maximizing Efficiency: Insulation and Water Maintenance
- Chiller and Heater Combos for Year-Round Use
- Common Mistakes When Installing a Cold Plunge Chiller
- Expert Perspective: The Horsepower to Gallon Ratio
- Frequently Asked Questions
Why a Dedicated Water Chiller for Cold Plunge is Better Than Ice
Dumping bags of ice into a tub is a chore that quickly loses its appeal for serious recovery enthusiasts. Beyond the manual labor and recurring cost‚ ice creates an inconsistent thermal environment where the water temperature fluctuates wildly during your session.
A dedicated water cooling system for cold plunge setups provides a controlled‚ stable environment that allows you to focus on your breathwork rather than wondering if the water is actually cold enough to trigger a physiological response. By automating the process‚ you ensure your recovery tool is ready the moment you wake up.
Consistent Temperatures for Maximum Health Benefits
To truly trigger the metabolic advantages of cold exposure‚ such as the activation of brown adipose tissue (BAT) and the release of norepinephrine‚ you need to maintain a specific temperature range. Most experts recommend staying between 40 and 50 degrees Fahrenheit‚ a feat that is nearly impossible to maintain with ice alone as it melts and dilutes the thermal mass.
When using optimal water chillers for cold plunge setups‚ the thermostat monitors the water in real-time. This precision allows for precise thermal regulation‚ ensuring that your body experiences a constant cold stimulus throughout the entire three-to-five-minute plunge. This consistency is what leads to improved insulin sensitivity and reduced systemic inflammation over time.
Comparing the Best Cold Plunge Chillers for 2026
The market for cold therapy equipment has exploded‚ moving from expensive medical devices to accessible home units. Choosing between a professional integrated system and a modified industrial chiller requires understanding the trade-offs in cooling speed‚ noise‚ and ease of setup.
| Feature | Professional Units (Nuvio/Plunge Crafters) | Modified Aquarium Chillers (Active Aqua) | Budget Import Units |
|---|---|---|---|
| Cooling Power | 1/2 HP to 1 HP High-Efficiency | 1/4 HP to 1/2 HP Standard | 1/10 HP to 1/4 HP Variable |
| Filtration | Built-in 20-Micron + Ozone/UV | None (Requires external pump/filter) | Minimal or None |
| Setup Time | 15 Minutes (Plug and Play) | 2-4 Hours (DIY Plumbing) | 1-2 Hours (Basic Hosing) |
| Durability | Weatherproof / Commercial Grade | Indoor Rated (Requires protection) | Varies (Lower lifespan) |
Professional Grade: Nuvio and Plunge Crafters Pro Reviews
When looking at the nuvio cold plunge chiller review data‚ the standout feature is the all-in-one housing. These units encapsulate the pump‚ the chiller‚ and the filtration system into a single‚ sleek box that operates at a much lower decibel level than exposed DIY components. This makes them ideal for indoor use or apartment balconies where noise complaints are a concern.
The plunge crafters cold plunge chiller pro product information highlights the use of titanium heat exchangers. Unlike cheaper copper alternatives‚ titanium resists corrosion from salt or chlorine‚ which is vital if you plan on using water stabilizers. These professional units often include 24/7 circulation modes that prevent water from becoming stagnant‚ a common issue in lower-end setups.
How to Build a DIY Cold Plunge with a Water Chiller
Building your own system is the most cost-effective way to get high-end performance. By sourcing your own tub and pairing it with a powerful motor‚ you can often achieve 39-degree water for a fraction of the price of a commercial “all-in-one” kit.
- Select your vessel: Choose an insulated tub or a stock tank. Insulation is the single most important factor in determining how hard your chiller has to work.
- Mount the pump: Use a submersible pump with a flow rate of at least 500-1000 GPH (gallons per hour) to ensure the water moves through the chiller fast enough to prevent internal freezing.
- Install the plumbing: Connect the pump to the chiller inlet using reinforced tubing. Always use stainless steel hose clamps to prevent the lines from popping off under pressure.
- Integrate filtration: Place an inline sediment filter before the water enters the chiller to protect the internal cooling coils from hair and skin cells.
- Seal the connections: Apply thread tape to all threaded fittings to ensure a vacuum-tight seal.
The Active Aqua Advantage for DIY Enthusiasts
The Active Aqua G2 series has become the gold standard for those looking for the best water chiller for diy cold plunge projects. Originally designed for hydroponics‚ these units are built for continuous operation and feature a robust freon-free R134a cooling system. They are known for their reliability and the ability to pull temperatures down significantly even in ambient environments above 80 degrees.
When sizing a diy cold plunge with active aqua chiller‚ do not settle for the 1/10 HP model. For a standard 100-gallon stock tank‚ the 1/2 HP model is the “sweet spot‚” providing enough thermal pull-down capacity to reach 42 degrees in just a few hours. Using an undersized unit will cause the compressor to run indefinitely‚ leading to premature mechanical failure and high electricity bills.
Plumbing Essentials: PVC vs. Braided Tubing
Choosing the right conduit for your water is a matter of permanence versus flexibility. Many builders prefer a diy cold plunge chiller pvc setup because rigid Schedule 40 PVC offers the most professional look and the least risk of kinking. However‚ PVC requires solvent welding with primer and glue‚ making it a permanent choice that is difficult to modify later.
Alternatively‚ a diy cold plunge chiller kit often uses braided vinyl tubing. This is easier to install but can collapse if the pump creates too much suction. If you choose tubing‚ opt for 3/4-inch or 1-inch diameters to reduce friction loss‚ which allows your pump to operate at maximum efficiency and keeps the motor running cool.
Finding a Reliable Cold Plunge Chiller Under $600
Entering the cold plunge world doesn’t have to cost $5‚000. While the high-end units are impressive‚ the budget-conscious segment can find success by looking at the crossover between the aquarium and hydrotherapy industries. However‚ you must be realistic about the trade-offs in cooling speed and longevity.
| Pros of Budget Chillers | Cons of Budget Chillers | ||
|---|---|---|---|
| Low initial investment ($300-$550) | Slower cooling times (1-2 degrees per hour) | Compact footprint for small spaces | Lower-quality plastic fittings prone to cracking |
| Simple digital interfaces | Higher noise levels from smaller fans | ||
| Readily available on major marketplaces | Often lack UL or ETL safety certifications |
Budget Hacks: Aquarium Chillers and Used Equipment
The best aquarium chiller for cold plunge use is typically one designed for large reef tanks (150+ gallons). These units are designed to maintain 70 degrees for fish‚ so they have to work significantly harder to reach 45 degrees for a human. If you find a used 1/2 HP aquarium unit‚ ensure the cooling fins are free of dust and debris‚ as airflow is the primary bottleneck for these machines.
To succeed with the best budget water chiller for cold plunge‚ you must assist the machine by using heavy-duty pond insulation or reflective bubble wrap around your tub. By reducing the “heat leak” from the environment‚ you allow a cheaper‚ less powerful chiller to reach lower temperatures that would otherwise be impossible in an uninsulated metal stock tank.
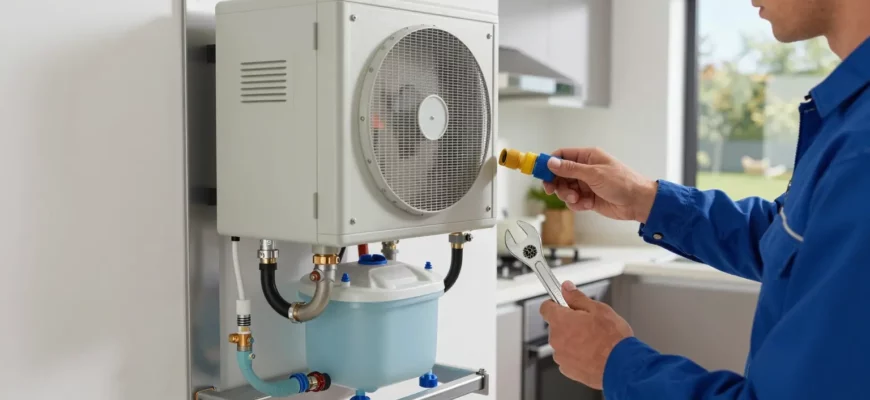
Technical Setup and Safety: From UL Ratings to GFCI
Safety is the most overlooked aspect of DIY water cooling. You are essentially sitting in a conductive medium (water) that is being circulated through an electrical appliance. This requires strict adherence to electrical protocols to prevent the risk of electric shock or equipment fires.
- Never plunge with the chiller running: While many units are safe‚ the best practice is to unplug the chiller and pump before entering the water.
- Use a GFCI outlet: Always plug your equipment into a Ground Fault Circuit Interrupter. This device cuts power in milliseconds if it detects a leak in the electrical current.
- Check for UL Ratings: Ensure your chiller has a Underwriters Laboratories (UL) or ETL mark‚ which indicates it has been tested to meet rigorous safety standards for water-cooling electronics.
- Keep electronics elevated: Never place your chiller or power strips directly on the floor where water might pool from splashes or condensation.
Outdoor Use and Weatherproofing Your Setup
If you are planning an outdoor use water chiller cooler cold plunge ul setup‚ you must account for the elements. Most chillers are not “weatherproof” in the sense that they can sit in the rain. You should build a vented enclosure that protects the unit from direct precipitation while allowing for massive amounts of airflow.
According to the typical as cold plunge chiller manual‚ the unit requires at least 12 to 18 inches of clearance on all sides. If the hot air exhausted by the condenser is trapped in a tight space‚ the chiller will overheat and eventually trigger a thermal cutout. For those in freezing climates‚ you must drain the unit entirely in winter or use a heater to prevent the internal heat exchanger from cracking due to ice expansion.
Maximizing Efficiency: Insulation and Water Maintenance
Your chiller’s efficiency is directly tied to the cleanliness of the water and the thermal resistance of the tub. A dirty system forces the pump to work harder‚ while a poorly insulated tub allows the ambient air to “fight” the chiller‚ essentially wasting electricity and wearing out the compressor.
Using a water chiller for 128 gallon cold plunge setups requires a robust filtration strategy. I recommend a dual-stage approach: a 50-micron pleated filter to catch large debris and an ozone generator or high-dose hydrogen peroxide treatment to kill bacteria. This keeps the internal coils of the chiller clean‚ ensuring maximum heat transfer and preventing the “biofilm” that can insulate the cooling plates and reduce performance.
Chiller and Heater Combos for Year-Round Use
For those living in regions with extreme seasons‚ a water chiller and heater for cold plunge becomes a necessity. Some high-end units feature a “heat pump” design that can reverse the refrigerant flow to warm the water. This is incredibly useful for contrast therapy or simply preventing your tub from turning into a solid block of ice during a polar vortex.
If your chiller does not have a built-in heater‚ you can add a separate titanium aquarium heater to the loop. However‚ never run the heater and chiller simultaneously‚ as they will fight each other‚ leading to massive energy waste and potential damage to both units. An external inkbird thermostat can be used to manage both devices‚ ensuring only one is active at a time based on your set parameters.
Common Mistakes When Installing a Cold Plunge Chiller
Even with the best equipment‚ a poor installation can ruin the experience. Avoiding these frequent errors will save you hundreds of dollars in replacement parts and hours of frustration.
Critical Warning: Never run your chiller without water flowing through it. The internal heat exchanger can freeze and rupture within minutes if the pump fails or if there is an air lock in the lines. Always verify water flow before engaging the compressor.
- Undersizing the unit: Buying a 1/10 HP chiller for a 100-gallon tub is the most common mistake. It will never reach the desired temperature in a room warmer than 65 degrees.
- Ignoring the filter: Small particles of skin‚ hair‚ and dirt will eventually coat the heat exchanger‚ permanently reducing the cooling efficiency of the unit.
- Poor ventilation: Placing a chiller in a closet or a tight corner will cause it to recirculate its own hot exhaust‚ leading to a “thermal runaway” where the unit works harder but the water gets warmer.
- Using thin hosing: Standard garden hoses are too narrow and create massive backpressure‚ which can burn out your water pump and reduce the chiller’s effectiveness.
Expert Perspective: The Horsepower to Gallon Ratio
In my professional experience‚ the most misunderstood aspect of cold plunge engineering is the relationship between horsepower (HP) and water volume. I have seen countless enthusiasts waste money on 1/10 HP aquarium chillers‚ only to find they can barely drop the temperature 5 degrees in a standard stock tank. I always advise that for a 100-gallon setup‚ a 1/2 HP motor is the absolute minimum requirement if you want to reach sub-50-degree temperatures in under 4 hours. If you are using an uninsulated tank in a garage that hits 90 degrees in the summer‚ you actually need a 1 HP unit to overcome the environmental heat load. Don’t just look at the price; look at the BTU rating—you need roughly 5‚000 to 7‚000 BTUs of cooling capacity for a standard human-sized tub to be effective.
Success in cold therapy is built on consistency. By choosing the right hardware and maintaining it properly‚ you transform a hobby into a reliable health ritual. Here are the key takeaways for your setup:
- Prioritize insulation: A well-insulated tub makes a cheap chiller perform like an expensive one.
- Safety first: Never skip the GFCI protection and always unplug before you plunge.
- Over-size your chiller: It is better to have a 1/2 HP unit that runs for 2 hours than a 1/4 HP unit that runs for 10.
- Maintain water chemistry: Use hydrogen peroxide or ozone to keep the internal components of your chiller free of gunk.
- Monitor flow rates: Ensure your pump is strong enough to push water through the chiller and any inline filters without straining.
Frequently Asked Questions
Yes‚ but you must choose a high-capacity model. Most standard aquarium chillers are 1/10 HP‚ which is insufficient for 100 gallons of water; ensure you get at least a 1/2 HP model for a human-sized tub.
How long does it take for a chiller to cool a cold plunge?
A 1/2 HP chiller typically drops the temperature of a 100-gallon insulated tub by 10 to 15 degrees per hour. Starting from tap water temperature (approx. 65°F)‚ it usually takes 2 to 4 hours to reach the 45°F range.
Is it safe to leave the water chiller running all the time?
It is safe and often more energy-efficient to maintain a temperature than to cool the water from scratch every day. Most units have a built-in thermostat that cycles the compressor on and off as needed.
What is the best water chiller for a DIY cold plunge under $600?
The Active Aqua G2 1/2 HP is widely considered the best option in this price bracket. You can also find high-quality 1/2 HP aquarium chillers on the secondary market that perform exceptionally well for DIY builds.
Do I need a filter if I have a water chiller?
Yes. Without a filter‚ debris and skin cells will clog the internal heat exchanger‚ which reduces cooling efficiency and can eventually lead to a total mechanical breakdown of the chiller.
Can I use a chest freezer as a chiller?
While freezer conversions are popular‚ they carry a high risk of electrical shock and are difficult to keep sanitary. An external water chiller is a much safer‚ more reliable‚ and easier-to-maintain solution for long-term use.