- How to Make a Weighted Blanket: Crochet and Fiber Art Techniques
- Choosing the Best Yarn Weight for Natural Heaviness
- Choosing Your Craft: Comparing Crochet‚ Knit‚ and Sewn Methods
- How to Knit a Weighted Blanket Using Hand-Knit and Traditional Styles
- The Hexipuff and Hand-Knitting Secrets
- Professional Sewing Secrets: Using Pellets and Creating Weighted Pockets
- Mastering the Pocket Method and Final Closures
- A Step-by-Step Workflow for Your First Weighted Crochet Project
- Safety First: Guidelines for Weighted Baby Blankets and Lap Pads
- Making a Safe Weighted Baby Blanket Without Pellets
- Maintenance and Repairs: How to Fix an Uneven Weighted Blanket
- Securing Your Cover and Patching Leaks
- Avoiding the Most Frequent DIY Weighted Blanket Fails
- Frequently Asked Questions
How to Make a Weighted Blanket: Crochet and Fiber Art Techniques
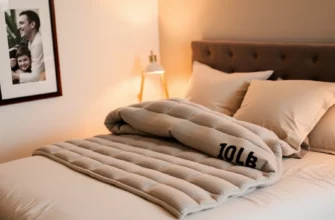
Creating a weighted blanket is more than just a craft project; it is an investment in your sleep hygiene and sensory well-being․ While mass-produced versions often rely on plastic beads‚ crafting your own allows you to customize the texture‚ breathability‚ and aesthetic to match your specific needs;
The decision to choose crochet over a traditional sewn method often comes down to the therapeutic nature of the process․ Crochet offers a rhythmic‚ tactile experience that results in a highly breathable final product‚ avoiding the stifling heat often associated with synthetic weighted inserts;
Choosing the Best Yarn Weight for Natural Heaviness
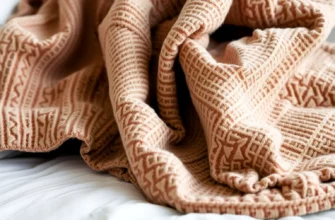
To achieve significant mass without using artificial fillers‚ you must look closely at the yarn category․ Using a category 6 (super bulky) or category 7 (jumbo) yarn is the most effective way to add weight through pure fiber density․ These yarns are thick enough that the sheer volume of material required for a standard throw will naturally reach that 10-15 pound threshold․
For those who struggle with night sweats or live in warmer climates‚ exploring how to make a weighted blanket from tree fiber yarn is a game-changer․ These yarns‚ often derived from bamboo‚ lyocell‚ or eucalyptus‚ carry a surprising amount of natural “heaviness” because the fibers are denser than hollow acrylics․ They provide a cooling sensation that works in tandem with the pressure of the blanket․
If you prefer a more customized feel‚ you can alternate different yarn weights within a single project․ Mixing a strand of bulky wool with a strand of cotton can create a variegated texture that provides additional sensory input․ This chunky throw blanket bulky 6 weight tutorial approach ensures that the blanket remains structural and doesn’t stretch out over time‚ which is a common pitfall for heavy crochet items․
Choosing Your Craft: Comparing Crochet‚ Knit‚ and Sewn Methods
Deciding which construction method to use depends on your available tools‚ your patience for repetitive tasks‚ and how you plan to clean the finished item․ Each method offers a different “feel” in terms of weight distribution․
| Feature | Crochet Method | Hand/Needle Knitting | Sewn (Pocket Method) |
|---|---|---|---|
| Difficulty Level | Intermediate (requires stitch consistency) | Beginner to Intermediate | Advanced (requires precise measurement) |
| Time Commitment | High (40-60 hours) | Low (Hand-knit) to High (Needle) | Moderate (10-15 hours) |
| Weight Source | Fiber mass and stitch density | Yarn volume or “Hexipuff” fill | Glass beads or poly-pellets |
| Durability | Very High; difficult to “leak” | Moderate; can stretch if too loose | High; but requires reinforced seams |
| Washability | Excellent (Machine wash/Dry flat) | Moderate (Depends on yarn type) | Difficult (Heavy for home machines) |
How to Knit a Weighted Blanket Using Hand-Knit and Traditional Styles
Knitting offers a unique “squish factor” that is hard to replicate with other methods․ Whether you choose the massive‚ oversized loops of hand-knitting or the intricate modularity of a traditional needle-knit project‚ the goal remains the same: consistent‚ grounding pressure․
Traditional knitting allows for more air pockets than crochet‚ making it the ideal choice for someone who wants the weight but fears feeling trapped in a heavy fabric․ The modular approach is particularly popular for those who want to use up their yarn stash while creating something functional․
The Hexipuff and Hand-Knitting Secrets
One of the most creative ways to build mass is learning how to knit a weighted hexipuff blanket․ This involves knitting small‚ individual “puffs” or hexagons‚ stuffing them with high-density fiberfill or even small pouches of glass beads‚ and then joining them together․ This modular style allows you to work on the project in small bursts‚ and the resulting blanket looks like a honeycomb of comfort․
If you are looking for speed‚ learning how to make a hand knitted weighted blanket is your best route․ By using “tube yarn”—which is essentially a cotton jersey tube stuffed with polyester filling—you can knit an entire blanket in a single afternoon using just your arms․ To prevent the blanket from sagging under its own weight‚ you must maintain extremely tight tension during the looping process․
Regardless of the style‚ the secret to a successful weighted knit blanket is the choice of material․ Tube yarns are superior to unspun roving wool because they do not pill or shed‚ and they maintain their structural integrity even after months of use․
Professional Sewing Secrets: Using Pellets and Creating Weighted Pockets
For those who want a blanket that feels most like a professional therapeutic tool‚ sewing is the gold standard․ This method allows you to use glass beads or poly-pellets‚ which provide a “fluid” weight that contours perfectly to the body․ However‚ the technical challenge lies in ensuring that these beads stay where they belong․
The most common failure in DIY sewn blankets is “bunching‚” where all the weight slides to the corners․ To avoid this‚ you must master the pocket method‚ which involves creating a grid of small‚ sewn-in squares that each hold an identical amount of weight․
Mastering the Pocket Method and Final Closures
When you begin to sew weighted blanket pockets individually‚ accuracy is your best friend․ You must use a digital kitchen scale to weigh the pellets for every single square․ Even a half-ounce discrepancy can lead to an unbalanced blanket that feels awkward during use․ Most beginners find success with a 4-inch by 4-inch or 5-inch by 5-inch grid․
The most stressful part for many is figuring out how to sew the final end of a weighted blanket without beads spilling into the sewing machine mechanism․ The trick is to leave a 2-inch “buffer” zone of fabric at the top․ Shake all the beads down into their rows‚ pin the fabric horizontally above the beads‚ and then use a zipper foot to get as close to the edge as possible․
If you are new to quilting‚ looking for a specific weighted blanket sewing quilt pattern can save hours of frustration․ These patterns usually include a “column-first” approach‚ where you sew long vertical channels‚ fill them with a row of beads‚ and then sew a horizontal line to lock that row in place before moving to the next․
A Step-by-Step Workflow for Your First Weighted Crochet Project
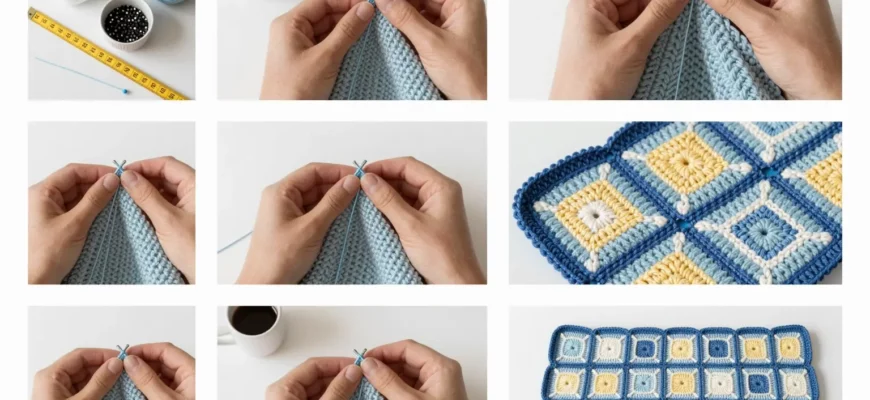
Crocheting a weighted blanket requires a plan․ Because you are adding weight through the yarn itself‚ you cannot simply “wing it” and hope for the best․ Follow this logic to ensure your project is both functional and beautiful․
- Calculate Your Target Weight: Aim for approximately 10% of the user’s body weight plus one or two pounds․ If the user is 150 lbs‚ target a 16-17 lb blanket․
- Select Your Fiber: Choose a dense cotton or a “tree fiber” (bamboo/lyocell)․ Avoid 100% acrylic if you tend to sleep hot‚ as it traps body heat․
- Choose a Dense Stitch: Opt for the Grit Stitch‚ Thermal Stitch‚ or Waffle Stitch․ These stitches use more yarn per square inch‚ naturally increasing the blanket’s mass․
- Weigh the Project Iteratively: Every five rows‚ weigh the blanket on a scale․ This helps you estimate if you need to add more rows or if you are reaching your target weight too quickly․
- Reinforce the Border: Use a simple single-crochet border to “lock” the edges․ This prevents the heavy center from stretching the perimeter of the blanket out of shape․
Safety First: Guidelines for Weighted Baby Blankets and Lap Pads
Safety is the absolute priority when crafting for children or infants․ While weighted blankets are excellent for sensory processing disorders‚ they carry risks if not constructed or used correctly․ Never use a weighted blanket for an infant under one year old‚ as they may lack the motor skills to move the blanket if it covers their face․
For older children‚ the weight should be strictly monitored․ A lap pad is often a better entry-level project than a full-sized blanket‚ as it provides the calming benefits of deep pressure therapy during school or mealtime without the risks of a full-body covering․
Making a Safe Weighted Baby Blanket Without Pellets
When learning how to make a weighted baby blanket‚ you should move away from pellets or beads entirely․ Small beads are a significant choking hazard if a seam ever bursts․ Instead‚ focus on how to make a weighted baby blanket without pellets by using multiple strands of heavy cotton yarn;
Cotton is breathable and heavy‚ providing a “hug” sensation without the danger of loose fillers․ A weighted lap blanket for an adult or child can follow the same principle․ By using a very small hook size with very thick yarn‚ you create a stiff‚ heavy fabric that stays in place on the lap; Always ensure the weight does not exceed 10% of the child’s weight and that they can remove the blanket themselves without assistance․
Maintenance and Repairs: How to Fix an Uneven Weighted Blanket
A well-loved weighted blanket will eventually face wear and tear․ Because of the extreme tension placed on the seams and stitches‚ you might notice the weight shifting or‚ in the case of sewn blankets‚ small leaks․ Fixing these issues early will extend the life of your project by years․
If you notice your blanket has become lumpy‚ it is likely that an internal seam has failed․ This is the primary reason why many people choose to use a duvet cover system rather than a standalone blanket․
Securing Your Cover and Patching Leaks
To fix an uneven weighted blanket‚ you may need to open a small section of the outer seam to redistribute the fill․ Once the beads are back in their designated grid‚ double-stitch the internal wall with high-strength upholstery thread to prevent a recurrence․
For those using a cover‚ knowing how to tie a weighted blanket cover is essential․ Standard duvet covers won’t work because the weight will cause the blanket to pile up in a ball at the bottom․ You must sew internal loops into the blanket and matching ties into the cover․ I recommend using at least 8 attachment points (four corners and the midpoint of each side) to keep the weight evenly distributed․ Using internal clasps inside the weighted blanket with a duvet system provides even more security for those who move around a lot during sleep․
Avoiding the Most Frequent DIY Weighted Blanket Fails
Even experienced crafters can run into trouble when dealing with the physics of a 15-pound textile․ Avoid these common errors to ensure your time and money aren’t wasted․
- Ignoring the “Sauna Effect”: Using 100% polyester or acrylic yarn for a dense stitch will create a blanket that is far too hot for most people․ Always opt for cotton‚ bamboo‚ or wool blends for better thermoregulation․
- Oversizing the Blanket: Unlike a regular comforter‚ a weighted blanket should not hang over the edges of the bed․ If it hangs over‚ the weight of the overhanging part will pull the rest of the blanket off you during the night․ Measure the blanket to fit only the top surface of the mattress․
- Using Weak Thread or Yarn: The weight of the beads or the fiber itself puts immense pressure on every stitch․ Use “Gutermann” or similar high-quality polyester thread for sewing‚ and avoid “single-ply” yarns for crochet that might pull apart under tension․
- Making it Too Heavy: More is not always better․ A blanket that is too heavy can lead to joint pain or a feeling of claustrophobia․ Stick to the 10% rule․
In my professional experience‚ the most common mistake DIYers make is obsessing over glass beads while ignoring the natural physics of fiber․ I always advise my clients to consider a high-density crochet or knit “mass” blanket over a pellet-filled one․ Why? Because pellets‚ no matter how small the pockets‚ will always have a slight “shifting” sound and feel․ A blanket made from bulky tree fiber or heavy-gauge cotton provides a silent‚ consistent pressure that mimics a human hug far more effectively․ Furthermore‚ natural fibers like bamboo are essential for preventing the ‘sauna effect․’ If you choose a synthetic fill‚ you are essentially wrapping yourself in plastic; choosing a dense‚ natural yarn allows your skin to breathe while still providing that critical deep-pressure stimulation․
Frequently Asked Questions
Yes․ By using multiple strands of yarn or jumbo category 7 yarn combined with dense stitches like the waffle stitch‚ you can create a blanket that reaches 10-15 pounds without any plastic fillers․
How do you add weight to a blanket without using plastic pellets?
You can use glass beads for a slimmer profile‚ or rely on high-density natural fibers like cotton and bamboo․ For modular blankets‚ “Hexipuffs” can be stuffed with heavy cotton batting or scrap fabric․
What is the best way to fix an uneven weighted blanket?
Open the side seam of the affected area‚ redistribute the beads into their original grid‚ and sew a reinforced double-seam using heavy-duty thread to prevent future shifting․
Is there a specific pattern for a crocheted weighted blanket?
While any dense pattern works‚ the Grit Stitch or Thermal Stitch are the most recommended because they create a thick‚ heavy fabric with very few gaps․
How do I keep my weighted blanket from sliding inside its cover?
Sew reinforced fabric loops onto the blanket and matching ties inside the duvet cover․ Using at least 8 tie-points ensures the weight stays flat and doesn’t bunch at the bottom․
How do you wash a DIY weighted blanket made of yarn?
Use a front-loading commercial washing machine on a gentle‚ cold cycle․ Always lay the blanket flat on a drying rack to dry; hanging it will cause the heavy fibers to stretch and ruin the shape․