- Why a Budget Cold Plunge is the Smartest Way to Start Your Recovery Journey
- Why are cold plunges so expensive anyway?
- From Stock Tanks to Chest Freezers: The Best Budget Cold Plunge Ideas
- The 100 Gallon Cold Plunge: Is the Everlast Tank Enough?
- Taking Control: The Most Affordable Cold Plunge with Chiller Options
- How to Hack Outdoor Cold Plunge Temperature Control
- The Reddit Review: What the Community Says About Budget Friendly Cold Plunge Setups
- Common Mistakes to Avoid When Building Your Own Cold Plunge
- Maintaining Your Water: Best Chemicals and Sanitizers for Small Tanks
- Keeping It Clear: Best Sanitizer for Cold Plunge Setups
- Maximizing Recovery: Best Training Programs Integrating Cold Plunge Sessions
- Building a Routine That Sticks
- Financial Planning: Financing Options and Monthly Operating Costs
- Hidden Costs of the Cheapest Way to Cold Plunge
- Expert Perspective: Sustainable Cold Exposure
- Frequently Asked Questions
Why a Budget Cold Plunge is the Smartest Way to Start Your Recovery Journey
The surge in popularity of cold water immersion has led to a marketplace flooded with high-end, titanium-chilled units that cost more than a used car. While these luxury setups are impressive, they often create a financial barrier that prevents athletes from accessing the genuine physiological benefits of cold therapy.
Choosing a budget-friendly path allows you to focus on the biological response rather than the aesthetic of the equipment. Whether you are using a modified stock tank or a simple insulated pod, the water molecules do not care how much you spent on the container; the norepinephrine release and vasoconstriction remain identical regardless of the price tag.
Why are cold plunges so expensive anyway?
The high cost of premium cold plunges usually stems from three factors: integrated cooling technology, high-end materials like marine-grade plywood or acrylic, and significant brand markups. Many commercial units use proprietary chillers that are essentially repackaged industrial water coolers, adding a premium for the convenience of an all-in-one “plug and play” system.
In the biohacking industry, branding often outweighs functional utility. You are frequently paying for the design aesthetic and the marketing budget of the company. By opting for a more cost-effective approach, you can save upwards of $4,000 while achieving the exact same thermal mass and temperature control required for effective recovery.
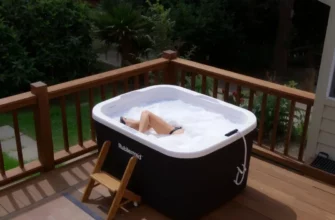
From Stock Tanks to Chest Freezers: The Best Budget Cold Plunge Ideas
Finding the right vessel is the foundation of your setup. For under $500, you have two primary paths: the simplicity of a stock tank or the superior insulation of a converted chest freezer. Each has specific trade-offs regarding durability, space, and the physical effort required to maintain temperature.
| Setup Type | Estimated Cost | Pros | Cons |
|---|---|---|---|
| 100-Gallon Stock Tank | $130 ⏤ $250 | Indestructible, easy to clean, portable. | Zero insulation; requires heavy ice usage. |
| DIY Chest Freezer | $200 ⏤ $500 | Excellent insulation, holds temp for days. | Risk of leaks; requires electrical sealing. |
| Inflatable Pod | $80 ― $150 | Cheapest entry point, very portable. | Prone to punctures; limited lifespan. |
If you live in a climate where the ambient temperature stays below 50°F for half the year, a basic tank is often all you need. However, for those in warmer regions, insulation is the most critical factor in reducing long-term operating costs and the constant need for ice delivery.
The 100 Gallon Cold Plunge: Is the Everlast Tank Enough?
The 100-gallon stock tank, particularly the Everlast or Rubbermaid commercial models, is the “gold standard” for budget builds because of its structural integrity. For an average-sized adult (up to 6’1″), 100 gallons provides enough volume to submerge up to the clavicle without excessive water displacement causing an overflow.
Plastic structural foam tanks are generally superior to galvanized metal for budget users. Metal tanks conduct heat rapidly, meaning your ice will melt significantly faster. A high-density polyethylene tank provides a slight natural insulation and won’t rust over time, making it the more durable choice for outdoor recovery stations.
Taking Control: The Most Affordable Cold Plunge with Chiller Options
Moving away from manual ice addition is the single biggest upgrade you can make to your recovery routine. While buying ice bags daily can cost $15-$30 a week, a dedicated cooling unit pays for itself within the first year of consistent use. You don’t need a medical-grade chiller to maintain 45°F water.
Most budget-conscious builders look toward 1/2 HP or 1 HP aquarium chillers. These units are designed to run 24/7 and can be integrated into a stock tank using a simple submersible pump and some PVC tubing. The key is ensuring the pump GPH (Gallons Per Hour) matches the flow requirements of the chiller to prevent the heat exchanger from freezing over.
How to Hack Outdoor Cold Plunge Temperature Control
To make a budget chiller effective, you must fight thermal gain. If your tank is sitting on concrete in the sun, the chiller will run constantly and eventually burn out. Using half-inch closed-cell foam insulation boards underneath the tank and wrapping the exterior in Reflectix sleeve can improve cooling efficiency by nearly 40%.
A self-regulating setup on a budget often involves a simple Inkbird temperature controller. This device acts as a fail-safe, cutting power to the chiller once the water hits your target temperature. This prevents the unit from overworking and extends the lifespan of the compressor by several years, which is vital when using lower-cost components.
The Reddit Review: What the Community Says About Budget Friendly Cold Plunge Setups
The DIY community, particularly on platforms like Reddit, has refined the “budget build” into a science. One of the most praised hacks is the “Box Plunge” liner or using specialized pond liners to turn any sturdy wooden frame into a cold tub. Users emphasize that the biggest hurdle isn’t the cold itself, but the maintenance of the vessel.
| Community Favorite Hacks | Why It Works | Potential Risk |
|---|---|---|
| JB Weld/Marine Sealant | Seals freezer seams perfectly. | Must cure for 72 hours or it will leach. |
| Danner Mag-Drive Pumps | Reliable, low-wattage water movement. | Needs frequent pre-filter cleaning. |
| Standard Rain Barrels | Vertical immersion (better for space). | Difficult for shorter individuals to exit. |
The general consensus among veterans is that “cheap” often becomes “expensive” if you skip the sealant phase. For chest freezer conversions, failing to seal the interior seams with food-grade silicone or JB Weld WaterBond is the number one cause of catastrophic failure. Water will eventually find its way into the insulation, causing mold and electrical shorts.
Common Mistakes to Avoid When Building Your Own Cold Plunge
Drainage is frequently an afterthought. A 100-gallon tank weighs approximately 830 pounds when full, excluding the weight of the person. If you don’t have a clear drainage path or a high-quality spigot, you will struggle with water changes. Always elevate your tank slightly on pressure-treated 4x4s to allow gravity to assist in the draining process.
Another frequent error is ignoring the “biofilm” that develops in standing water. Even if the water is cold, skin oils and sweat will create a slick surface on the walls of the tank within 7 days. You must incorporate a 20-micron pleated filter into your pump loop if you want to avoid draining and scrubbing the unit every single week.
Maintaining Your Water: Best Chemicals and Sanitizers for Small Tanks
Water maintenance is the “hidden” cost of a budget setup. If you don’t treat the water, you’ll be dumping 100 gallons of water every three days, which is wasteful and time-consuming. However, you don’t need expensive pool chemicals that can irritate the skin during the high-intensity breathing typical of cold exposure.
- Do: Use Food-Grade Hydrogen Peroxide (35%) as a primary oxidizer. It breaks down into water and oxygen, leaving no harsh chemical residue.
- Do: Install a small UV-C light sterilizer in your filtration line to kill 99% of bacteria and viruses without changing the water chemistry.
- Don’t: Use standard pool chlorine tablets in a small plastic tank; the concentration is often too high and can degrade the plastic or cause skin rashes.
- Don’t: Forget to shower before you plunge. Removing body oils and deodorants can extend the life of your water by up to 300%.
Keeping It Clear: Best Sanitizer for Cold Plunge Setups
For those looking for the absolute cheapest effective maintenance, a combination of Epsom salts and low-dose Bromine is often the most stable. Bromine remains more effective than chlorine in the lower pH levels often found in tap water and is less “gassy” in an enclosed space like a garage.
If you prefer a chemical-free approach, you must be prepared for a complete water change every 5 to 7 days. To make this easier, use a submersible utility pump (often called a “sump pump”) which can empty a 100-gallon tank in less than 10 minutes, rather than waiting for a slow-trickle garden hose drain.
Maximizing Recovery: Best Training Programs Integrating Cold Plunge Sessions
The effectiveness of your budget setup depends entirely on your timing. Cold immersion is a powerful tool for Central Nervous System (CNS) regulation, but it can actually hinder muscle growth if used incorrectly. The cold blunts the inflammatory response, which is necessary for hypertrophy immediately following a resistance training session.
To get the most out of your home setup, schedule your plunges either at least 4 hours after lifting or on active recovery days. If your goal is pure athletic performance, cardiovascular recovery, or mental resilience, plunging immediately after a session is acceptable. However, for those focused on building maximum muscle mass, the “cold window” should be pushed to the morning or late evening.
Building a Routine That Sticks
Consistency beats intensity every time. You don’t need to sit in 34°F water for ten minutes to see results. Research suggests that 11 total minutes of cold exposure per week, split into 2-3 minute sessions, is the threshold for significant metabolic and hormonal benefits; Start at 55°F and slowly lower the temperature as your nervous system adapts.
Integrating the plunge into a “Contrast Therapy” block can also enhance results. Alternating between your budget cold tub and a hot shower or sauna triggers a “vascular pump” effect, where blood vessels rapidly constrict and dilate. This flush of the lymphatic system is one of the fastest ways to clear metabolic waste after a high-intensity interval training (HIIT) session.
Financial Planning: Financing Options and Monthly Operating Costs
While the initial build of a DIY setup is cheap, the operating costs can sneak up on you. A DIY chest freezer is incredibly efficient, usually costing less than $5 to $10 per month in electricity because the thick insulated walls hold the temperature so well. Conversely, an uninsulated stock tank using a chiller in a hot garage can cost $40 to $60 a month in energy.
| Expense Item | DIY Cost (Monthly) | Commercial Cost (Monthly) |
|---|---|---|
| Electricity | $8 ― $15 | $15 ⏤ $30 |
| Water Sanitizers | $10 | $15 (Proprietary filters) |
| Ice (If no chiller) | $80 ⏤ $120 | N/A |
| Filter Replacements | $5 | $20 |
If the $500 to $1,000 upfront cost for a robust DIY setup is too high, many mid-tier companies now offer financing through services like Affirm or Klarna. Occasionally, financing a $1,200 entry-level commercial unit at $50 a month is more economical than spending $400 on a DIY setup that requires constant repairs or expensive ice hauls.
Hidden Costs of the Cheapest Way to Cold Plunge
The “ice trap” is the most common financial pitfall. If you buy five 10-lb bags of ice three times a week to keep a stock tank cold, you are spending over $1,800 a year just on frozen water. This is why a chiller or a chest freezer conversion is almost always the better financial move for anyone planning to plunge more than twice a week.
Additionally, consider the “Time Tax.” A budget setup that requires 20 minutes of prep and 20 minutes of cleanup every time you use it will eventually become a decorative lawn ornament. Investing $50 in a high-quality cover is a one-time cost that prevents debris from entering, reducing the time you spend cleaning and the money you spend on filters.
Expert Perspective: Sustainable Cold Exposure
In my professional experience as a recovery specialist, the biggest mistake beginners make is focusing on the “cool factor” of the equipment rather than the minimum effective dose. I always advise my clients that a $150 stock tank with 55-degree water used daily is 100% more effective than a $10,000 custom tub that is only used once a week because the setup is too complex. Consistency is the only metric that matters for nervous system regulation. When using budget setups, prioritize safety over depth; ensure you have a non-slip mat outside the tank and never plunge alone if you are pushing the temperature below 40 degrees, as the risk of “cold shock” can lead to a loss of motor control.
Frequently Asked Questions
The lowest barrier to entry is purchasing a 100-gallon structural foam stock tank or a heavy-duty rain barrel. These require minimal setup beyond a garden hose and a few bags of ice to get started immediately.
Can I use a 2 person cold plunge for a budget setup?
Yes, but you will need to scale up to at least a 150-gallon stock tank. Be aware that the thermal mass of two people will raise the water temperature rapidly, requiring significantly more ice or a higher-horsepower chiller.
What is a dry cold plunge and is it cheaper?
A “dry” cold plunge usually refers to air-based cryotherapy. These units are significantly more expensive than water-based setups and generally less effective for home use because water conducts heat away from the body 25 times faster than air.
Is the Vital cold plunge set up worth the money compared to DIY?
The Vital setup is worth it for users who value their time over a few hundred dollars in savings. It provides a cohesive system that eliminates the trial-and-error of sourcing pumps, filters, and compatible fittings yourself.
What are the best gifts for someone who cold plunges?
Budget-friendly options include a high-accuracy floating thermometer, 5mm neoprene booties to protect the toes from “ice burn,” or a high-quality waterproof Bluetooth speaker to help manage breathing during the first two minutes.
How often should I drain my budget cold plunge?
If you are using a 35% hydrogen peroxide sanitizer and a 20-micron filter, you only need to drain every 3 to 4 months. Without sanitizers, the water should be changed every 3 to 5 days to prevent bacterial growth.