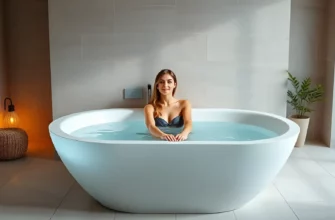
- What Makes the Best Cold Plunge Chiller Right for Your Setup?
- Why a Dedicated Chiller Beats Buying Ice Every Day
- Top-Rated Cold Plunge Chiller Units: A 2026 Comparison
- Premium Performance: Coldture and Nordic Wave Systems
- Budget-Friendly Chilling: Best Units Under $1000 and $2000
- Finding a Reliable Chiller Without Breaking the Bank
- The DIY Route: How to Build Your Own Cold Plunge with a Grizzly 450
- Engineering the Perfect Grizzly 450 or Wheelie Bin Setup
- Maintenance 101: Filters, Chemicals, and Keeping Water Clear
- The Best Cold Plunge Filtration and Chemical Setup
- Capacity and Design: Vertical Barrels vs. 2-Person Tubs
- Choosing Between a Solo Pod and a Large Hybrid Barrel
- Expert Perspective: Thermal Efficiency and Chiller Longevity
- Frequently Asked Questions
What Makes the Best Cold Plunge Chiller Right for Your Setup?
Think of the chiller as the high-performance engine of your recovery routine. While a simple tub holds the water, the chiller dictates whether your experience is a consistent, professional-grade therapeutic session or a frustrating battle with lukewarm temperatures. Moving beyond the era of hauling heavy bags of ice from the gas station, modern enthusiasts are now prioritizing automated systems that offer “set it and forget it” convenience.
The transition to a dedicated cooling unit fundamentally changes the psychology of cold water immersion. When the water is always sitting at a crisp 39 degrees Fahrenheit, the mental barrier to entry vanishes. You no longer have to plan your plunge thirty minutes in advance; you simply peel back the lid and step into a precisely controlled environment designed for maximum metabolic and inflammatory benefits.
Why a Dedicated Chiller Beats Buying Ice Every Day
If you are plunging three to five times a week, the logistics of using ice become an expensive nightmare. A standard 100-gallon tub requires roughly 40 to 60 pounds of ice to drop the temperature from 65 degrees to a therapeutic 45 degrees. At retail prices, you could easily spend $150 to $200 per month just on frozen water, not to mention the physical labor and plastic waste involved.
Investing in a high-quality cold plunge chiller unit shifts your primary cost from consumable ice to a negligible increase in your electricity bill. Most modern 1/2 HP chillers are remarkably energy efficient, drawing less power than a standard window air conditioner. Over a twelve-month period, the machine typically pays for itself through the savings on ice alone, while providing a level of precision that ice simply cannot match.
Precision temperature control is where the best cold plunge chiller truly shines. With a digital thermostat, you can dial in the exact degree required for your specific recovery protocol. Whether you are following a protocol that calls for 50 degrees for longer endurance sessions or a 38-degree “shock” for dopamine regulation, the chiller maintains that set point regardless of the ambient outdoor temperature. This consistency ensures that every minute spent in the water is optimized for your health goals.
Top-Rated Cold Plunge Chiller Units: A 2026 Comparison
The market has matured rapidly, moving away from repurposed aquarium chillers toward heavy-duty, purpose-built machines designed for the high-volume water flow of human-sized tubs. When evaluating the current landscape, we look at cooling speed, noise output, and the integration of internal filtration systems.
| Model/Brand | Horsepower (HP) | Cooling Speed (Ambient to 40°F) | Key Features | Best For |
|---|---|---|---|---|
| Coldture Classic | 0.5 HP | 3-4 Hours | Integrated 20-micron filter, Ozone | All-in-one simplicity |
| Nordic Wave Chiller | 0.75 HP | 2-3 Hours | Ultra-quiet compressor, compact frame | Small apartments or decks |
| Nuvio Pro Unit | 1.0 HP | 1.5-2 Hours | WiFi control, industrial pump | High-use commercial or hot climates |
Premium Performance: Coldture and Nordic Wave Systems
When looking at the upper echelon of the market, the Coldture cold plunge classic tub and chiller system stands out for its aesthetic integration and “plug-and-play” nature. The unit is designed to work in tandem with their insulated tubs, creating a closed-loop system that minimizes thermal loss. However, I have noticed that some users report tub leak issues at the bulkhead connections if the gaskets aren’t seated perfectly during the initial setup. Always ensure you apply a thin layer of silicone lubricant to the O-rings to prevent these common sealing failures.
The Nordic wave cold plunge chiller takes a slightly different approach, focusing on a smaller footprint without sacrificing cooling power. This is arguably the most reliable cold plunge chiller for users who have limited space, such as a garage corner or a small patio. Its internal components are vibration-dampened, making it significantly quieter than the industrial-style units often found on DIY forums. If you plan on plunging early in the morning near a bedroom window, the decibel rating of your chiller should be a primary purchasing factor.
One often overlooked aspect of these premium units is the “pull-down” time. A 1/2 HP motor is generally sufficient for a standard 100-gallon tub, but if you live in a region where summer temperatures regularly exceed 90 degrees, upgrading to a 1 HP unit is a wise move. The larger motor won’t have to work as hard to maintain the temperature, which extends the lifespan of the compressor by preventing constant cycling.
Budget-Friendly Chilling: Best Units Under $1000 and $2000
Entering the world of cold therapy shouldn’t require a second mortgage. While the high-end systems offer sleek housings and integrated apps, the core technology of a chiller—the compressor and the heat exchanger—can be found in more affordable packages if you know what to look for. The key is distinguishing between a cheap toy and a value-driven workhorse.
Key Takeaways for Budget Buyers:
- Prioritize a 1/2 HP motor; anything less will struggle to keep 100 gallons below 50 degrees in the summer.
- Look for units with “Titanium Heat Exchangers” to prevent corrosion from salt or chlorine.
- Expect to buy your own external pump and hoses, as budget units are often “standalone” chillers.
- Check for 110V compatibility to avoid having to hire an electrician for a 220V circuit.
Finding a Reliable Chiller Without Breaking the Bank
The quest for the best cold plunge chiller under $1000 often leads buyers toward modified aquarium chillers like the Active Aqua series. While these weren’t originally designed for human use, they are incredibly durable. When building an affordable cold plunge with a chiller, the trick is to oversize your unit. An aquarium chiller rated for 100 gallons of fish will struggle with a 100-gallon human tub because humans generate significant body heat. Buying a unit rated for 250 gallons ensures it can handle the “thermal load” of a warm body entering the water.
If you are looking for the cheapest cold plunge chiller that still offers a “pro” feel, consider searching the used market for reputable brands. A used cold plunge chiller can be a steal, but you must inspect the cooling fins for calcium buildup and ensure the fan is spinning freely. If the previous owner didn’t use a filter, the internal heat exchanger might be clogged with hair and skin cells, which drastically reduces efficiency. A quick flush with a mild citric acid solution can often restore a used unit to near-factory performance.
For those with a budget closer to $2000, you can find the best cold plunge chiller for the money by looking at “unbranded” industrial chillers that utilize the same internal components as the $5,000 big-name brands. These units might not have the fancy logos or the powder-coated finishes, but they often include built-in circulating pumps and basic 20-micron filtration, which simplifies your setup significantly.
The DIY Route: How to Build Your Own Cold Plunge with a Grizzly 450
The DIY community has revolutionized the accessibility of cold therapy. By combining a high-performance chiller with an ultra-insulated cooler like the Grizzly 450, you can create a system that rivals $10,000 commercial units for a fraction of the cost. The Grizzly 450 is a favorite because its R-value (insulation thickness) is superior to almost any stock plastic tub, meaning your chiller has to run 50% less to maintain the temperature.
- Drill the Bulkheads: Use a 1-1/4 inch hole saw to drill two holes in the Grizzly 450. One should be low for the “suction” line and one higher for the “return” line.
- Install the Fittings: Use 3/4 inch or 1 inch NPT bulkhead fittings. Always use marine-grade 3M 5200 adhesive sealant on both sides of the gasket to ensure a permanent, leak-proof seal.
- Connect the Pump: Place a submersible pump or an external inline pump between the tub and the chiller. If using an external pump, ensure it is self-priming or placed below the water line.
- Plumb the Chiller: Run braided PVC tubing from the pump to the “Inlet” of the chiller, and from the “Outlet” back to the tub. Secure every connection with stainless steel worm-gear clamps to prevent blowouts under pressure.
- Add Filtration: Install a whole-house water filter housing (with a 5-micron pleated filter) on the return line. This protects the chiller’s internal coils from debris.
Engineering the Perfect Grizzly 450 or Wheelie Bin Setup
If the Grizzly 450 is out of your price range, the wheelie bin cold plunge is the ultimate “garage-built” alternative. These upright trash bins are surprisingly ergonomic for a deep soak, but they lack insulation. To make this work with a chiller, you must wrap the exterior in Reflectix or spray foam insulation. Without insulation, the ambient air will constantly heat the water, forcing your chiller to run 24/7, which will lead to a premature compressor failure.
For those using an Ice Barrel cold plunge with a chiller, the plumbing is slightly more complex due to the barrel’s curved walls. I recommend using flexible “offset” bulkheads that can conform to the radius of the barrel. When plumbing these vertical units, always pull the coldest water from the bottom and return the chilled water to the top. This creates a natural convection current that ensures the entire water column stays at a uniform temperature, preventing “warm spots” near your torso.
Safety is the most critical part of any DIY build. Since you are mixing water and high-voltage electricity, you must plug your chiller and pump into a GFCI (Ground Fault Circuit Interrupter) outlet. Never skip this step. Additionally, ensure your chiller has adequate ventilation; if you tuck it into a tight cabinet without airflow, it will overheat and fail within weeks.
Maintenance 101: Filters, Chemicals, and Keeping Water Clear
A cold plunge is essentially a tiny, very cold swimming pool. Without proper maintenance, the water will become a breeding ground for bacteria and biofilm within days. A chiller’s internal heat exchanger is particularly sensitive to “scaling”—the buildup of minerals and organic matter. If the heat exchanger gets coated in slime, the chiller loses its ability to transfer heat, and your water will stay stubbornly warm.
- DO: Change your water filter every 2 to 4 weeks depending on usage. A dirty filter reduces flow rate, which can trigger a “Flow Error” on your chiller.
- DO: Use a skimmer net daily to remove surface debris like hair or skin flakes before they enter the plumbing.
- DON’T: Use high concentrations of chlorine. Large amounts of chlorine can corrode the titanium or copper heat exchanger inside your chiller.
- DON’T: Leave the chiller running if the water level is below the suction port, as this will burn out the circulating pump.
The Best Cold Plunge Filtration and Chemical Setup
The foundation of a clean plunge is the best cold plunge filtration system you can afford. I recommend a dual-stage approach: a 20-micron sediment filter followed by an Ozone generator. Ozone is a powerful oxidizer that kills bacteria on contact and then dissipates, leaving no chemical residue. This allows you to drastically reduce your reliance on harsh chemicals like bromine or chlorine, which can be irritating to the skin during a long soak.
For chemical maintenance, a “low-chlorine” or “silver ion” approach works best. Many users find success with food-grade Hydrogen Peroxide (35% concentration). Adding roughly 1-2 ounces per 100 gallons once a week keeps the water sparkling clear without the “pool smell.” Always test your water with strips to ensure the pH stays between 7.2 and 7.6; if the water becomes too acidic, it can eat away at the seals inside your cold plunge tub with chiller and filter.
When you first fill your tub, use a “pre-filter” on your garden hose to remove heavy metals and calcium. This initial step prevents 90% of the cloudiness issues people face in the first week. If you notice the water getting “milky,” it is usually a sign of high phosphate levels or a failing filter. Never wait for the water to look dirty to clean it; by then, a biofilm has already formed in the hoses.
Capacity and Design: Vertical Barrels vs. 2-Person Tubs
The physical design of your tub dictates the “thermal layering” of the water. In a horizontal tub, your body heat can actually create a thin “envelope” of warm water around your skin, which reduces the effectiveness of the cold shock. This is why active water circulation from a chiller is superior to a static ice bath—the moving water constantly breaks that thermal layer, ensuring the cold penetrates deep into the muscle tissue.
Vertical plungers, like the best vertical cold plunge with chiller setups, are gaining popularity because they allow the user to sit in an upright, “fetal” position. This posture is often more comfortable for managing the “fight or flight” response during the first 60 seconds of immersion. Additionally, vertical barrels have a much smaller footprint, making them the best outdoor cold plunge with chiller for people with small balconies or limited deck space.
Choosing Between a Solo Pod and a Large Hybrid Barrel
If you plan on plunging with a partner or using the tub for social recovery sessions, a hybrid cold plunge barrel 2 people with chiller is the gold standard. These units are significantly larger, often holding 150 to 200 gallons. Because of the massive water volume, a 1 HP chiller is non-negotiable for a 2-person tub. Anything smaller will take forever to recover its temperature after the first person exits and the second person enters.
The plumbing for a 2-person unit also needs to be “high-flow.” This means using 1-inch diameter piping instead of the standard 3/4 inch. The goal is to move as much water as possible through the chiller to maintain a steady 38-42 degree range even when two 180-pound bodies (which act as large heaters) are submerged. Shared tubs also require more aggressive filtration, often utilizing a larger UV-C light sterilizer in addition to Ozone to handle the increased biological load.
Expert Perspective: Thermal Efficiency and Chiller Longevity
In my professional experience, the single biggest mistake people make is underpowering their cooling system; While a 1/4 HP chiller might work for a small 50-gallon pod in a climate-controlled basement, it will fail miserably in a garage during a Texas summer. I always advise clients to opt for a 1/2 HP chiller as the bare minimum for any tub over 80 gallons. This isn’t just about reaching the target temperature; it’s about the “duty cycle.” A more powerful motor reaches the set point faster and shuts off, whereas an underpowered motor runs 24/7, leading to a burnt-out compressor within eighteen months.
Furthermore, I cannot stress enough the importance of the thermal-layer-breaker. If your chiller’s return jet is weak, the water stays still, and you won’t get the full metabolic benefit of the cold. I always recommend positioning the return jet so it creates a gentle vortex. Finally, for any DIY setup, never bypass the GFCI protection. I’ve seen units short out due to simple condensation; that $20 safety plug is the only thing standing between a refreshing plunge and a lethal electrical surge.
Frequently Asked Questions
Typically, a 1/2 HP chiller will drop the temperature of a 100-gallon tub by 3 to 5 degrees Fahrenheit per hour. Starting from tap water at 65°F, it usually takes 4 to 6 hours to reach a therapeutic 40°F, depending on ambient air temperature and tub insulation.
Can I leave my cold plunge chiller running 24/7?
Yes, most high-quality chillers are designed for continuous operation. Keeping it running ensures the water is always ready and allows the filtration and ozone systems to maintain water clarity, which is more energy-efficient than cooling the water from scratch every day.
What is the best cold plunge chiller for a DIY build?
For most DIYers, a 1/2 HP Active Aqua or EcoPlus chiller is the most reliable choice. They are compatible with standard 3/4 inch or 1-inch vinyl tubing and offer a proven track record of durability when paired with an external 1000+ GPH pump.
Do I need to use chemicals in my cold plunge if I have a filter?
Yes. While a filter removes physical debris like hair and dirt, it cannot kill bacteria or algae. You must use a sanitizer like Ozone, UV-C light, or Hydrogen Peroxide to ensure the water remains safe and sanitary for skin contact.
Is a used cold plunge chiller a good investment?
A used chiller can be a great deal if you verify the compressor kicks on and the unit blows cold air. Check for corrosion on the fittings and listen for any grinding noises from the fan or pump, which could indicate an imminent failure.
What should I do if my cold plunge tub starts leaking?
First, identify if the leak is at a bulkhead fitting or a seam. For bulkheads, tighten the nut or re-apply marine-grade silicone. If a budget inflatable tub is leaking from a seam, a PVC patch kit can provide a temporary fix, but structural leaks often require tub replacement.