- Mastering the Method: How to Put a Cover on a Weighted Blanket
- The Step-by-Step Inside-Out Technique
- Step-by-Step: Attaching Your Cover Without the Bunching
- Specific Instructions for YNM and Serenefox Covers
- How to Keep Your Weighted Blanket From Sliding Inside the Cover
- Troubleshooting Loose Ties and Shifting Weight
- Styling and Placing Your Weighted Blanket on the Bed
- How to Place and Style Your Blanket for Better Sleep
- Essential Maintenance: Washing and Storing Your Heavy Blanket
- How to Fold, Pack, and Store for Longevity
- The DIY Perspective: Can You Make Your Own Weighted Insert?
- Rice vs․ Glass Pellets: Material Safety
- Gifting and Presentation: How to Wrap a Weighted Blanket
- Creative Wrapping for Christmas and Special Occasions
- Frequently Asked Questions
Mastering the Method: How to Put a Cover on a Weighted Blanket
Taming a fifteen or twenty-pound weighted blanket can feel like wrestling a heavy, sleeping octopus․ The sheer density of the glass beads or plastic pellets makes the fabric behave differently than a standard down comforter, often leading to frustration and strained muscles․ Learning how to fit a weighted blanket into its protective shell requires a strategy that works with gravity rather than against it․
The most effective way to attach a weighted blanket cover involves the inside-out method, which utilizes the weight of the insert to help guide the fabric into place․ By shifting your perspective and working with the cover reversed, you eliminate the need to reach deep into a dark fabric tunnel to find elusive corner loops․ This approach ensures the weight remains evenly distributed from the moment you zip it shut․
The Step-by-Step Inside-Out Technique
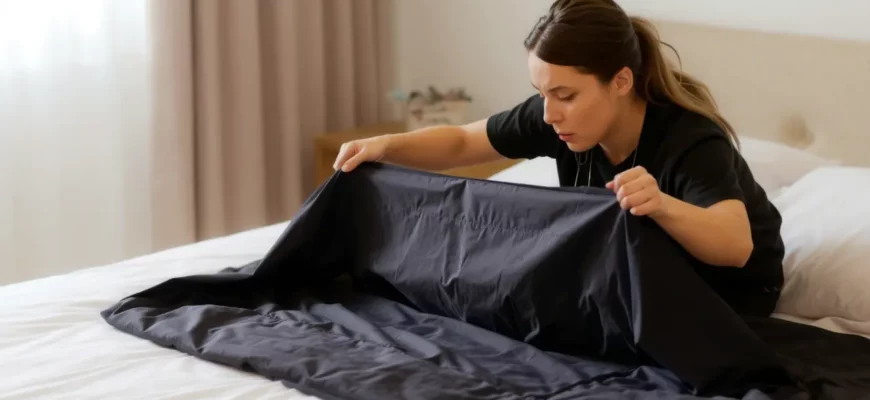
To begin, clear a large flat surface like a freshly made bed or a clean area of the floor․ Lay your duvet cover out completely flat, but ensure it is turned entirely inside out․ The internal ties or snaps should be visible and easily accessible on the exterior of the reversed fabric․ Position the cover so the zipper or button opening is at the foot of the bed, facing away from you․
Next, take your weighted insert and lay it directly on top of the inside-out cover․ Spend a moment smoothing out the insert to ensure the micro-glass beads are not pooled in one section․ Align the corners of the weighted insert perfectly with the corners of the cover․ Once aligned, individually secure every single tie or snap provided by the manufacturer․ Most high-quality blankets include more than just the four corner ties; look for additional loops along the sides to prevent the heavy fabric from sagging in the middle․
Once all ties are knotted securely—ideally with a double bow for easy removal later—reach your arms into the opening at the bottom and grab the far corners (the head of the blanket)․ While holding both the cover and the insert firmly, flip the cover right-side out over the rest of the blanket․ Give the blanket a firm shake to help the weight settle into the corners, then zip the bottom closed․ This method minimizes physical strain and ensures the insert doesn’t bunch up during the transition․
Step-by-Step: Attaching Your Cover Without the Bunching
Consistency is the secret to a sensory blanket that provides even pressure across your entire body․ If the insert is not properly anchored, the “weighted” part of the bedding will eventually slide to one side, leaving you with two layers of empty fabric on one half and a heavy lump on the other․ Following a rigid sequence prevents this common bedding failure;
- Prepare the Workspace: Clear the bed and lay the cover inside out with the opening at the foot․
- Overlay the Insert: Place the weighted blanket on top, ensuring the dimensions match (e․g․, Queen insert on a Queen cover)․
- The Anchor Phase: Start at the corners furthest from the opening․ Tie these first using a secure square knot to ensure they don’t slip under the blanket’s weight․
- Mid-Point Security: Locate the loops along the long edges of the blanket․ Fastening these is critical because they support the center-mass of the weight․
- The Inversion: Reach through the opening to the top corners, grip them tightly, and pull the cover over the insert in one smooth motion․
- Final Leveling: Lay the blanket flat and run your hands from the center toward the edges to displace any trapped air or fabric folds before zipping․
Specific Instructions for YNM and Serenefox Covers
Brand-specific designs often feature unique attachment systems that require extra attention․ For instance, when learning how to put a duvet cover on a YNM weighted blanket, you will notice they often provide ten to twelve internal loops rather than the standard four․ This higher tie count is a premium feature designed to manage the heavy glass bead fill, but it requires more patience during the assembly process to ensure every point is connected․
Similarly, understanding how to put a cover on a Serenefox weighted blanket involves managing their specific tie-and-loop configuration․ These covers are often designed with a snugger fit to maximize the sensory experience․ When working with these brands, never skip the side ties․ Because these blankets use very fine micro-beads, any gap in the attachment points will allow the insert to “sag” between the ties, creating an uneven pressure profile that can disrupt your sleep hygiene․
How to Keep Your Weighted Blanket From Sliding Inside the Cover
The physics of a weighted blanket are simple: gravity wants to pull those 20 pounds toward the floor․ If there is any slack in your internal ties, the weight of the beads will eventually stretch the fabric and cause the insert to pool at the bottom of the cover․ This shifting is the primary reason people find weighted bedding “difficult” to maintain, but it is easily solvable with proper tension and friction․
Internal loops are your first line of defense․ However, the standard cotton strings provided with many covers can sometimes become undone due to the constant movement of a sleeper․ To prevent this, always use a double-knot․ If your cover uses snaps instead of ties, ensure they click audibly․ If they feel loose, the weight of the blanket will likely pop them open within a few nights of use․
Troubleshooting Loose Ties and Shifting Weight
If you find that your blanket is still migrating despite your best efforts, you may need to implement a more robust anchoring system․ A popular “hack” involves using large, heavy-duty safety pins to supplement the ties․ Attach the pins from the inside of the cover, through the loop of the insert, and back through the cover’s interior seam․ Always ensure the pin is facing away from the sleeper to prevent any accidental pokes during the night․
Another factor is the fabric itself․ A slippery silk or high-sheen polyester cover provides very little “grip” for the weighted insert․ If shifting is a chronic issue, consider switching to a high-friction fabric cover like minky, fleece, or a textured cotton․ These materials naturally grab onto the insert’s shell, using surface-area friction to assist the ties in keeping the weight perfectly centered․ This is the most effective way to attach a duvet cover on a weighted blanket for long-term stability․
Styling and Placing Your Weighted Blanket on the Bed
Once the cover is on, the challenge shifts to keeping the entire assembly on top of your bed․ Weighted blankets are notorious for sliding off the mattress and onto the floor in the middle of the night․ Because of their weight, once a few inches of the blanket hang over the edge, the gravitational pull often drags the rest of the blanket down, leaving you cold and uncompressed at 3 AM․
Proper placement is essential for both aesthetics and function․ Unlike a standard comforter, a weighted blanket should not necessarily drape deep over the sides of the mattress․ In fact, many experts suggest the blanket should be slightly smaller than the top surface of your bed․ This ensures the entirety of the weight is concentrated on the sleeper rather than being wasted on the edges of the mattress where it contributes to “the slide․”
How to Place and Style Your Blanket for Better Sleep
For the best results, center the blanket so that it covers only the area where you actually sleep․ If you share a bed but only one person uses the weighted blanket, fold it in half vertically and place it on only one side․ To keep a weighted blanket on the bed effectively, you can tuck the very bottom edge under the mattress at the foot of the bed․ This “anchor” prevents the blanket from moving upward or sideways as you toss and turn․
From a design perspective, a weighted blanket can look somewhat industrial due to its quilted pockets․ To style a bed with a weighted blanket on it, use the layering technique․ Place your decorative quilt or duvet over the weighted blanket․ This hides the “functional” bedding while keeping the therapeutic weight close to your body․ Alternatively, fold the weighted blanket neatly into a “runner” at the foot of the bed during the day for a curated, hotel-inspired look․
Essential Maintenance: Washing and Storing Your Heavy Blanket
Cleaning a weighted blanket is not as simple as throwing it in the wash with your towels․ Most residential washing machines have a weight limit, typically between 15 and 20 pounds․ Attempting to wash a heavy weighted insert in a standard top-loader can damage the machine’s suspension springs or burn out the motor․ This is why using a machine-washable cover is so vital for sleep hygiene․
The cover acts as a sacrificial layer, absorbing sweat, skin oils, and dust․ You should wash the cover every one to two weeks, just like your standard bed sheets․ The inner weighted insert, however, should only be cleaned when absolutely necessary․ If you must wash the insert, check the care label carefully․ Many are “spot clean only,” while others require a commercial-grade front-loading machine at a laundromat that can handle the centrifugal force of a heavy, wet blanket․
How to Fold, Pack, and Store for Longevity
When the seasons change or you need to put your blanket away, proper storage is key to protecting the internal fill․ Never hang a weighted blanket over a hanger or a rail; the weight will stretch the fabric and potentially rupture the internal baffles, leading to a “leak” of glass pellets․ Instead, learn how to fold a weighted blanket by folding it into a tight, flat square, ensuring the weight is distributed evenly across the stack․
- Avoid Plastic Bags: Do not store your blanket in airtight plastic bins, which can trap moisture and lead to mildew․
- Use Breathable Fabric: A canvas storage bag or a large cotton pillowcase is ideal for keeping dust off while allowing the fibers to breathe․
- Cool, Dry Placement: Store the blanket in a closet at floor level․ Placing 20 pounds on a high shelf is a safety hazard and can cause the shelf to bow over time․
- Bead Protection: Ensure the blanket is not compressed under other heavy items, as this can crush the poly-fill padding surrounding the glass beads;
The DIY Perspective: Can You Make Your Own Weighted Insert?
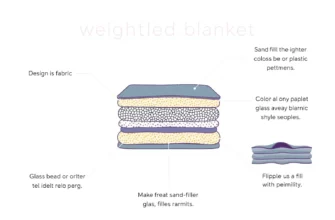
The rise of sensory bedding has led many crafters to attempt DIY weighted blankets․ While the concept is simple—sewing pockets and filling them with weighted material—the execution requires precision․ The primary concern is weight consistency․ If one pocket has two ounces and the next has four, the blanket will feel lumpy and fail to provide the “Deep Pressure Touch” (DPT) needed for therapeutic benefits․
Material choice is the most critical factor in a DIY project․ Many beginners ask: can you fill a weighted blanket with rice? While rice is inexpensive and accessible, it is a poor choice for long-term bedding․ Organic materials like rice, beans, or corn absorb moisture from the air and your body․ Over time, this leads to mold growth, unpleasant odors, and even pest infestations․ Furthermore, you cannot wash a blanket filled with food products, making it a “single-use” item from a hygiene perspective․
Rice vs․ Glass Pellets: Material Safety
| Feature | Organic Fill (Rice/Beans) | Glass Micro-Beads |
|---|---|---|
| Washability | Non-washable; will rot․ | Machine washable and dryer safe․ |
| Durability | Degrades over time․ | Lasts indefinitely․ |
| Heat Retention | Holds heat (can become too hot)․ | Stays cool; high thermal conductivity․ |
| Hypoallergenic | No; can attract dust mites/mold․ | Yes; inorganic and dust-free․ |
When looking at how to use glass pellets in a weighted blanket, you are choosing the gold standard․ Glass beads are much denser than plastic pellets, meaning the blanket can be thinner and less bulky while maintaining the same weight․ They also distribute heat more efficiently, which is a major benefit for those who “sleep hot․” If you are taking the DIY route, investing in high-quality glass pellets is the only way to ensure a safe, hygienic, and effective result․
Gifting and Presentation: How to Wrap a Weighted Blanket
Giving a weighted blanket as a gift is a wonderful gesture for someone struggling with anxiety or insomnia, but the logistics of wrapping it are a nightmare․ Traditional wrapping paper is designed for light objects; the sharp corners of a folded 20-pound blanket will tear through standard paper the moment you try to lift it․ To provide a high-quality presentation, you must think outside the box—literally․
The best way to wrap a weighted blanket for Christmas or a birthday is to use a sturdy decorative storage bin or a wooden crate․ Not only does this support the weight, but the container becomes part of the gift itself․ If you prefer the look of a traditional gift, look for “heavy-duty” oversized gift bags with reinforced handles․ Standard bags will likely have the bottom fall out before the recipient even opens it․
Creative Wrapping for Christmas and Special Occasions
For a more personal touch, consider using the fabric wrap method (Furoshiki)․ Use a beautiful, thick tablecloth or a piece of heavy upholstery fabric to wrap the blanket․ Secure the knot at the top․ This accommodates the bulkiness of the blanket and eliminates the waste of torn paper․ If you are learning how to wrap a weighted blanket as a gift, remember to place the gift exactly where you want it to stay․ Don’t place it under a tree if the recipient has to carry it across the house; instead, present it on a sturdy chair or at the foot of their bed to avoid any “heavy lifting” surprises․
In my professional experience, the most critical factor in weighted blanket success is the 10% rule․ A blanket should ideally weigh approximately 10% of the user’s total body weight․ While adding a thick cover can provide a cozy protective layer, you must account for the cover’s weight as well—especially with heavy minky or faux-fur options which can add another 2-3 pounds․ I always advise my clients to ensure that their internal ties are checked and re-tightened once a month․ Loose ties don’t just cause bunching; they create uneven pressure points that can actually cause joint discomfort rather than relief․ Lastly, never sacrifice breathability for weight; a cotton duvet cover is almost always the superior choice for maintaining a neutral core temperature during deep sleep cycles․
Frequently Asked Questions
Yes, you can use a standard cover, but you must sew your own internal ties into the corners․ Without these anchors, the heavy weighted insert will inevitably slide into a lump at the bottom of the cover․
How often should you wash the weighted blanket cover?
You should wash the cover every 7 to 14 days as part of your regular bedding routine․ This keeps your sleep environment hygienic while protecting the inner weighted insert from needing frequent, difficult cleanings․
Can you heat up a weighted blanket in the dryer?
You must be extremely careful․ High heat can melt plastic pellets or damage the fabric integrity․ Always use the lowest heat setting or an air-dry cycle, and check the manufacturer’s label to see if the insert is dryer-safe․
Is it okay to use rice to make a weighted blanket?
I strongly advise against using rice․ Rice absorbs moisture and can grow mold or attract insects over time․ For a safe and durable DIY blanket, use glass micro-beads or heavy-duty plastic pellets instead․
Why does my weighted blanket feel heavier in the cover?
This is usually due to the added weight of the cover material itself or because the insert has shifted to one side․ If the ties aren’t secure, the weight concentrates in one area, making it feel significantly more cumbersome to move․