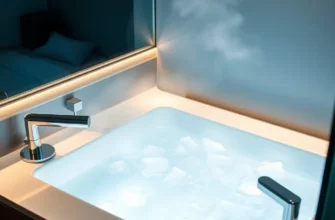
- Essential Components of a High-Performance Cold Plunge Setup
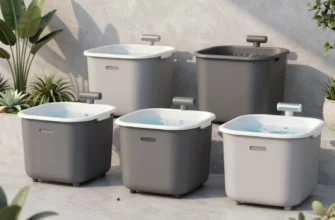
- Choosing Between Dedicated Tubs and DIY Conversions
- Finding the Sweet Spot: Ideal Cold Plunge Pool Temperature
- Why 10 to 15 Degrees Celsius is the Recovery Goldilocks Zone
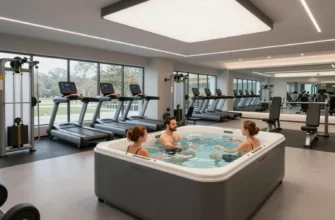
- The Logistics of Space: Cold Plunge Depth and Dimensions
- How Much Room Do You Really Need for Full Submersion?
- The Science of Shiver: Cold Plunge Calorie Calculator Explained
- Do Cold Plunges Actually Help with Weight Loss?
- Cold Plunge Troubleshooting: Solving Common Water and Tech Issues
- Maintaining Crystal Clear Water Without Harsh Chemicals
- Safety First: Staying Healthy During and After Your Plunge
- Frequently Asked Questions
Essential Components of a High-Performance Cold Plunge Setup
Building a professional-grade cold therapy station at home requires more than just a vessel and some ice bags. To create a sustainable habit, you need a system that manages temperature, hygiene, and accessibility without becoming a daily chore. A high-performance setup serves as the foundation for consistent recovery, ensuring the water is always ready when your central nervous system needs a reset.
The three pillars of a successful installation are the structural vessel, the mechanical cooling unit, and the filtration circuit. When these components work in harmony, you eliminate the friction of “prepping” the bath, which is the primary reason most people abandon cold therapy within the first month. Investing in a dedicated chiller and a well-insulated tub transforms a simple soak into a precision-controlled medical-grade recovery tool.
Choosing Between Dedicated Tubs and DIY Conversions
Choosing your vessel is the first major decision in setting up your recovery space. While stock tanks are popular for their rugged aesthetic and lower entry price, they often suffer from poor thermal retention and significant condensation issues. If you choose a galvanized steel tank, always apply a spray-foam insulation layer to the exterior to prevent your chiller from running 24/7 and skyrocketing your energy bill.
Purpose-built insulated tubs, often made from high-density drop-stitch materials or acrylic, offer far superior thermal efficiency. These vessels are designed to reduce inflammation effectively by maintaining a steady temperature regardless of the ambient heat. For those looking to integrate a home wellness spa, a dedicated tub with pre-drilled ports for 3/4-inch PVC or flexible hosing prevents the common leaking issues associated with DIY bulkhead installations.
Finding the Sweet Spot: Ideal Cold Plunge Pool Temperature
Temperature selection is not a “colder is better” competition; it is a physiological calculation based on your current adaptation level. The goal of cold immersion is to trigger a hormetic stress response without overtaxing the heart or causing significant tissue damage. Understanding the specific thermal benchmarks helps you tailor your sessions for either metabolic boost or neurological recovery.
| Level | Temperature (°C) | Primary Benefit | Recommended Duration |
|---|---|---|---|
| Beginner | 15°C ⏤ 18°C | Vagus nerve activation and mental resilience. | 5 ⎻ 10 Minutes |
| Intermediate | 10°C ⎻ 12°C | Standard recovery; mimics Centre Parcs and pro-spa settings. | 3 ⎻ 5 Minutes |
| Advanced | 3°C ⏤ 5°C | Maximum norepinephrine release and BAT activation; | 1 ⏤ 3 Minutes |
Why 10 to 15 Degrees Celsius is the Recovery Goldilocks Zone
For most practitioners, the 10°C to 15°C range represents the “Goldilocks Zone” where the body receives maximum benefit with manageable risk. This temperature is sufficient to trigger the release of thermal shock proteins and significantly increase the production of mitochondrial-dense brown fat. Staying within this range helps you avoid the severe cold shock response that can lead to hyperventilation or panic in inexperienced users.
To progress safely, you should prioritize duration over extreme cold; it is more beneficial to spend five minutes at 12°C than thirty seconds at 3°C. Ensure you use a calibrated digital thermometer rather than relying on the chiller’s built-in sensor, as water temperature can vary by up to 2 degrees between the bottom of the tub and the surface where the sensor is often located.
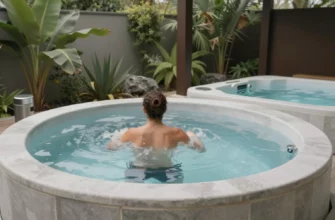
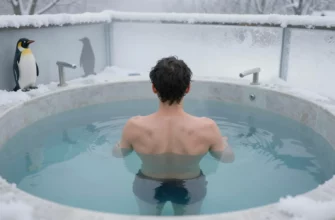
The Logistics of Space: Cold Plunge Depth and Dimensions
The physical footprint of your setup determines not just where it fits in your home, but how effective the treatment will be. To achieve the full benefits of hydrotherapy, including vagus nerve stimulation, the water must be deep enough to cover your collarbones. If the water only reaches your waist, you miss out on the hydrostatic pressure required to assist in lymphatic drainage and the specific cooling of the neck area.
- Standard Tub Length: 150 cm is the minimum length required for an adult to sit with legs extended comfortably.
- Optimal Submersion Depth: Aim for a water level of 60 cm to 70 cm to ensure full torso coverage for most body types.
- Total Footprint: Allow for an extra 50 cm of clearance on the side of the tub for the chiller unit and ventilation.
- Weight Capacity: Ensure your floor can support roughly 500kg to 700kg once the tub is filled and an occupant is inside.
How Much Room Do You Really Need for Full Submersion?
When measuring your space, remember that the “internal” cold plunge dimensions in cm are what matter for comfort, while the “external” dimensions dictate the fit. If you are fitting a tub in small spaces, such as a balcony or a corner of a garage, consider a vertical “barrel” style plunge. These designs allow for deep water levels (up to 90 cm) while maintaining a small horizontal footprint, making them ideal for tall users who prefer a seated, upright position.
To find your comfortable water level, sit in the tub while it is empty and mark the height of your clavicles on the side wall. Never fill the tub to the brim before entering; displacement will cause a significant overflow. A good rule of thumb is to fill the vessel to 70% capacity and adjust after your first test plunge to ensure the water reaches the base of your neck without spilling over the sides.
The Science of Shiver: Cold Plunge Calorie Calculator Explained
The metabolic impact of cold immersion is a major draw for many fitness enthusiasts, but the numbers are often misunderstood. When you enter cold water, your body engages in non-shivering thermogenesis, a process where brown adipose tissue (BAT) burns glucose and white fat to generate heat. This metabolic rate boost can last for several hours after you have exited the water, extending the energy expenditure beyond the duration of the plunge itself.
Metabolic Estimation Formula:
Total Burn = (BMR / 24) x (Thermic Factor) x (Duration of Session)
Do Cold Plunges Actually Help with Weight Loss?
While a cold plunge calories burned calculator might suggest an extra 50 to 100 calories per session, the real magic lies in brown fat activation. Unlike regular white fat, brown fat is packed with mitochondria and acts like a furnace for the body; Regular exposure to cold increases the density of your brown adipose tissue, effectively raising your resting metabolic rate even on days you don’t plunge.
To maximize the fat-burning potential, you should avoid immediately jumping into a hot shower after your session. Allowing your body to warm up naturally—a practice known as the Soeberg Principle—forces your metabolism to work harder to restore your core temperature. This natural “reheating” phase is where the most significant metabolic work occurs, so embrace the shiver for at least 10 minutes post-plunge.
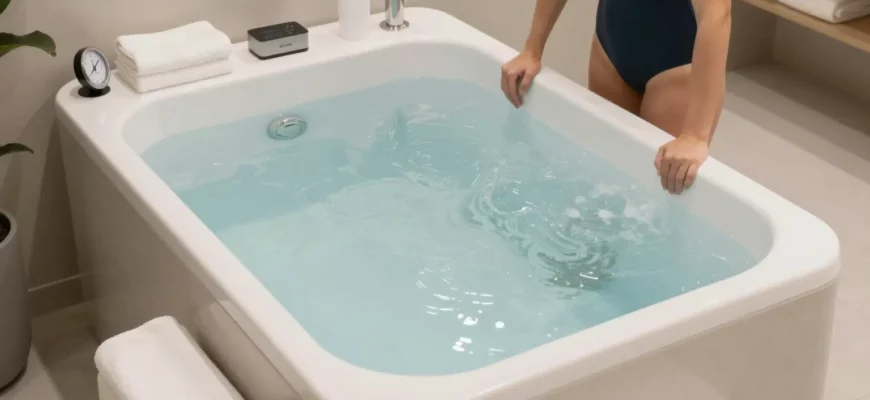
Cold Plunge Troubleshooting: Solving Common Water and Tech Issues
Maintaining a cold plunge is more akin to managing a small pool than a bathtub. Because the water is kept at low temperatures, bacteria grow more slowly, but they still accumulate through skin oils, sweat, and environmental debris. If you notice your water becoming cloudy or the walls feeling slick, your filtration system is likely being bypassed or is insufficient for the volume of water.
- Cloudy Water: Usually caused by high total dissolved solids (TDS). Shock the water with 3% food-grade hydrogen peroxide (about 500ml per 300L) to oxidize organic matter.
- Slimy Tub Walls: This indicates biofilm buildup. Scrub the walls with a soft brush and increase your circulation pump’s run time.
- Chiller Not Cooling: Check the air filter on the intake. A clogged dust filter can reduce cooling efficiency by 40% and eventually burn out the compressor.
- Noisy Pump: This often signifies air trapped in the lines. Tilt the chiller or slightly loosen a fitting to “bleed” the air out until the water flow is silent.
Maintaining Crystal Clear Water Without Harsh Chemicals
Keeping water clean in a recovery tub doesn’t require heavy chlorine, which can irritate the skin and lungs during deep breathing exercises. Instead, many professional setups utilize a combination of a 5-micron sediment filter and an ozone generator or UV-C light sterilizer. These systems neutralize pathogens at the molecular level without changing the water’s pH or leaving a chemical residue.
If you are fixing a broken chiller that won’t reach target temps, first verify that the ambient air around the unit isn’t too hot. Chillers require at least 30cm of clearance on all sides to exhaust heat effectively. If the unit is tucked into a tight corner without ventilation, it will recirculate its own hot exhaust, making it impossible to drop the water temperature into the single digits.
Safety First: Staying Healthy During and After Your Plunge
The most dangerous part of cold therapy isn’t the water itself, but how you handle the transition out of it. The “afterdrop” phenomenon occurs when peripheral blood vessels dilate upon exiting the cold, sending chilled blood from your extremities back to your core. This can cause your core temperature to continue falling even after you are in a warm environment, potentially leading to dizziness or fainting.
- DO: Move your body immediately after exiting. Gentle movements like “horse stance” or air squats help circulate blood and generate internal heat.
- DO: Dry off your head and torso first to preserve core heat.
- DON’T: Jump directly into a hot sauna or shower. The rapid vasodilation can cause a dangerous drop in blood pressure.
- DON’T: Plunge alone if you are pushing into temperatures below 5°C for the first time.
- DO: Focus on long, slow exhales while in the water to suppress the sympathetic “fight or flight” response.
In my professional experience as a recovery specialist, I have seen hundreds of people invest in top-tier equipment only to let it sit idle because of “maintenance friction.” The best setup is the one you can maintain with less than 10 minutes of effort per week. I always advise clients to prioritize a high-quality filtration system and a chiller with a built-in timer; If the water is crystal clear and the temperature is exactly where it needs to be the moment you wake up, you remove the mental barriers to entry. Remember, the physiological benefits of cold therapy are cumulative; a 12°C plunge you do every day is infinitely more valuable than a 3°C plunge you only do once a month because the setup was too much of a hassle.
Frequently Asked Questions
For most adults, a depth of 60-70 cm is ideal. This allows for full submersion of the torso up to the clavicles, which is necessary to stimulate the vagus nerve and maximize the benefits of hydrostatic pressure.
How many calories do you burn in a 3-minute cold plunge?
While results vary based on body mass and water temperature, a 3-minute session can burn between 50 and 100 extra calories. The primary metabolic benefit comes from the hours of increased thermogenesis that follow the session.
Why is my cold plunge water getting cloudy so quickly?
Cloudy water is usually the result of skin oils, dead skin cells, and a lack of proper oxidation. Use a 5-micron filter and consider adding a small amount of hydrogen peroxide or an ozone generator to break down organic contaminants.
Is 10 degrees Celsius too cold for a beginner?
10°C is quite intense for a first-timer. Beginners should start at 15°C to adapt to the cold shock response and gradually lower the temperature by 1 degree every few sessions as their tolerance increases.
Can I use a regular chest freezer for my setup?
Yes, chest freezer conversions are popular DIY options. However, you must completely seal all interior seams with marine-grade sealant and always unplug the unit before entering to eliminate the risk of electric shock.