- Choosing the Right Cold Plunge System for Home Use
- Evaluating Cold Plunge Manufacturers and the Pro XL Model
- The Essential Cold Plunge Equipment Checklist
- Hardware Essentials: From Hoses to Liners
- Mastering Water Quality: Chemical Kits and Ozone Generators
- Is the Cold Plunge Ozone Generator by Ambohr Worth It?
- Using a Cold Plunge Water Test Kit for Daily Safety
- Optimizing Thermal Efficiency: Insulation and Design
- Applying a Cold Plunge Insulation Wrap for Maximum Chill
- Enhancing the Experience with Cold Plunge Accessories
- Safety First: Basin Mats and Foot Covers
- Portable vs․ Permanent: Which Setup Fits Your Lifestyle?
- When to Choose a Portable Tank Over a Fixed System
- Frequently Asked Questions
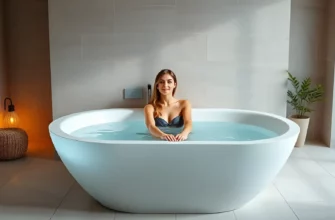
Choosing the Right Cold Plunge System for Home Use
Bringing a cold plunge into your home is a major step in upgrading your recovery routine, but it requires more than just buying a tub and filling it with ice․ You need to consider how a system fits into your daily life, specifically focusing on how quickly the unit can drop the temperature and whether your home’s electrical circuit can handle the load․ Most high-end chillers pull significant amperage, so always verify if your setup requires a dedicated 20-amp circuit to avoid tripping breakers during the initial pull-down phase․
The footprint of the system is the next hurdle․ A unit that looks small in a warehouse can easily dominate a garage or spare room once you account for the chiller, the external plumbing, and the clearance needed for ventilation․ When you are looking at these systems, prioritize units with a cooling speed of at least 3 to 5 degrees per hour so you aren’t waiting all day for the water to hit that sub-50-degree sweet spot․
Evaluating Cold Plunge Manufacturers and the Pro XL Model
The market is currently flooded with reliable manufacturers, but the gap between a budget “ice box” and a professional-grade system is wide․ High-end brands focus on the integration of the pump and chiller, ensuring that the water remains moving even when the cooling cycle is off․ This prevents “thermal layering,” where the water near your skin warms up while the rest of the tank stays cold․ Look for manufacturers that offer at least a one-year comprehensive warranty on the compressor, as this is the most expensive component to replace․
For individuals who are over six feet tall, finding the right fit is a common struggle․ This is where larger tank sizes, such as the Pro XL model, become a necessity rather than a luxury․ These tanks are designed with a longer internal basin, allowing taller users to fully submerge their shoulders without having to cram their knees against their chest․ A tank length of at least 65 inches is the industry standard for tall users to ensure the vagus nerve in the neck is properly exposed to the cold, which is vital for the full nervous system benefits of immersion․
The Essential Cold Plunge Equipment Checklist
Setting up a professional-level home system requires a symphony of hardware working in unison․ It is helpful to think of your setup not as a tub, but as a closed-loop life support system for your water quality․ Without the right circulation components, your water will turn stagnant and cloudy within forty-eight hours, regardless of how cold it is․
- High-Efficiency Chiller: Aim for a minimum of 1/2 horsepower for indoor units and 1 horsepower for outdoor units in warmer climates․
- Self-Priming Circulation Pump: This ensures water moves through the filter and chiller even if a small amount of air enters the lines․
- 20-Micron Pleated Filter: This is the sweet spot for catching skin cells and hair without significantly restricting water flow․
- GFCI Protected Power Strip: Never operate a cold plunge without Ground Fault Circuit Interrupter protection to prevent electrical shock․
- Reinforced Braided Hoses: Standard garden hoses will collapse under the suction of a powerful pump; use 3/4-inch or 1-inch reinforced tubing․
- Insulated Hard Cover: A cover is the most important tool for reducing the workload on your chiller by up to 40%․
Hardware Essentials: From Hoses to Liners
The “guts” of your system—the hoses and connectors—are often where DIY setups fail․ Using durable plumbing is non-negotiable because the constant expansion and contraction caused by temperature fluctuations can stress plastic fittings․ Switching to stainless steel or brass quick-connect fittings will save you from the headache of slow drips that can eventually rot your subfloor if the unit is kept indoors;
If you are building a custom basin, the tub liners you choose must be UV-resistant and chemical-grade․ A heavy-duty cold plunge liner acts as the primary barrier against leaks, but it also provides the structural integrity needed to hold over 800 pounds of water․ Always inspect the seams of your liner for “stress whitening” before the first fill, as this indicates a weak point in the plastic that will likely fail under the pressure of a full tank․
Mastering Water Quality: Chemical Kits and Ozone Generators
Maintaining hygiene in a cold plunge is actually more difficult than in a hot tub․ Bacteria don’t die in cold water; they simply go dormant, only to reactivate the moment they touch your skin․ To keep the water crystal clear for months at a time, you need a multi-stage sanitization approach that combines physical filtration, oxidation, and residual sanitizers․ Never rely on “just changing the water” once a week, as this wastes hundreds of gallons and forces your chiller to work overtime to cool fresh, room-temperature water․
A cold plunge water treatment kit is your first line of defense․ These kits typically include a non-chlorine oxidizer, a sequestering agent to prevent mineral buildup on the chiller’s heat exchanger, and a sanitizer․ Using an enzyme-based cleaner is highly effective in a cold environment because it physically breaks down the oils and sweat that filters often miss, preventing that “ring around the tub” look․
Is the Cold Plunge Ozone Generator by Ambohr Worth It?
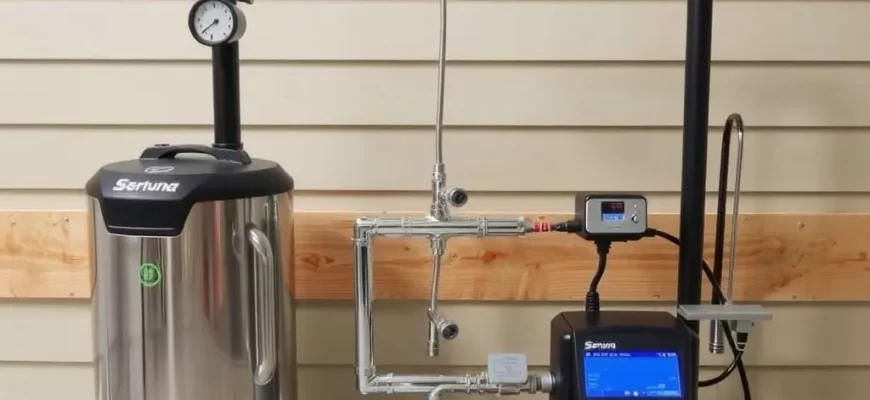
Ozone technology has become the gold standard for high-end home systems․ An ozone generator, like the specialized units from Ambohr, works by injecting O3 molecules into the water line․ Ozone is a massive oxidizer that destroys bacteria, viruses, and biological contaminants on contact․ The biggest advantage of using ozone is that it drastically reduces the need for harsh chemicals like chlorine or bromine, which can dry out your skin and damage the internal seals of your chiller over time․
When reviewing sanitization options, the Ambohr units are often favored because they are designed for the high-pressure environments of a circulation pump loop․ However, you must ensure your system has a “degassing” mechanism or a long enough hose run to allow the ozone to dissipate before it hits the main tank․ Ozone is highly effective but can be corrosive to certain low-grade plastics, so ensure all your seals and hoses are ozone-compatible (look for Viton or EPDM materials)․
Using a Cold Plunge Water Test Kit for Daily Safety
Even with an ozone generator, you cannot skip the manual checks․ A cold plunge water test kit should be used at least twice a week to monitor pH and alkalinity․ In cold water, the pH tends to drift upward, which can lead to calcium scaling inside your chiller․ Keeping your pH between 7․2 and 7․6 ensures that your sanitizers work efficiently and that the water doesn’t irritate your eyes or skin during long immersions․
Safety for your skin is paramount․ If your alkalinity drops too low, the water becomes “hungry” or acidic, which can actually pit the metal inside your chiller’s cooling coils․ Always adjust your total alkalinity first (aiming for 80-120 ppm) before you try to balance the pH, as alkalinity acts as a buffer that prevents the pH from swinging wildly after you use a chemical kit․
Optimizing Thermal Efficiency: Insulation and Design
The efficiency of your system determines whether your electricity bill stays manageable or skyrockets․ A cold plunge is essentially a reverse refrigerator; it is constantly fighting the ambient air temperature to keep the water cold․ Without proper insulation, your chiller will “short-cycle,” turning on and off every few minutes, which shortens the lifespan of the compressor significantly․
| Insulation Method | Pros | Cons |
|---|---|---|
| Built-in Spray Foam | Excellent R-value; covers every nook and cranny․ | Makes internal plumbing repairs nearly impossible․ |
| Reflective Bubble Wraps | Cheap and easy to install on hoses and tanks․ | Less aesthetically pleasing; lower thermal resistance․ |
| Rigid Foam Boards | Best for DIY builds; very high energy savings․ | Bulky and requires a custom outer frame to hide․ |
| Neoprene Sleeve Wraps | Great for hoses; prevents condensation drips․ | Can be expensive for full-tank coverage․ |
Applying a Cold Plunge Insulation Wrap for Maximum Chill
If you have exposed hoses between your tank and the chiller, you are losing “coolness” to the air every second the pump is running․ Applying a cold plunge insulation wrap to these lines is one of the most cost-effective upgrades you can make․ This is especially critical for indoor setups where uninsulated cold pipes will “sweat” or create condensation, leading to mold growth on your floors or walls over time․
When wrapping your tank, focus on the bottom and the sides․ Heat rises, but in a cold plunge, the heat from the floor can transfer into the water through a process called conduction․ Placing your tank on a 1-inch thick rubber stall mat provides a thermal break from the concrete floor, which can save more energy than wrapping the sides of the tank itself․ Keeping the water icy becomes much easier when the chiller isn’t fighting the literal foundation of your home․
Enhancing the Experience with Cold Plunge Accessories
Once the technical setup is complete, the focus shifts to the human element; The first thirty seconds of a cold plunge are a mental battle, and anything that reduces physical discomfort—other than the cold itself—will help you stay consistent with the habit․ Accessories shouldn’t be about luxury; they should be about removing the friction points that make you want to skip a session․
For example, a simple floating thermometer is a vital tool, but a digital one with an indoor remote display is better․ Knowing the water is exactly 48 degrees before you even leave your kitchen helps with mental preparation․ Consistency is the key to cold adaptation, and having the right supplies on hand makes that consistency possible․
Safety First: Basin Mats and Foot Covers
Safety is often overlooked until someone slips․ The area around a cold plunge is perpetually wet, and smooth plastic or acrylic tanks become incredibly slick․ A non-slip cold plunge basin mat inside the tank and a heavy-duty rubber mat outside are essential․ Look for mats with “suction-cup” bottoms for the interior to ensure they don’t float away or slide when you are stepping in with numb feet․
Many users find that the “pain” of the cold is most intense in their toes․ This is due to the high density of nerves and the body’s natural response of shunting blood away from the extremities․ Using 2mm or 3mm neoprene cold plunge foot covers can be a game-changer․ These covers allow you to stay in the water longer by protecting your toes from the stinging sensation, allowing your core and large muscle groups to get the full benefit of the soak without the distraction of extremity pain․
Portable vs․ Permanent: Which Setup Fits Your Lifestyle?
The choice between a portable tank and a permanent installation usually comes down to your living situation and your long-term commitment․ A permanent setup, often made of stainless steel or high-grade acrylic, is a piece of furniture that adds value to a home gym․ A portable setup, however, offers a level of flexibility that is hard to beat for renters or those who want to take their recovery routine on the road․
| Feature | Portable (Inflatable/Bucket) | Permanent (Hard-Shell/Custom) |
|---|---|---|
| Installation Time | 15–30 minutes | 2–5 hours (plus plumbing) |
| Durability | 3–5 years (Drop-stitch) | 10+ years |
| Mobility | High (Fits in a carry bag) | None (Requires 2+ people to move) |
| Insulation Value | Moderate (Air-walled) | High (Insulated cavities) |
When to Choose a Portable Tank Over a Fixed System
A cold plunge tank portable option is ideal if you aren’t ready to commit to a permanent location in your home․ Modern portable tanks use “drop-stitch” technology—the same material used in high-end stand-up paddleboards—which allows them to be inflated to a rock-hard 15 PSI․ This provides a surprisingly sturdy basin that won’t collapse when you sit on the edge, a common problem with cheaper, “balloon-style” inflatables․
When vetting a cold plunge bucket manufacturer for a portable setup, check the diameter of the inlet and outlet ports․ Many cheaper buckets use proprietary sizes that won’t connect to standard 1/2 HP or 1 HP chillers without a messy array of adapters․ A high-quality portable tank should feel like a rigid structure once inflated and should include a dedicated, insulated lid that clips down to prevent it from blowing away in the wind if used outdoors․
In my professional experience, the biggest mistake new owners make is believing that an ozone generator or a high-end chiller makes the system maintenance-free․ I always advise clients that physical filtration is still the king of water clarity․ Even with O3, you must rinse your pleated filter every two weeks and replace it every month․ If you skip this, the organic load (skin cells and oils) will eventually overwhelm the ozone, leading to a bacterial bloom that is very hard to kill․ Furthermore, remember that insulation is the best insurance policy for your chiller․ A chiller that runs 20% of the day will last twice as long as one that runs 60% of the day because of poor insulation․ Don’t skimp on the cover!
Frequently Asked Questions
You should test your water at least twice a week․ If you plunge daily, add a non-chlorine oxidizer once a week to break down organic waste, and balance the pH as needed to keep it between 7;2 and 7․6․
What is the best way to insulate a DIY cold plunge system?
Use a combination of neoprene wraps for all external hoses and a thick rubber stall mat underneath the tub․ For the basin itself, rigid foam board insulation or a dedicated thermal wrap will provide the best R-value․
Do I really need cold plunge foot covers?
They aren’t mandatory, but they are highly recommended for beginners․ Foot covers protect the high-density nerve endings in your toes, which often feel the “sting” of the cold most intensely, allowing for a more comfortable submersion of the rest of your body․
Can I use a portable cold plunge tank outdoors in winter?
Yes, but you must keep the pump running to prevent water from freezing in the hoses․ If the temperature drops below zero for extended periods, it is safer to drain the unit or use a heater/chiller combo that has a built-in “anti-freeze” mode․
What should I look for in a cold plunge bucket manufacturer?
Focus on material thickness and port compatibility․ Ensure they use high-pressure drop-stitch construction (rated for at least 10-15 PSI) and that the valves are standard 1-inch or 3/4-inch NPT to match common chiller kits․
How does an ozone generator improve my home cold plunge?
Ozone acts as a powerful oxidizer that destroys pathogens and breaks down sweat and oils on a molecular level․ This reduces your reliance on chemicals like chlorine, keeping the water gentler on your skin and eyes․