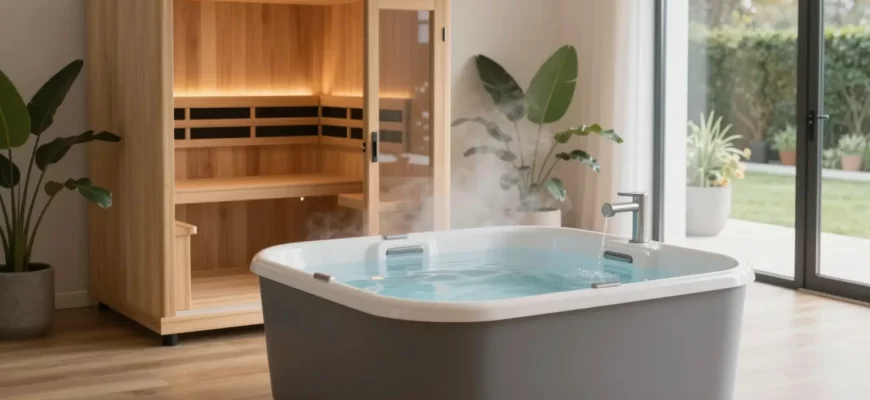
- Understanding the Total Cold Plunge and Infrared Sauna Price Tag
- Entry-Level vs. Luxury: What Drives the Cost?
- Comparing Costs: Budget-Friendly DIY vs. Professional Grade Suites
- Breaking Down the Tiers of Home Contrast Therapy
- Finding the Best Red Light Therapy for Cold Plunge and Sauna Rooms
- Integrating Photobiomodulation Into Your Routine
- Hidden Expenses: Maintenance, Electricity, and Installation
- The Monthly Reality of Running a Home Spa
- Common Mistakes When Buying Recovery Equipment
- Why Cheap Components Can Cost You More Later
- Planning Your Layout: Maximizing Small Spaces
- Designing the Ultimate 10×10 Recovery Zone
- Expert Perspective: Professional Perspective on Contrast Therapy Setup
- Frequently Asked Questions
Understanding the Total Cold Plunge and Infrared Sauna Price Tag
Investing in a home recovery suite is a commitment to long-term physical resilience and mental clarity. By combining the metabolic demands of heat stress with the systemic anti-inflammatory response of cold exposure, you create a powerful contrast therapy circuit right in your spare room or garage.
The cost of a cold plunge and infrared sauna setup varies wildly based on the level of automation and material quality you require. While it is tempting to focus solely on the initial purchase price, the true value lies in how these tools integrate into your daily life and how long they remain operational without expensive repairs.
Entry-Level vs. Luxury: What Drives the Cost?
The primary price drivers for saunas are the wood species and the heating technology. Western Red Cedar remains the gold standard because it is naturally resistant to rot and provides an aromatic experience, whereas Hemlock or Spruce are more affordable but may warp over time if not maintained.
For cold plunges, the chiller unit is the most significant expense. A high-quality chiller must be able to pull water down to 39 degrees Fahrenheit even in a warm garage, which requires at least a 1/2 horsepower motor for consistent performance. Lower-end units often struggle to maintain these therapeutic temperature ranges, leading to frequent motor burnouts and higher energy bills.
Comparing Costs: Budget-Friendly DIY vs. Professional Grade Suites
Choosing the right tier depends on your technical skills and how much time you want to spend on maintenance versus recovery. A DIY setup offers a low barrier to entry but requires constant vigilance regarding water chemistry and seal integrity.
| Feature | Budget DIY Tier | Mid-Range Enthusiast | High-End Professional |
|---|---|---|---|
| Estimated Cost | $1,500 – $3,500 | $6,000 – $12,000 | $15,000 – $35,000+ |
| Sauna Type | Portable Steam or Low-End Carbon | 2-Person Hemlock Infrared | Custom Cedar Full-Spectrum |
| Cold Plunge | Stock Tank + Ice or DIY Chest Freezer | Rotomolded Tub + 1/4 HP Chiller | Stainless Steel/Acrylic + 1 HP Chiller |
| Installation | Self-Assembled | Plug-and-Play Units | Professional Electrical/Plumbing |
Breaking Down the Tiers of Home Contrast Therapy
In the budget category, many users start with a galvanized stock tank or a converted chest freezer; While the “freezer-mod” community is large, you must use a marine-grade sealant on all seams to prevent catastrophic leaks and electrical shorts. These setups are functional but lack the sophisticated filtration systems found in professional-grade equipment.
Mid-range systems typically feature all-in-one systems where the chiller, pump, and filtration are housed in a single aesthetic cabinet. This reduces the footprint and simplifies the setup. In this price bracket, you should expect saunas with low-EMF (Electromagnetic Field) carbon heaters, which provide a safer and more consistent heat distribution than the cheap ceramic tubes found in entry-level models.
Finding the Best Red Light Therapy for Cold Plunge and Sauna Rooms
Red light therapy (RLT), or photobiomodulation, is the perfect “third pillar” for a recovery room. It uses specific wavelengths of light to stimulate mitochondrial function, but adding these panels to a high-moisture or high-heat environment requires careful planning.
Most standard RLT panels are not designed to withstand the 150-degree heat of an infrared sauna. To avoid frying the delicate internal circuitry, always mount panels on the exterior of the sauna or use specialized sauna-rated light bars. If you place a panel near your cold plunge, ensure it has a high IP (Ingress Protection) rating to protect against splashes.
Integrating Photobiomodulation Into Your Routine
When selecting a panel, look for a combination of 660nm (red) and 850nm (near-infrared) wavelengths. The 660nm light is absorbed by the skin to help with surface-level healing, while the 850nm light penetrates deeper into muscle tissue and joints to reduce systemic inflammation.
Safety is paramount when mixing water and electricity. Never handle an RLT panel while standing in a cold plunge or while dripping wet. The ideal setup involves a wall-mounted panel located three feet away from the tub, allowing you to bask in the light during the “re-warming” phase after your plunge.
Hidden Expenses: Maintenance, Electricity, and Installation
The “sticker price” of your equipment is only the beginning of your investment. To keep your recovery sanctuary running efficiently, you must account for the ongoing costs of power and sanitation.
- Electrical Upgrades: Most luxury saunas and high-powered chillers require a dedicated 20-amp circuit or a 240V outlet. Hiring an electrician to run these lines can cost between $500 and $1,500 depending on your home’s layout.
- Water Filtration: To avoid changing the water every week, you need a 20-micron filter and an ozone generator or UV-C sterilizer. Replacement filters usually cost $20-$40 and should be swapped every 1 to 3 months.
- Energy Consumption: Running a chiller 24/7 to keep water at 40 degrees can add $30 to $60 to your monthly bill. Using an insulated thermal cover on your plunge can cut these costs by nearly 50%.
- Water Treatment: Even with filtration, you will need hydrogen peroxide or specialized non-chlorine shocks to keep the water crystal clear.
The Monthly Reality of Running a Home Spa
Many users overlook the impact of ambient temperature on their operating expenses. If your cold plunge is located in a hot garage, the chiller will work overtime to fight the surrounding heat. Adding a simple radiant barrier or insulating the pipes can significantly reduce the wear and tear on your compressor.
For the sauna, the cost is largely dependent on the pre-heat time. Carbon heaters take longer to reach maximum temperature than ceramic heaters. Expect to spend roughly $1.50 per session in electricity if you are using a standard 2-person infrared unit three times a week.
Common Mistakes When Buying Recovery Equipment
The most frequent error is prioritizing aesthetics over technical specifications. A beautiful wooden tub that lacks proper insulation will sweat profusely, leading to mold growth on your floors and a chiller that never stops running.
Critical Warning: Never buy a sauna without verifying its EMF and ELF ratings. High-EMF heaters can negate the health benefits of the sauna by exposing your body to unnecessary electromagnetic stress during your recovery window.
Why Cheap Components Can Cost You More Later
A low-quality chiller is often loud enough to disturb your neighbors and lacks the power to drop the temperature quickly after someone has used the tub. A “hot” body entering a 40-degree plunge will raise the water temperature by several degrees instantly; a professional-grade chiller will recover that temperature in minutes, whereas a cheap unit may take hours.
Insulation quality is the silent hero of a recovery setup. In saunas, thin walls lead to massive heat loss, forcing the heaters to run at 100% capacity the entire time. Look for double-walled construction with non-toxic glues to ensure you aren’t breathing in chemical off-gassing while you sweat.
Planning Your Layout: Maximizing Small Spaces
You don’t need a 5,000-square-foot home to build a professional recovery zone. Most dual setups can fit comfortably within a 10×10 area, provided you plan for drainage and airflow.
- Floor Load Capacity: A filled 100-gallon cold plunge weighs over 900 pounds. Always verify that your subfloor can handle concentrated weight, especially if you are installing on a second floor or a wooden deck.
- Ventilation Requirements: Infrared saunas produce dry heat, but the moisture from your body and the nearby cold plunge can create humidity issues. Install a high-CFM exhaust fan to prevent peeling paint or mold in confined spaces.
- Drainage Solutions: You will eventually need to drain the plunge for deep cleaning. Position the tub near a floor drain or ensure you have a submersible pump with a hose long enough to reach the nearest sink or outdoor area.
- Clearance for Electronics: Keep the sauna control panel and any RLT equipment away from the “splash zone” of the cold plunge to prevent short-circuiting.
Designing the Ultimate 10×10 Recovery Zone
When arranging the room, place the sauna and the cold plunge at opposite ends if possible. This prevents the heat from the sauna from fighting the cooling efforts of the chiller. Rubber gym flooring is an excellent choice for this area because it provides grip when wet and protects the underlying floor from the heavy weight of the equipment.
If space is extremely tight, consider a vertical layout for your red light therapy. Wall-mounted panels take up zero floor space and can be positioned to hit your back while you stand between the two units. Ensure there is a dedicated “dry zone” with a bench for changing and towel storage to keep the rest of the room organized.
Expert Perspective: Professional Perspective on Contrast Therapy Setup
In my professional experience, I have seen dozens of clients try to save money by purchasing “off-brand” chillers or portable steam tents, only to replace them within six months. My primary advice is always: Buy once, cry once. A high-quality chiller with a titanium heat exchanger will last a decade, whereas the cheaper aluminum versions will corrode from the water treatments within two seasons. If your budget is tight, I always recommend spending the bulk of your money on a high-end cold plunge chiller and opting for a simpler, well-insulated infrared sauna, as the chiller is the component most likely to fail under heavy use.
Frequently Asked Questions
Standard RLT panels should not be used inside a sauna due to heat-sensitive electronics. Use them in the room or look for sauna-specific models.
How much does a combined setup increase my monthly electric bill?
Expect an increase of $40 to $80 per month, depending on how often you heat the sauna and your local utility rates.
Is it cheaper to buy a bundle or separate units?
Bundles often save $500-$1,000 on shipping and provide a cohesive look, but separate units allow you to pick the best-in-class tech for each modality.
Do I need a plumber to install a home cold plunge?
Most modern units are “plug-and-play.” You only need a garden hose to fill them and a nearby drain or pump to empty them.
What is the most expensive part of a cold plunge and sauna setup?
The chiller unit for the cold plunge and the wood quality/heater type for the sauna are the primary cost drivers.