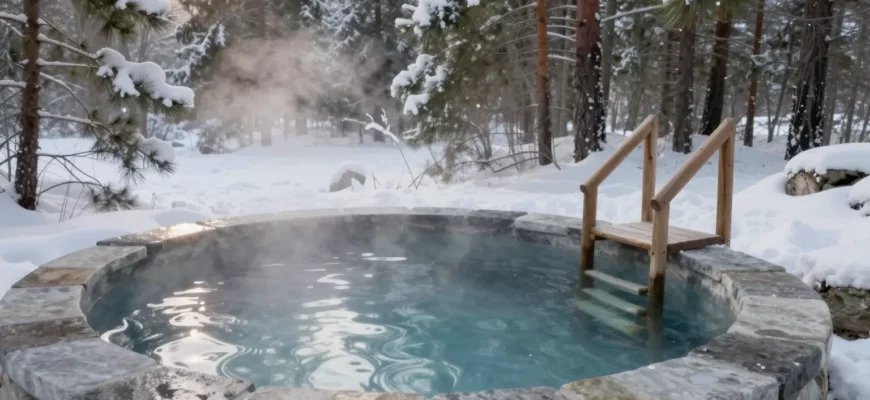
- Understanding the Basics: What is a Cold Plunge Pool?
- Why Athletes and Biohackers are Diving In
- The Mechanics of Recovery: How Does a Cold Plunge Pool Work?
- The Cooling Cycle: From Ambient to Arctic
- Budgeting for the Freeze: How Much Does a Cold Plunge Pool Cost?
- From Budget Tubs to Luxury Spas
- Taking the DIY Route: The Actual Cost to Build a Cold Plunge Pool
- Essential Components for a Home-Built Setup
- Mastering the Dip: Staying Safe After a Cold Plunge
- Avoiding the Afterdrop and Common Pitfalls
- Frequently Asked Questions
Understanding the Basics: What is a Cold Plunge Pool?
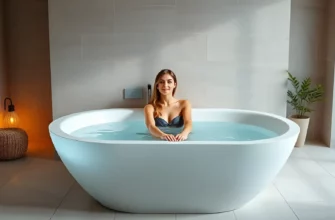
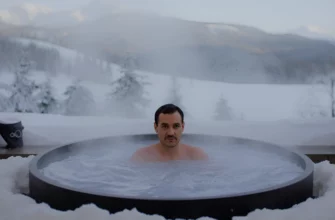
A cold plunge pool is more than just a tub filled with chilly water; it is a precision-engineered recovery tool designed to maintain specific, low temperatures for therapeutic purposes․ Unlike a standard bathtub that loses heat rapidly, these dedicated vessels use advanced insulation and cooling technology to provide a consistent environment for cold water immersion․ They have transitioned from elite athletic training rooms to backyard patios, serving as a primary modality for physical and mental reset․
In the modern wellness landscape, the cold plunge has evolved into a sophisticated appliance․ While a traditional ice bath requires lugging heavy bags of ice and constant monitoring, a dedicated plunge pool is “always-ready,” allowing users to step into temperatures ranging from 39°F to 55°F at any moment․ This consistency is what separates a casual soak from a disciplined recovery protocol, ensuring the body experiences a genuine physiological shift rather than just a brief shiver․
Why Athletes and Biohackers are Diving In
The surge in popularity isn’t merely a trend; it’s rooted in the pursuit of systemic resilience․ Athletes utilize these pools to manage the inflammatory response following high-intensity training, essentially using the cold to “reset” the vascular system․ By forcing rapid vasoconstriction, the body efficiently moves metabolic waste away from muscle tissue, which is the primary mechanism for how to reduce inflammation after a grueling workout․
Biohackers, on the other hand, often focus on the neurological impact․ The immediate shock of the water triggers a massive release of norepinephrine, a neurotransmitter that sharpens focus and elevates mood for hours after the session․ This “cold shock” also provides a unique challenge to the nervous system, helping individuals build mental grit․ Many users find that regular exposure makes them more resilient to daily stressors, effectively toughening the mind through a controlled physical challenge․ While the initial sensation of muscle soreness may diminish, the long-term cognitive benefits often become the main reason for continued use․
The Mechanics of Recovery: How Does a Cold Plunge Pool Work?
The magic of a cold plunge pool lies in its ability to defy ambient temperatures, staying ice-cold even in the heat of summer․ This is achieved through a closed-loop system that continuously moves water through a cooling and cleaning cycle․ Rather than relying on the thermal mass of ice, the pool uses a mechanical chiller to strip heat from the water and a pump to keep that water moving, preventing the “thermal layer” that usually forms around the skin during a still soak․
Modern units integrate filtration and sanitation directly into the plumbing․ This ensures that the water remains crystal clear and safe for skin contact over several months of use․ By combining high-flow pumps with micron-level filters, these systems remove hair, skin cells, and debris, while secondary sanitation systems like Ozone or UV-C light neutralize bacteria and viruses without the heavy chemical smell of a traditional swimming pool․
- Extraction: The pump pulls water from the tub through a suction fitting, usually located at the bottom to capture the densest, coolest water․
- Filtration: Water passes through a 20 to 50-micron pleated filter to remove physical particulates and maintain clarity․
- Sanitation: The filtered water moves through an Ozone generator or UV-C chamber, which kills organic pathogens at a molecular level․
- Cooling: The clean water enters the heat exchanger of the chiller, where a refrigerant gas absorbs the heat from the water and exhausts it into the air․
- Return: The chilled, purified water is pumped back into the tub, often through a jet that creates slight turbulence to enhance the cooling effect on the user․
The Cooling Cycle: From Ambient to Arctic
The heart of the system is the water chiller, which functions similarly to an air conditioner or refrigerator but is optimized for liquid․ Most high-end home units utilize a 1/4 HP to 1/2 HP chiller, capable of dropping water temperature by 10 to 15 degrees per hour․ Maintaining water temperature is a matter of thermal efficiency; well-insulated tubs require the chiller to run far less frequently, saving on electricity and extending the life of the compressor․
Clean water systems are equally critical for the “set it and forget it” lifestyle․ Without proper circulation and sanitation, standing cold water can become a breeding ground for biofilm․ By utilizing Ozone injection, the system oxidizes contaminants much faster than chlorine alone, resulting in water that feels “softer” on the skin and lacks the harsh chemical odors associated with public pools․ This allows the user to focus entirely on the immersion experience rather than maintenance chores․
Budgeting for the Freeze: How Much Does a Cold Plunge Pool Cost?
Entering the world of cold immersion requires a clear understanding of the financial landscape․ Prices vary wildly based on the materials used, the power of the cooling unit, and the sophistication of the filtration system․ While a basic setup might cost a few hundred dollars, a professional-grade, all-in-one unit can rival the cost of a small car․ It is helpful to view this as a long-term investment in health rather than a one-time purchase, as the durability of the components determines the total cost of ownership over time․
Beyond the initial sticker price, prospective owners must account for operational costs․ A standard chiller setup will typically add $15 to $30 to your monthly electricity bill, depending on your local rates and how cold you keep the water․ Additionally, you should budget for replacement filter cartridges and water conditioners, which generally cost about $100 to $150 per year․ Investing in a highly insulated cover is the single best way to reduce these ongoing expenses․
| Category | Price Range | Typical Features | Best For |
|---|---|---|---|
| Entry-Level Inflatable | $500 – $1,500 | Drop-stitch fabric, portable, basic 1/4 HP chiller․ | Renters or those with limited space․ |
| Mid-Range DIY/Hybrid | $2,000 – $4,000 | Stock tank or modified freezer, powerful external chiller․ | Hands-on users wanting high performance for less․ |
| Luxury All-in-One | $5,000 – $10,000 | Acrylic or wood finish, integrated plumbing, smartphone apps․ | Home gyms and users prioritizing aesthetics․ |
| Commercial Grade | $12,000 – $20,000+ | Stainless steel, rapid cooling, high-volume filtration․ | Spas, pro-sports facilities, and high-traffic gyms․ |
From Budget Tubs to Luxury Spas
Inflatable options have revolutionized the market, offering a surprisingly rigid experience thanks to high-pressure drop-stitch technology․ These units are excellent for those who may need to move their setup or want a lower barrier to entry․ However, the long-term durability of inflatable PVC is lower than hard-shell alternatives, and they often struggle to maintain temperatures in extreme outdoor heat without additional insulation wraps․
On the higher end, premium units offer a “furniture-grade” appearance that blends into home interiors․ These often feature 316-grade stainless steel interiors, which are naturally antimicrobial and incredibly resistant to corrosion․ While the price tag is significant, these units are built to last decades and often include robust warranties that cover the expensive chiller and pump components․ For those who plan to plunge daily, the reliability of a commercial-grade motor is often worth the premium․
Taking the DIY Route: The Actual Cost to Build a Cold Plunge Pool
For the mechanically inclined, building a custom setup is a badge of honor and a significant money-saver․ The most common DIY paths involve converting a galvanized steel stock tank or a chest freezer into a dedicated plunge․ While the upfront cost to build a cold plunge pool is much lower—often landing between $800 and $1,800—it requires a commitment to “sweat equity․” You will need to handle the plumbing, waterproofing, and electrical safety yourself, which demands a high level of attention to detail․
The DIY route also allows for modularity․ If your pump fails, you can replace just the pump for $100 rather than dealing with a proprietary all-in-one system’s repair service․ However, the biggest challenge in DIY builds is managing condensation and preventing leaks at the bulkhead fittings․ Using high-quality marine-grade silicone and ensuring all threaded connections are properly taped is non-negotiable for a setup that won’t ruin your flooring or garage․
Essential Components for a Home-Built Setup
To build a reliable system, you cannot cut corners on the life-support components․ The basin is your foundation; many choose 100-gallon stock tanks for their durability, though these require external insulation to be efficient․ If using a chest freezer, sealing the internal seams with JB WaterWeld or Pond Liner is critical to prevent water from reaching the electrical cooling coils, which would create a terminal short circuit․
- The Basin: A 100-150 gallon stock tank or a 14-cubic foot chest freezer․
- Water Chiller: A 1/3 HP or 1/2 HP aquarium chiller (active cooling is better than passive)․
- Circulation Pump: A magnetic drive pump rated for at least 500-800 gallons per hour․
- Filtration: An inline canister filter housing with 20-micron pleated filters․
- Plumbing Kit: 3/4-inch braided vinyl tubing, stainless steel hose clamps, and PVC ball valves․
- Electrical Safety: A dedicated GFCI outlet or adapter is mandatory to prevent electric shock․
By sourcing these DIY cold plunge parts individually, you can often build a system that outperforms entry-level commercial units․ The key is saving money on recovery without sacrificing safety․ For example, spending an extra $50 on a high-quality UV-C clarifier will drastically reduce the amount of time you spend scrubbing the tank, making the DIY experience much more sustainable in the long run․
Mastering the Dip: Staying Safe After a Cold Plunge
Safety in cold water immersion doesn’t end when you climb out of the tub․ In fact, the most dangerous period for your core temperature often occurs 10 to 15 minutes after the session․ This is due to a phenomenon known as “afterdrop,” where the cold blood from your extremities begins to circulate back to your heart and brain as you warm up․ Managing this transition is the difference between a successful recovery session and a miserable, shivering afternoon․
To stay safe, you must respect the “minimum effective dose․” You do not need to sit in 34°F water for 10 minutes to see results․ For most people, two to three minutes at 50°F is more than enough to trigger the desired hormonal and anti-inflammatory responses․ Pushing past your limits doesn’t increase the benefits linearly; it simply increases the risk of hypothermia and significant physical distress․
Critical Warning: Never plunge alone if you are pushing your time or temperature limits․ Always ensure a GFCI (Ground Fault Circuit Interrupter) is used for all electrical components to eliminate the risk of accidental electrocution in the water․
Avoiding the Afterdrop and Common Pitfalls
The best way to handle the post-plunge period is through natural rewarming․ Resist the urge to jump immediately into a steaming hot shower․ This can cause your blood vessels to dilate too quickly, accelerating the afterdrop and potentially causing lightheadedness or fainting․ Instead, pat yourself dry, put on warm layers (including a hat and socks), and move your body gently․ Doing light air squats or a “horse stance” helps your muscles generate heat from the inside out․
- Dry off immediately: Remove all wet clothing as soon as you exit the pool․
- Layer up: Use wool or thermal layers to trap the heat your body is producing․
- Sip warm liquids: A warm tea or room-temperature water helps stabilize your core․
- Avoid alcohol: Alcohol thins the blood and interferes with the body’s thermoregulation․
- Listen to your body: If you are shivering uncontrollably for more than 20 minutes, your session was too long or too cold․
By staying safe after a cold plunge and warming up naturally, you allow your vascular system to do the work it was designed for․ This “metabolic exercise” of rewarming is actually part of the benefit, as your body burns calories to restore its homeostatic temperature․ Consistency over intensity is the golden rule of cold therapy․
In my professional experience working with high-performance athletes, I have found that the “Soberg Principle” is the most sustainable framework for the average person․ I always advise aiming for a total of 11 minutes of cold exposure per week, spread across 3 or 4 sessions․ You don’t need to stay in until you are numb; in fact, the benefits for metabolic health and inflammation plateau quickly after the 3-minute mark․ Consistency beats extreme temperatures every single time․ If you can maintain 55°F every day, you will see far better results than someone who does 39°F once a week and hates every second of it․ Focus on the habit, not the thermometer․
Frequently Asked Questions
For most users, 2 to 5 minutes is the ideal duration․ Physiological benefits like dopamine release and reduced inflammation are triggered within this window, and staying in longer significantly increases the risk of hypothermia without adding much extra benefit․
What is the best temperature for a cold plunge?
The “sweet spot” for most people is between 50°F and 59°F (10°C to 15°C)․ This range is cold enough to trigger the cold-shock response and metabolic benefits while remaining safe enough for regular, daily use․
Is it cheaper to buy or build a cold plunge?
Building a DIY setup usually costs between $1,000 and $2,000, whereas buying a pre-built commercial unit starts at $3,000 and can exceed $10,000․ While DIY is cheaper, buying offers better warranties, integrated aesthetics, and less technical troubleshooting․
Can I just use my bathtub with ice?
You can, but it is highly inefficient․ A standard bathtub is uninsulated, meaning you may need 40-60 lbs of ice to reach 50°F, which is expensive and time-consuming compared to a dedicated chiller system that stays cold 24/7․
How often should I change the water in my plunge pool?
If your pool has a robust filtration and ozone/UV system, you only need to change the water every 3 to 6 months․ Without a filtration system, the water should be drained and replaced every 2 to 3 days to prevent bacterial growth․