- Why Making a Weighted Blanket is the Ultimate DIY Comfort Project
- The Science of Deep Touch Pressure in a DIY Blanket
- Choosing the Best Beads to Make a Weighted Blanket
- Weighted Fillers: From Poly-Pellets to Metal Washers
- Calculating the Safe Weight for Kids and Adults
- Safety First: Making a Weighted Blanket for Children vs Adults
- Step-by-Step: Sewing a Weighted Blanket Like a Pro
- Mastering the Grid: How to Sew Weighted Blanket Channels
- Creative Hacks: Making a Weighted Blanket from Existing Items
- Pillowcases, Duvet Covers, and Stuffed Animals
- The No-Sew Approach: DIY Weighted Blanket for Non-Sewers
- Velcro and Tie Methods for a No-Stitch Blanket
- Troubleshooting and Maintenance: Keeping Your Blanket in Top Shape
- Fixing Bead Shifting Problems and Washing Tips
- Expert Perspective: DIY Sensory Bedding
- Frequently Asked Questions
Why Making a Weighted Blanket is the Ultimate DIY Comfort Project
Creating your own weighted blanket is more than just a weekend sewing task; it is an investment in personalized wellness. While retail versions often come with a high price tag and limited aesthetic choices, a handmade version allows you to control every variable, from the exact heaviness to the breathability of the fabric. You are essentially tailoring a therapeutic tool that fits your specific sensory needs and home decor.
The satisfaction of finishing a project that actively improves your sleep quality is immense. By choosing your own materials, you ensure that the blanket is free from cheap fillers or irritating synthetic fabrics. You can create a piece that feels like a warm hug, specifically calibrated to your body weight, providing a level of comfort that mass-produced items simply cannot match.
The Science of Deep Touch Pressure in a DIY Blanket
The magic behind these blankets lies in a concept known as Deep Touch Pressure (DTP). This gentle, distributed weight stimulates the release of serotonin and melatonin while simultaneously reducing cortisol levels. When you make your own weighted blanket, you are designing a delivery system for this pressure, ensuring it is applied evenly across your body to calm the nervous system.
Proper weight distribution is the most critical factor in achieving a calming effect. If the weight is concentrated in one area, it can cause muscle strain or discomfort rather than relaxation. By sewing individual pockets for the filler, you ensure the weight stays exactly where it belongs, providing a consistent sensory experience that helps ground the body and quiet the mind during high-stress moments or before bed.
Choosing the Best Beads to Make a Weighted Blanket
Selecting the right filler is the most important technical decision you will make. The material you choose dictates the blanket’s drape, noise level, and how easily it can be cleaned. While many beginners reach for whatever is cheapest, seasoned crafters know that the internal medium affects the overall lifespan and “breathability” of the finished product.
High-quality fillers like glass beads offer a low-profile feel that mimics the texture of fine sand, while plastic poly-pellets provide a more textured, “beady” sensation. If you are looking for a more eco-friendly or immediate solution, household items can work, but they come with significant trade-offs in terms of durability and hygiene. Understanding these nuances is key to creating a weighted blanket that lasts for years.
| Filler Material | Pros | Cons | Best For |
|---|---|---|---|
| Glass Micro-Beads | High density (less bulk), silent, excellent heat distribution, hypoallergenic. | Higher cost than plastic, requires very tight stitching to prevent leaks. | Adults, hot sleepers, and professional-looking finishes. |
| Plastic Poly-Pellets | Affordable, widely available, machine washable, durable. | Bulkier than glass, can be noisy when moving, holds more heat. | Children’s blankets and those on a strict budget. |
| Steel Washers | Extremely heavy for their size, very flat profile. | Can be noisy, may rust over time if not stainless, difficult to sew around. | Small lap pads or heavy-duty sensory tools. |
| Dried Rice/Beans | Zero cost if already in the pantry, easy to handle. | Cannot be washed, prone to mold, may attract pests over time. | Temporary prototypes or non-washable lap pads. |
Weighted Fillers: From Poly-Pellets to Metal Washers
When you decide to beads to make weighted blanket projects, glass micro-beads are generally the gold standard. Because they are much smaller and denser than plastic, you need less volume to reach your target weight. This results in a thinner, more flexible blanket that doesn’t feel like a lumpy beanbag. It also allows for better airflow, which is essential if you plan to use the blanket through the summer months.
On the other hand, making a weighted blanket with metal washers or rice is a common “hack” for those who want a heavy feel without ordering specialty supplies. If you go the metal route, always opt for stainless steel to prevent oxidation during washing. If you are making a weighted blanket with rice, understand that this is a “dry clean only” or “spot clean only” item; once those organic grains get wet, they will swell and eventually rot, rendering the blanket useless and potentially unsanitary.
Calculating the Safe Weight for Kids and Adults
Safety is the non-negotiable foundation of this project. A blanket that is too heavy can be restrictive or even dangerous, while one that is too light won’t provide the desired therapeutic benefits. The industry standard is the “10% rule,” which suggests the blanket should weigh roughly 10% of the user’s total body weight, plus an additional pound or two to account for the fabric weight itself.
It is vital to remember that a weighted blanket should never be used as a restraint. The user must be able to remove the blanket independently. This is particularly important for children and the elderly. When you sew a weighted blanket for an adult, you have more leeway with the upper limits of weight, but for younger users, precision in your math is a matter of physical safety.
- The 10% Rule: Multiply the user’s body weight by 0.10 and add 1-2 lbs. (e.g., a 150 lb adult needs a 16-17 lb blanket).
- Toddler Safety: Never use a weighted blanket for children under the age of two or those who lack the motor skills to push it off their face.
- Adult Preferences: While 10% is the baseline, some adults prefer up to 15%, but never exceed 30 lbs for a single-person blanket to avoid respiratory or circulatory issues.
- Weight Distribution: Ensure the total weight is divided equally across the entire surface area, not just concentrated in the center.
Safety First: Making a Weighted Blanket for Children vs Adults
When you make a weighted blanket for children, the stakes are higher. Pediatricians often recommend a stricter adherence to the 10% rule. For a child weighing 50 pounds, a 5-pound blanket is the target. Using a blanket that is too heavy for a child can lead to “learned helplessness” or physical fatigue. Always consult with an occupational therapist before introducing a weighted tool to a child with sensory processing disorders.
Conversely, if you make your own weighted blanket adult sized, you can customize the dimensions to fit a Queen or King bed. However, keep in mind that a full-sized bed blanket that weighs 20 lbs will feel lighter than a small throw blanket that weighs 20 lbs because the weight is spread over a larger area. To maintain the “hug” feel, try to keep the weighted portion focused on the area that actually covers the body, rather than the decorative overhang of the bed.
Step-by-Step: Sewing a Weighted Blanket Like a Pro
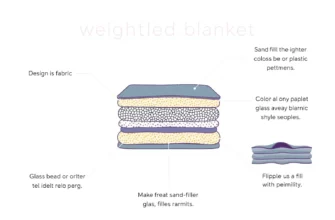
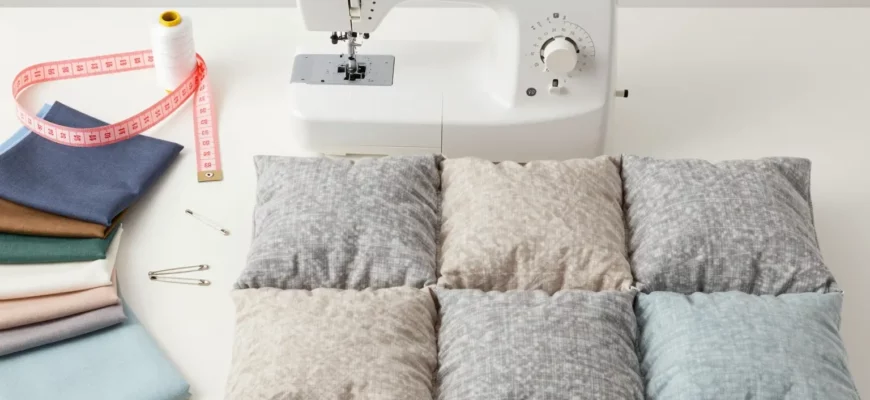
Sewing a weighted blanket requires patience and a heavy-duty needle. You are essentially creating a grid of small pockets, filling each one with a precise amount of beads, and sealing them as you go. This method ensures that the beads don’t all slide to the bottom of the blanket when you sit up. The choice of fabric also matters; breathable cotton is best for temperature regulation, while minky or fleece provides extra tactile comfort.
Before you begin, pre-wash your fabric. This prevents the blanket from shrinking unevenly after you’ve already added the beads. You will also need a digital kitchen scale to ensure every pocket has the exact same amount of filler. Even a slight variation in weight per square can lead to a lopsided blanket that feels uncomfortable over time.
- Calculate and Mark: Determine your total weight and divide it by the number of squares in your grid (typically 4×4 or 5×5 inch squares). Use a fabric marker to draw the grid on the inside of your fabric.
- Sew Vertical Columns: Stitch the vertical lines of your grid first, leaving the top of the blanket open. This creates long channels from the bottom to the top.
- The First Fill: Using a funnel, pour the calculated amount of beads into each vertical channel. Ensure they all drop to the very bottom.
- Horizontal Sealing: Use a zipper foot on your sewing machine to sew across the first horizontal line of your grid, trapping the beads in their individual squares.
- Repeat: Continue filling each channel and sewing horizontal rows until you reach the top.
- Final Closure: Fold the top edges inward and sew a clean topstitch to seal the entire blanket. Double-stitch the perimeter for maximum durability.
Mastering the Grid: How to Sew Weighted Blanket Channels
The grid is the “skeleton” of your project. If you are sewing a weighted blanket for the first time, using a “funnel and tube” method can save hours of frustration. You can use a simple PVC pipe or a rolled piece of cardstock to guide the beads to the bottom of the channels. This prevents the beads from getting caught in your sewing machine’s feed dogs, which can break needles or jam the motor.
When mastering the easy sew weighted blanket technique, keep your squares small. Larger squares (over 6 inches) allow the beads to shift too much within the pocket, creating a “pooling” effect. Smaller squares (4 inches) provide the most consistent pressure. If you are following a pattern like the classic “Sewing with Nancy” weighted blanket, you’ll find that using a walking foot on your machine is a lifesaver for handling the multiple layers of heavy fabric and batting.
Creative Hacks: Making a Weighted Blanket from Existing Items
You don’t always need to start from a raw bolt of fabric. If you are intimidated by the thought of sewing dozens of tiny squares, you can repurpose items you already have at home. These hacks are perfect for creating travel-sized lap pads or budget-friendly versions of the full-sized blanket. They also allow you to test the concept of weighted pressure before committing to a 20-hour sewing project.
The key to these shortcuts is ensuring the “shell” is strong enough to hold the weight. Most standard pillowcases and duvet covers are made of cotton or polyester blends that can handle several pounds of pressure, provided the seams are reinforced. This is a great way to recycle old bedding while creating something highly functional.
Pillowcases, Duvet Covers, and Stuffed Animals
If you are making a weighted blanket from a pillowcase, you are essentially creating a “weighted lap pad.” This is an excellent tool for children to use at a desk or for adults to use while working from home. Simply sew the grid directly onto the pillowcase, fill, and seal. To make weighted blanket from duvet cover materials, you can use the duvet as a pre-sewn bag, but you will still need to stitch the internal grid to prevent the “sack of potatoes” effect where all the beads fall to the corners.
Another popular DIY sensory tool is to turn a stuffed animal into weighted lap blanket or “weighted pal.” To do this, carefully open a seam on the back of a plush toy, remove some of the stuffing, and replace it with a sealed pouch of poly-pellets. This provides the same calming pressure in a form that is portable and discreet for kids who need sensory input in public spaces.
The No-Sew Approach: DIY Weighted Blanket for Non-Sewers
Not everyone has access to a sewing machine, but that shouldn’t stop you from enjoying the benefits of a weighted blanket. No-sew methods focus on using physical fasteners or fabric manipulation to hold the weight in place. While these methods are generally less durable than a sewn version, they are significantly faster to assemble and can be easily adjusted if you decide you want the blanket to be heavier or lighter later on.
The most common no-sew techniques involve “tie blankets” or the use of industrial-strength adhesives. However, be aware that beads are tiny and escape easily. If you are making no sewing weighted blanket with rice or pellets, you must use pre-sealed pouches (like small Ziploc bags or heat-sealed fabric scraps) before placing them inside the blanket layers. This ensures that a single loose thread doesn’t lead to a floor full of beads.
- The Tie-Fleece Method: Use two layers of fleece with fringed edges. Tie the fringes together, leaving a small gap to insert pre-weighted pouches before finishing the knots.
- Velcro Strips: Attach heavy-duty Velcro to the inside of a duvet cover to create removable “channels” for weighted inserts.
- Fabric Glue: While possible, fabric glue is generally not recommended for full-sized blankets as the weight of the beads will eventually pull the bond apart.
- Duct Tape Reinforcement: For a purely functional, non-aesthetic lap pad, duct tape can seal heavy-duty plastic bags containing the filler, which are then tucked into a fleece sleeve.
Velcro and Tie Methods for a No-Stitch Blanket
The most successful make your own weighted blanket no sew strategy involves using a “pocket and pouch” system. By using a no sew diy velcro weighted blanket approach, you can create a series of pockets inside a fleece blanket that close with Velcro. This allows you to take the weighted pouches out whenever the blanket needs to be washed, solving one of the biggest problems with DIY weighted items: the fear of breaking the washing machine.
When using the tie-fleece method, ensure your knots are double-tied and pulled extremely tight. Fleece has a lot of stretch, and as the weight of the beads pulls on the fabric, the gaps between the knots can widen. Using smaller, more frequent ties will provide a more secure perimeter and prevent the internal pouches from shifting or falling out during use.
Troubleshooting and Maintenance: Keeping Your Blanket in Top Shape
A weighted blanket is a high-stress textile. The constant pull of gravity on the seams means that even the best-made blankets can develop issues over time. Common problems include “bead migration,” where the grid stitching fails and beads move into neighboring squares, or simple wear and tear on the outer fabric. Regular inspections are necessary to catch small holes before they become major leaks.
Maintenance also involves knowing how to clean the blanket without damaging your appliances. A 15-pound blanket becomes significantly heavier when wet, which can throw a standard residential washing machine out of balance. Always check your washer’s weight capacity before tossing in a full-sized weighted blanket. For many, taking the blanket to a commercial laundromat with heavy-duty machines is the safest option.
- Seam Reinforcement: If you notice beads shifting, immediately stop using the blanket and re-sew the grid lines with a heavy-duty nylon thread.
- Washing Temperature: Use cold water and a gentle cycle. High heat can melt plastic poly-pellets or damage the fibers of minky and fleece fabrics.
- Drying: Air drying is best. If you must use a dryer, use the “no heat” or “low heat” setting to prevent the filler from warping.
- Outer Covers: Using a removable cover is the best way to extend the life of your blanket, as you only need to wash the cover regularly rather than the heavy interior.
Fixing Bead Shifting Problems and Washing Tips
Fixing bead shifting problems on weighted blanket projects usually requires a seam ripper and a bit of patience. If a horizontal seam has popped, you’ll need to shake all the beads back into their proper squares before re-stitching. To prevent this from happening in the first place, use a shortened stitch length (around 2.0mm) when sewing your grid. This creates more “holds” per inch and makes it much harder for beads to squeeze through.
When making weighted blanket cover accessories, ensure the cover has internal ties. A weighted blanket cover 42×72 how to guide will often suggest sewing ribbons into the corners of the blanket and the inside of the cover. This prevents the heavy blanket from bunching up into a ball inside the cover. Without these ties, the blanket will slide around, making it difficult to spread evenly over your body at night.
Expert Perspective: DIY Sensory Bedding
In my professional experience, the most common failure point in DIY weighted blankets isn’t the choice of beads, but the failure to account for fabric “creep” during the sewing process. When you are moving 15 pounds of material under a sewing machine needle, the top layer of fabric naturally wants to move faster than the bottom layer. I always advise using an excessive number of quilting clips—not pins, which can bend or break—to keep your grid lines perfectly aligned. Furthermore, while the cost-savings of DIY are attractive, never compromise on safety. Never gift a weighted blanket to someone with respiratory issues or a child who cannot move it themselves. Precision in your grid squares is what transforms a “bag of beads” into a legitimate therapeutic tool.
Frequently Asked Questions
Yes, you can use no-sew methods like the tie-fleece technique or industrial-strength Velcro to create pockets for weighted pouches, though these are generally less durable than sewn versions.
What are the best beads to use for a homemade weighted blanket?
Glass micro-beads are the superior choice because they are dense, silent, and provide a smooth texture, while plastic poly-pellets are a more affordable and widely available alternative.
How do I calculate how much weight to add to my DIY blanket?
The standard formula is 10% of the user’s total body weight plus one or two additional pounds to account for the weight of the fabric and batting.
Can I use rice or beans as a filler for a weighted blanket?
While possible, organic fillers like rice or beans cannot be washed and are susceptible to mold, rot, and pests, making them a poor choice for long-term use.
How do I stop the beads from shifting to one side of the blanket?
You must sew a consistent grid or “pocket” system into the blanket, which traps a specific amount of weight in each square and prevents migration.
Is it safe to make a weighted blanket for a baby?
No, weighted blankets are never recommended for infants or toddlers under age two due to the high risk of SIDS, suffocation, and their inability to remove the weight themselves.