- Finding the Best Cold Plunge in DC and Major Urban Hubs
- Top-Rated Wellness Centers for Cold Plunge in SF and DC
- Getting Started: A Comprehensive Cold Plunge Guide for Beginners
- Mastering the Thermal Layer and Initial Immersion
- DIY Engineering: How to Build Your Own Cold Plunge Setup
- From Stock Tanks to Custom Cold Plunge Trailers
- Maintenance Mastery: Keeping Your Cold Plunge All-In and Pristine
- Water Chemistry and Filtration for All-In Systems
- Advanced Cold Plunge Options and Performance Limits
- Pushing Limits: World Records and Elite Equipment
- Staying Safe: Cold Plunge Warnings and Physiological Risks
- Recognizing Your Limits and Avoiding Cold Shock
- Frequently Asked Questions
Finding the Best Cold Plunge in DC and Major Urban Hubs
The wellness landscape in the nation’s capital has shifted from traditional gyms toward high-performance recovery centers․ In Washington DC, the demand for intentional cold exposure has spiked, leading to a surge in dedicated studios that prioritize water purity and precise temperature control․ Whether you are a lobbyist decompressing from a high-stakes week or a marathoner training on the Rock Creek Park trails, finding a reliable spot to submerge is now a fundamental part of the local health circuit․
While the District offers a sophisticated array of options, the trend is equally vibrant in other major hubs․ From the biohacking sanctuaries of the West Coast to the growing recovery communities in the Midwest, urban dwellers are seeking the metabolic and mental clarity that only a sub-50-degree soak can provide․ Understanding what differentiates a premium facility from a standard gym pool is the first step in your cryotherapy journey․
Top-Rated Wellness Centers for Cold Plunge in SF and DC
If you are searching for a cold plunge in DC, locations like Balance Gym or specialized social wellness clubs in neighborhoods like Navy Yard and Georgetown have become the gold standard․ These facilities often pair their cold tubs with infrared saunas, following the Nordic cycle of hot-and-cold therapy․ A professional facility in the District should offer water temperatures maintained between 39°F and 45°F and utilize advanced filtration like ozone or UV-C light to ensure the highest hygiene standards․
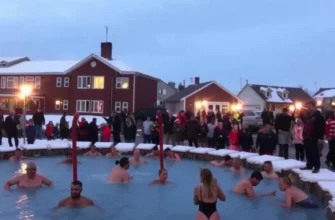
Moving across the country, a cold plunge in SF (San Francisco) often looks like a high-tech biohacking lab․ Facilities in the Mission District or SoMa integrate ice baths with neuro-feedback and sensory deprivation tanks․ In these hubs, the focus is on the data—tracking heart rate variability (HRV) before and after immersion․ Similarly, if you are looking for a cold plunge in STL (St․ Louis) or a cold plunge in Bend, Oregon, the scene is shifting toward community-based “social saunas” where the ice bath is the centerpiece of a communal recovery experience․
When evaluating a professional facility, always ask about their filtration turnover rate․ A high-quality studio will cycle their water through a 20-micron filter at least several times per hour․ This ensures that even in high-traffic urban centers, the water remains crystalline and safe for every user․
Getting Started: A Comprehensive Cold Plunge Guide for Beginners
Entering freezing water is a psychological battle as much as a physical one․ To get the most out of your first session, you must understand the physiological shift that occurs the moment your skin hits the water․ This transition, known as the cold stress response, can be managed through specific protocols that turn a moment of panic into a period of profound meditative clarity․
Safety is paramount for beginners․ Never plunge alone and always ensure you have a clear exit strategy․ The goal is not to endure the longest time possible but to trigger a hormonal response that releases norepinephrine and jumpstarts your metabolism․ For most people, the magic happens within the first three minutes; anything beyond that offers diminishing returns for the average user․
- Pre-Plunge Breathwork: Before entering the water, perform three minutes of box breathing (4 seconds in, 4 seconds hold, 4 seconds out, 4 seconds hold)․ This stabilizes the nervous system and prepares you for the initial gasp reflex․
- The Controlled Entry: Step into the tub and sit down in one fluid motion․ Avoid “testing” the water with your toes, as this only increases the psychological barrier․ Submerge up to your collarbone immediately․
- Exhale Through the Shock: As the cold hits your chest, your body will want to hyperventilate․ Force a long, slow exhale through pursed lips to signal to your brain that you are not in immediate danger․
- Find the Stillness: Once submerged, stay as still as possible․ Moving creates “forced convection,” which breaks the thin layer of warmth your body naturally produces, making the experience significantly colder․
- The Safe Exit: After 2-3 minutes, stand up slowly․ Your blood pressure may shift, so take a moment to find your footing before stepping out of the tub․
Mastering the Thermal Layer and Initial Immersion
One of the most important cold plunge basics is the concept of the thermal layer․ When you remain perfectly still in a still-water bath, your body heat slightly warms the water immediately touching your skin․ This micro-layer of insulation acts as a buffer against the biting cold․ If you stir the water or use a tub with a constant jet stream, you strip this layer away, making 45°F feel like 35°F․
For those looking to take their practice deeper, some enthusiasts utilize a cold plunge snorkel․ While it looks unusual, a snorkel allows you to submerge your face and head—where a high concentration of cold receptors and the vagus nerve are located—without compromising your ability to breathe rhythmically․ This can lead to a more intense vagus nerve stimulation, though it should only be attempted by those who have mastered the standard cold plunge directions and feel comfortable with total immersion․
DIY Engineering: How to Build Your Own Cold Plunge Setup
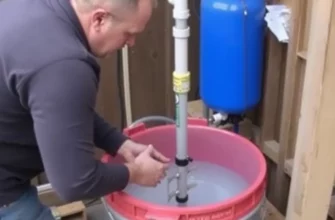
For many, the cost of a daily studio visit in DC or SF becomes prohibitive, leading to the “DIY” movement․ The cold plunge diy reddit community has become a massive repository of engineering knowledge, where users share everything from chest freezer conversions to elaborate backyard spa builds․ Building your own setup requires a balance of electrical safety, structural integrity, and water chemistry management․
The location of your build is the first major decision․ A cold plunge room inside your home requires dedicated floor drainage and waterproof walling (like FRP panels) to prevent mold․ Conversely, a cold plunge deck build must account for the immense weight of water․ A standard 100-gallon tub weighs approximately 834 pounds plus the weight of the occupant, meaning your deck joists may require additional blocking or sistering to prevent structural failure․
| Build Type | Pros | Cons | Best For |
|---|---|---|---|
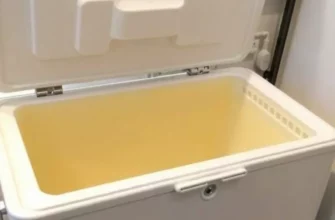
| Chest Freezer | Excellent insulation, cheap to buy․ | Requires extensive sealing (JB Weld), electrical risks․ | Budget DIYers with technical skills․ |
| Stock Tank | Indestructible, easy to clean․ | Zero insulation; requires a high-powered chiller․ | Outdoor setups in moderate climates․ |
| Cold Plunge Trailer | Mobile, great for events or groups․ | High cost, complex suspension needs․ | Professional trainers and recovery brands․ |
| Custom Deck Build | Aesthetic, adds property value․ | Permanent, requires permits and carpentry․ | Homeowners with a dedicated wellness space․ |
From Stock Tanks to Custom Cold Plunge Trailers
If you are looking for a mobile solution, the cold plunge trailer has become a popular niche for “pop-up” wellness events․ These setups typically involve a reinforced utility trailer, a high-output 1HP chiller, and a heavy-duty plastic or metal tank․ Weight distribution is critical here; ensure the tank is centered over the axle to prevent swaying while driving․ For those building a stationary unit, downloading a cold plunge steps pdf can provide the necessary dimensions for building safe, slip-resistant stairs, which are vital when your feet are numb and your coordination is slightly impaired․
When setting up a cold plunge all-in system, the “Outlaw” or “Werner” styles often refer to rugged, industrial-grade components that can withstand the elements․ Whether you are using a basic stock tank or a high-end insulated tub, the goal of a proper cold plunge set up is consistency․ If your insulation is poor, your chiller will run constantly, shortening its lifespan and spiking your electricity bill․ Always prioritize a well-insulated lid; 80% of heat gain occurs through the surface of the water․
Maintenance Mastery: Keeping Your Cold Plunge All-In and Pristine
Maintaining a cold plunge is more complex than a standard hot tub because the cold environment suppresses some bacterial growth but makes others harder to kill․ You must manage the cold plunge po—the potential oxidation and pH levels—to keep the water skin-safe․ Without a rigorous maintenance protocol, your refreshing dip can quickly become a haven for biofilm and contaminants․
- Do: Use a 20-micron pleated filter and change it every 2-4 weeks depending on usage․
- Do: Maintain a pH level between 7․2 and 7․6 to prevent skin irritation and equipment corrosion․
- Do: Shower before every plunge to remove body oils, lotions, and sweat․
- Don’t: Use standard pool chlorine in high doses; it can be too harsh for a small volume of water․
- Don’t: Forget to test the water weekly using high-quality reagent strips or a digital tester․
- Don’t: Leave the tub uncovered; debris and sunlight accelerate algae growth․
Water Chemistry and Filtration for All-In Systems
Modern cold plunge support systems often include an ozone generator or a UV-C clarifier․ Ozone is a powerful oxidizer that kills pathogens on contact and then reverts back to oxygen, leaving no chemical residue․ This is ideal for those who want a more natural experience․ However, ozone works best when paired with a small amount of sanitizer, such as hydrogen peroxide (35% food grade), to provide a residual kill factor in the water․
If you notice the water becoming cloudy or “slick” to the touch, you likely have a biofilm buildup․ This requires a deep clean․ Drain the tub, scrub the surfaces with a diluted vinegar solution, and flush the internal plumbing of your chiller․ Regular maintenance ensures that your cold plunge maintenance routine takes only 10 minutes a week rather than hours of troubleshooting later․ A properly balanced tub should only need a full water change every 3 to 6 months if the filtration system is robust․
Advanced Cold Plunge Options and Performance Limits
Once you have mastered the basics, you may find yourself looking toward the elite end of the spectrum․ The high-performance community is constantly pushing the boundaries of duration and temperature․ While the average person benefits most from 11 minutes of total exposure per week, the cold plunge world record for duration—currently held by individuals who have spent over 2․5 hours submerged in ice—serves as an extreme testament to human adaptation․
For the serious practitioner, the market offers high-end cold plunge options that far exceed the capabilities of a DIY chest freezer․ Brands like Tyb, THB, and the specialized Werner models offer integrated “chiller-and-filter” stacks that can hold water at a steady 34°F even in 100-degree heat; These units are designed for 24/7 operation and often feature smartphone integration to monitor water quality and temperature remotely․
Pushing Limits: World Records and Elite Equipment
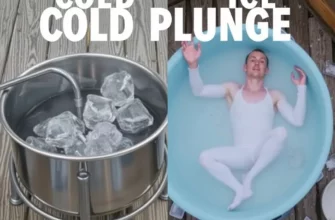
When comparing high-end models like the cold plunge tyb or the cold plunge thb, look for the cooling ramp rate․ A high-quality unit should be able to drop the water temperature by 5-10 degrees per hour․ This is vital if you have multiple people using the tub in a short period, as body heat will naturally raise the water temperature․ If you find yourself traveling and away from your primary rig, a cold plunge substitute can be as simple as a hotel bathtub filled with 4-5 bags of convenience store ice․ While not as precise, it maintains the habit and provides the necessary cold stimulus․
Staying Safe: Cold Plunge Warnings and Physiological Risks
Cold immersion is a powerful tool, but it is not without significant risks․ The “cold shock response” can cause an involuntary gasp, which, if your face is submerged, can lead to drowning․ Furthermore, people with underlying cardiovascular issues must be extremely cautious․ The cold causes immediate vasoconstriction, which spikes blood pressure and puts a sudden, intense load on the heart․
Common Mistakes to Avoid:
The “Afterdrop” Hazard: Many people make the mistake of jumping into a hot shower immediately after a plunge․ This causes peripheral vasodilation, sending cold blood from your limbs back to your core too quickly, which can cause fainting or heart arrhythmias․
Hyperventilating: Rapid, shallow breathing increases the risk of passing out․ Always focus on the exhale․
Plunging for Ego: Staying in until you are shivering uncontrollably is not a badge of honor; it is a sign of mild hypothermia․
Recognizing Your Limits and Avoiding Cold Shock
To stay safe after a cold plunge, the best practice is to dry off and move your body naturally․ Use the “horse stance” or light calisthenics to generate heat from the inside out․ This allows your core temperature to stabilize slowly․ If you are following a specific protocol like the cold plunge weston method or other community-led safety standards, remember that the “minimum effective dose” is usually enough․ You do not need to suffer to see results․
Always heed the specific cold plunge warnings: if you feel a “thumping” in your temples, extreme dizziness, or if your skin turns a mottled grey/white, exit the water immediately․ These are signs that your body’s vasoconstriction is reaching a critical limit․ Consult a physician before starting a cold practice if you have a history of Raynaud’s disease, high blood pressure, or any heart condition․
In my professional experience as a recovery specialist, I have seen too many people treat cold plunging like an endurance sport․ I always advise my clients that consistency beats intensity every single time․ You will gain more metabolic benefit from three sessions a week at 50°F than one “hero” plunge at 34°F that leaves you shivering for hours․ I emphasize the thermal layer as a natural defense mechanism; learning to sit with the discomfort rather than fighting it is where the true neurological growth happens․ Don’t chase the clock—chase the calm․
Frequently Asked Questions
Top-rated spots include Balance Gym, Hope Floats, and various social wellness clubs in the Navy Yard and Georgetown areas that offer filtered, temperature-controlled tubs․
How do I maintain my cold plunge water quality?
You must use a 20-micron filter, maintain a pH of 7․2-7․6, and use an oxidizer like ozone or hydrogen peroxide to keep the water free of bacteria and biofilm․
Is a DIY Reddit cold plunge build actually safe?
They can be safe if you properly seal the unit with food-grade epoxy, use a GFCI outlet for all electronics, and ensure the unit is unplugged while you are inside․
What is the thermal layer in a cold plunge?
The thermal layer is a thin envelope of water warmed by your body heat that forms around your skin; staying still preserves this layer, making the cold more tolerable․
How long should I stay in a cold plunge for the first time?
For your first session, aim for 1-2 minutes at a temperature between 50°F and 55°F to allow your body to adapt to the cold shock response safely․
What are the main cold plunge warnings I should know?
Avoid plunging if you have heart disease or high blood pressure, never plunge alone, and be wary of the “afterdrop” effect where your core temperature continues to fall after exiting․