- Can You Really Turn Your Bathtub Into a Cold Plunge?
- Evaluating Your Current Tub for Cold Therapy
- Choosing Your Method: From Budget Ice Baths to High-End Chillers
- The Reality of Making Ice for a Cold Plunge Every Day
- The Step-by-Step Guide to a Permanent Bathtub Conversion
- Plumbing Your Tub with an External Chiller
- Converting a Chest Freezer: The Deep Freeze Alternative
- Sealing and Sanity: Making a Freezer Water-Tight
- Can You Turn Your Hot Tub Into a Cold Plunge?
- Modifying Inflatable Spas for Ice Baths
- Maintenance Secrets: Keeping the Water Clean Without Draining Daily
- Filtration Systems for DIY Setups
- Mistakes to Avoid When Building Your Home Setup
- Electrical Safety and GFCI Protection
- Frequently Asked Questions
Can You Really Turn Your Bathtub Into a Cold Plunge?
Converting a standard household bathtub into a functional cold plunge is entirely possible, but the approach differs significantly depending on whether you want a temporary chill or a permanent, temperature-controlled sanctuary. Most people begin by simply dumping bags of ice into their evening bath, yet they quickly realize that the logistics of hauling 40 pounds of ice daily is neither sustainable nor cost-effective.
To turn your bathtub into a cold plunge effectively, you must bridge the gap between basic ice baths and dedicated cryotherapy hardware. A permanent conversion involves integrating a mechanical chiller and a filtration loop, essentially treating your bathroom tub like a high-end spa. While the porcelain or acrylic surface of a standard tub is well-suited for holding water, its lack of built-in insulation means the surrounding air will constantly fight to warm your water back up to room temperature.
Evaluating Your Current Tub for Cold Therapy
Before you purchase a single fitting or a pump, you need to look at the physical architecture of your bathroom. Most standard alcove tubs are 60 inches long and roughly 14 to 16 inches deep, which is sufficient for a seated soak but may not allow for full submerged shoulder coverage for taller individuals. If you are serious about making your bathtub a cold plunge, measure the internal water volume to determine the cooling capacity needed for a potential chiller.
Standard indoor plumbing is designed for drainage, not for the continuous recirculation required by a professional-grade cold plunge. To maintain consistent temperatures, you will need to account for the fact that a standard tub has no built-in intake or return ports. This means your DIY setup will likely involve hoses draped over the side of the tub, which requires a thoughtful strategy for preventing water damage to your bathroom floor caused by condensation or minor splashes.
Choosing Your Method: From Budget Ice Baths to High-End Chillers
The path you choose depends entirely on your budget, your technical skill level, and how often you plan to plunge. A manual ice setup is the lowest barrier to entry, while a dedicated chiller system offers a “set it and forget it” experience that mirrors professional athletic facilities.
| Method | Initial Cost | Daily Effort | Temperature Control | Best For |
|---|---|---|---|---|
| Manual Ice Method | $10 ⸺ $50 | High (Hauling Ice) | Manual / Inconsistent | Occasional users |
| DIY Chiller Conversion | $500 ー $1,200 | Low (Automatic) | Precise (Digital) | Daily practitioners |
| Chest Freezer Build | $300 ー $800 | Medium | Very Precise | Garage/Outdoor setups |
| Modified Hot Tub | $400 ⸺ $900 | Low | Automatic | Owners of existing spas |
The Reality of Making Ice for a Cold Plunge Every Day
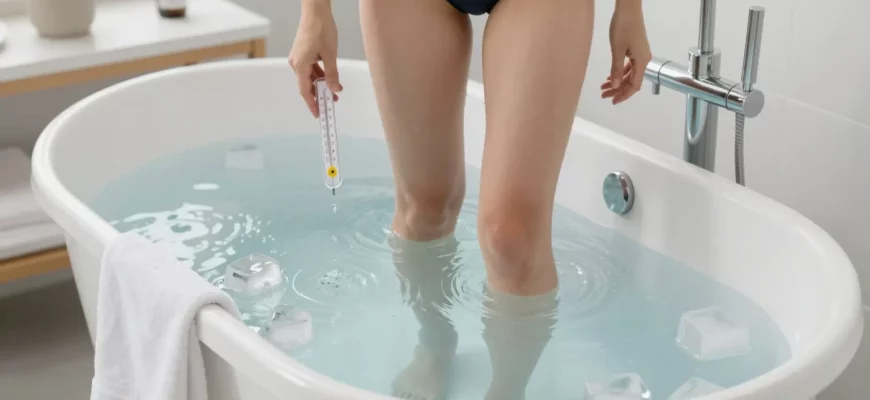
Relying on bagged ice from the grocery store is the most common mistake beginners make. At $3 to $5 per bag, and requiring at least 4 to 5 bags to drop a standard tub from 65°F to a therapeutic 45°F, you could easily spend $600 a month just on frozen water. This makes the “budget” option the most expensive choice over a six-month period.
To make ice for a cold plunge more sustainably, many DIY enthusiasts pivot to large silicone molds or even plastic frozen water bottles. While this reduces the financial drain, it requires significant freezer space and a strict rotation schedule. If you want to keep a cold plunge cold without the logistical nightmare, investing in a 1/4 HP or 1/2 HP water chiller is the only way to ensure the water is ready the moment you wake up.
The Step-by-Step Guide to a Permanent Bathtub Conversion
If you have decided to move past the ice-hauling phase, a permanent conversion using an external chiller is the gold standard for indoor setups. This method uses a submersible pump inside the tub to push water through an external chiller and back into the tub via a return hose. It requires no permanent drilling into your tub, making it ideal for renters or those who still want to use the tub for hot baths occasionally.
- Source Your Components: You will need a water chiller (at least 1/3 HP for most tubs), a submersible utility pump rated for at least 500 GPH, and 3/4-inch reinforced PVC tubing.
- Set Up the Filtration Loop: Connect the intake hose to your submersible pump. Place the pump at the opposite end of the tub from where the chilled water will return to ensure proper circulation.
- Install an Inline Filter: Before the water reaches the chiller, install a 20-micron sediment filter to catch hair and skin cells, which can clog the delicate heat exchanger inside the chiller.
- Connect the Chiller: Run the tubing from the filter to the “In” port of the chiller, and run a second tube from the “Out” port back into the tub.
- Secure the Hoses: Use heavy-duty suction cups or custom acrylic clips to keep the hoses from flopping out of the tub and flooding your bathroom.
- Electrical Safety: Plug all components into a GFCI-protected outlet. Never enter the water while the chiller or pump is actively running unless you have confirmed the circuit is grounded and protected.
Plumbing Your Tub with an External Chiller
The most technical aspect of this build is managing the “head height”—the vertical distance the pump must push the water. Most aquarium-style chillers are not designed for high pressure, so keeping the chiller on a small stand at the same level as the tub rim is highly recommended. This reduces the strain on the pump and ensures a consistent flow rate.
When you use a garden hose to plumb a cold plunge, ensure you are using “drinking water safe” hoses to avoid leaching lead or chemicals into your water. A bypass loop is also a smart addition; this allows you to disconnect the chiller for cleaning without draining the entire tub. By using quick-connect fittings, you can revert your bathroom back to its original state in less than five minutes.
Converting a Chest Freezer: The Deep Freeze Alternative
The “Chest Freezer Cold Plunge” has become a cult favorite in the biohacking community because freezers are naturally insulated and designed to maintain sub-freezing temperatures. However, this is a “high-risk, high-reward” project. A freezer is not designed to hold the lateral pressure of several hundred pounds of water, nor is it designed to be an electrical device that humans sit inside.
- DO: Unplug the unit completely before every single use. This is the most critical safety rule.
- DO: Seal every interior seam with marine-grade sealant (like Loctite Marine or JB WaterWeld) to prevent water from reaching the cooling coils and causing a short.
- DONT: Use a standard freezer without a temperature controller like an Inkbird. Without it, the water will eventually turn into a solid block of ice.
- DONT: Forget to check the weight capacity of your floor. A 14-cubic foot freezer filled with water can weigh over 1,000 pounds.
Sealing and Sanity: Making a Freezer Water-Tight
The interior of a chest freezer is usually made of thin aluminum or plastic with seams at the corners. To convert a deep freezer into a cold plunge, you must be meticulous with your waterproofing. Apply at least three layers of sealant to every joint, allowing a full 24 hours of cure time between applications. Any pinhole leak will allow water to seep into the insulation, leading to rust and eventual mechanical failure.
Temperature management in a freezer setup is handled by an external thermostat. You plug the freezer into the thermostat, and the thermostat into the wall. A probe sits in the water, and when the temperature rises above your set point (e.g., 42°F), the controller kicks the freezer on. This creates a highly efficient cooling system that costs pennies a day to operate compared to the high energy draw of a dedicated water chiller.
Can You Turn Your Hot Tub Into a Cold Plunge?
If you have an old hot tub or an inflatable spa like a Saluspa, you are already halfway to a professional cold plunge. These units already have the plumbing, filtration, and pumps built-in. The challenge is that hot tub heaters are designed to move water in one direction: up. To turn a hot tub into a cold plunge, you must either bypass the heater or integrate a chiller into the existing plumbing lines.
For inflatable spas, the process is surprisingly simple. Most use standard 1.5-inch or 2-inch threaded connectors. You can buy adapters that allow you to tap into the existing pump lines and divert the water through an external chiller. This allows you to use the spa’s built-in bubble jets during your cold soak, which breaks up the “thermal layer” of warm water that forms around your skin, making the plunge feel significantly colder.
Modifying Inflatable Spas for Ice Baths
Inflatable spas are notorious for poor insulation. If you are adding a chiller to a Saluspa or similar unit, you must insulate the bottom of the tub with 1-inch thick foam boards to prevent the cold from leaching into the ground. Additionally, using a heavy-duty thermal cover is mandatory; without it, your chiller will run 24/7 trying to fight the ambient heat, drastically shortening its lifespan.
Maintenance Secrets: Keeping the Water Clean Without Draining Daily
One of the biggest hurdles in a DIY cold plunge is water chemistry. Because you are sitting in the water at low temperatures, the water doesn’t “funk” as quickly as a hot tub, but skin cells, oils, and sweat will still accumulate. If you don’t want to drain your tub every three days, you need a sanitation strategy.
- Mechanical Filtration: Use a 50-80 GPH pump with a pleated polyester filter to remove physical debris.
- Ozone Therapy: Small, portable ozone generators can be timed to run for 15 minutes after each plunge to kill bacteria.
- UV-C Sterilization: An inline UV-C light is highly effective at neutralizing pathogens without the use of harsh chemicals like chlorine.
- Non-Chlorine Shock: Use an oxidizer like potassium monopersulfate once a week to break down organic contaminants.
- Pre-Plunge Rinse: The most effective way to keep water clean is to shower before you enter the plunge to remove lotions and skin oils.
Filtration Systems for DIY Setups
In a DIY environment, you are often working with limited space. A “canister filter” designed for aquariums or small pools is the best choice for a bathtub conversion. These filters sit outside the tub and can be easily hidden inside a small cabinet or decorative box. Remember that cold water is denser and harder to move, so your pump needs enough “head pressure” to push that cold water through the filter media effectively.
Mistakes to Avoid When Building Your Home Setup
The most common DIY failure isn’t the cooling—it’s the collateral damage. When you turn a deep freezer into a cold plunge or plumb a chiller to a tub, you are dealing with extreme temperature differentials. This creates condensation. If you have a DIY setup in a carpeted room or on a wood floor without a waterproof barrier, you will likely experience mold or rot within the first six months.
Warning: Always place a heavy-duty pond liner or a rubber gym mat underneath your setup to catch condensation “sweat” and the inevitable drips that occur when you exit the tub.
Electrical Safety and GFCI Protection
Water and electricity are a lethal combination. When you convert a freezer to a cold plunge, the risk is magnified because the entire metal shell can become energized if there is a short in the cooling lines. Never assume your home’s outlets are properly grounded. Use a portable GFCI adapter as a secondary fail-safe for every piece of equipment in your system.
If you are using a chiller outdoors, it must be housed in a weather-proof enclosure. While the chiller itself is designed to move water, its internal circuit boards are often not rated for direct rain or snow. Using a “Mr. Build It” style deck box to house your pump, filter, and chiller will protect your investment and keep your setup looking professional.
In my professional experience, I have found that the biggest hurdle for most DIYers isn’t getting the water cold—it’s maintaining the structural integrity of the home. I always advise clients that standard acrylic bathtubs are not designed for constant 40°F cycles; the thermal expansion and contraction can eventually lead to hairline fractures in the finish. If you are planning a permanent indoor conversion, I recommend reinforced fiberglass or stainless steel. Furthermore, while the allure of a $300 freezer build is high, the “unplug before you plunge” rule is non-negotiable. I have seen far too many “pro” setups where the user relies on a simple timer; mechanical timers can fail in the ‘on’ position, so manual disconnection is the only way to ensure 100% safety from electrical shock.
Frequently Asked Questions
To maintain cold temperatures without ice, you must install a dedicated water chiller and a recirculating pump. This system continuously moves water through a heat exchanger to keep it at your desired temperature 24/7.
Is it safe to turn a chest freezer into a cold plunge?
It is safe only if you follow two strict rules: seal all interior seams with marine-grade sealant to prevent leaks, and completely unplug the unit from the wall before you step inside to avoid electrocution.
Can I use my existing hot tub as a cold plunge?
Yes. You can turn off the heater and allow it to reach ambient temperature, or for true cold therapy, you can bypass the heater and plumb an external chiller into the existing filtration lines.
What is the best way to drain a DIY cold plunge indoors?
The most efficient method is using a 1/4 HP submersible utility pump connected to a standard garden hose, which allows you to pump the water directly into a toilet, shower drain, or floor drain.
How much does it cost to convert a bathtub to a cold plunge?
A basic ice-based setup costs under $50, but a permanent conversion with a high-quality chiller, pump, and filtration system typically ranges between $500 and $1,500 depending on the power of the chiller.