- Essential Foundations: How to Make a Weighted Blanket at Home
- Understanding the Science of Deep Pressure
- The Math of Comfort: Calculating Weight and Size
- Standard Weight Ratios for Adults and Kids
- Gathering Your Materials: Fillers and Fabrics
- Choosing Between Glass Beads and Poly Pellets
- Step-by-Step Sewing Tutorial: The Grid Method
- Marking and Stitching Your Weight Pockets
- The No-Sew Alternative: How to Make a Simple Weighted Blanket
- Using a Pre-made Blanket Cover for Weight
- Specialized Projects: Cooling, King-Size, and Lap Pads
- Crafting a Weighted Lap Blanket for Focus
- Avoiding Crafting Pitfalls: Common Mistakes to Avoid
- Frequently Asked Questions
Essential Foundations: How to Make a Weighted Blanket at Home
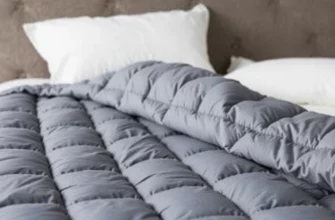
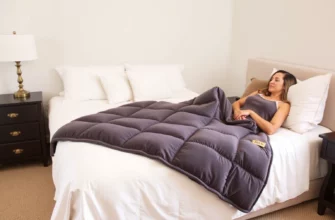
Constructing a custom weighted blanket allows you to bypass the high retail markups often found in sensory tool shops․ By crafting your own, you maintain total control over the weight distribution, fabric breathability, and aesthetic finish of the piece․
The primary appeal of these blankets lies in deep pressure stimulation, a therapeutic technique that applies firm, gentle pressure to the body․ This sensation mimics the feeling of being held or hugged, which can significantly lower cortisol levels while boosting serotonin and melatonin production․
Understanding the Science of Deep Pressure
Deep pressure relief is not merely a comfort preference; it is a neurological intervention․ For individuals struggling with sensory processing disorders, ADHD, or chronic insomnia, the weighted input helps the nervous system switch from a “fight or flight” state to a “rest and digest” state․ When you ask yourself, how do I make a weighted blanket, you are essentially designing a personal regulation tool that provides constant proprioceptive input․
This therapeutic touch works by stimulating pressure points across the body, which helps ground the user and reduces physical restlessness․ Many users find that the added weight prevents tossing and turning, leading to a more restorative REM cycle․ By tailoring the materials to your specific sensory needs, you ensure the blanket provides maximum relief without causing sensory overload from scratchy textures or excessive heat․
The Math of Comfort: Calculating Weight and Size
Precision is the difference between a therapeutic tool and a heavy, uncomfortable quilt․ Before purchasing a single yard of fabric, you must calculate the exact load your sewing machine and your body can handle․ The industry standard is the 10% rule, but customization allows for nuanced adjustments based on personal preference and physical capability․
| User Body Weight | Recommended Blanket Weight | Ideal Blanket Dimensions |
|---|---|---|
| 50 lbs (Child) | 5 ‒ 6 lbs | 36″ x 48″ |
| 100 lbs (Teen/Small Adult) | 10 ‒ 11 lbs | 42″ x 72″ |
| 150 lbs (Adult) | 15 ― 16 lbs | 48″ x 72″ |
| 200 lbs (Adult) | 20 ‒ 22 lbs | 48″ x 72″ or 60″ x 80″ |
Standard Weight Ratios for Adults and Kids
When calculating blanket weight, the general formula for adults is 10% of the total body weight plus one or two pounds․ If you are learning how to make a weighted blanket for adults, aim for a weight that feels substantial but does not restrict breathing or movement․ For a 180-pound person, a 20-pound blanket is often the “sweet spot” for deep sleep, though some prefer slightly lighter versions for couch use․
Safety is the most critical factor when designing for children․ Never use a weighted blanket for infants or toddlers under the age of two, as they lack the physical strength to move the blanket if it covers their face․ For older children, stick strictly to the 10% plus one pound rule and ensure the child can easily remove the blanket themselves without assistance․ Overweighting a child’s blanket can lead to joint strain or respiratory restriction․
Gathering Your Materials: Fillers and Fabrics
The internal components of your blanket dictate its longevity, washability, and tactile feel․ Sourcing the right materials is the how to make a cheap weighted blanket secret—buying glass beads in bulk is significantly more cost-effective than purchasing small pre-packaged craft bags․ You want materials that provide density without excessive bulk․
| Filler Type | Pros | Cons |
|---|---|---|
| Glass Beads | Silent, hypoallergenic, high density, machine washable․ | More expensive than plastic․ |
| Poly Pellets | Affordable, widely available, durable․ | Bulky, can be noisy, holds more heat․ |
| Steel Shot | Extremely dense (great for thin blankets)․ | Can be noisy; risk of rust if not stainless․ |
| Organic (Rice/Beans) | Cheapest option, eco-friendly․ | Non-washable, may attract pests, will rot if damp․ |
Choosing Between Glass Beads and Poly Pellets
Micro-glass beads are widely considered the best weighted blanket fillers because they are roughly the size of grains of sand․ This high density means you need less volume to achieve your target weight, resulting in a thinner, more flexible blanket that drapes better over the body․ Because glass doesn’t retain heat like plastic, these beads are the superior choice for “hot sleepers” who need weight without the sweat․
Poly pellets are small plastic beads that are more budget-friendly․ They provide a “pebbly” texture that some users find sensory-soothing, but they make a distinct rustling sound when moved․ If you use poly pellets, ensure they are BPA-free and high-density to reduce the overall thickness of the blanket․ For the outer shell, 100% breathable cotton is the easiest to sew, while minky or fleece provides a softer, warmer touch for winter use․
Step-by-Step Sewing Tutorial: The Grid Method
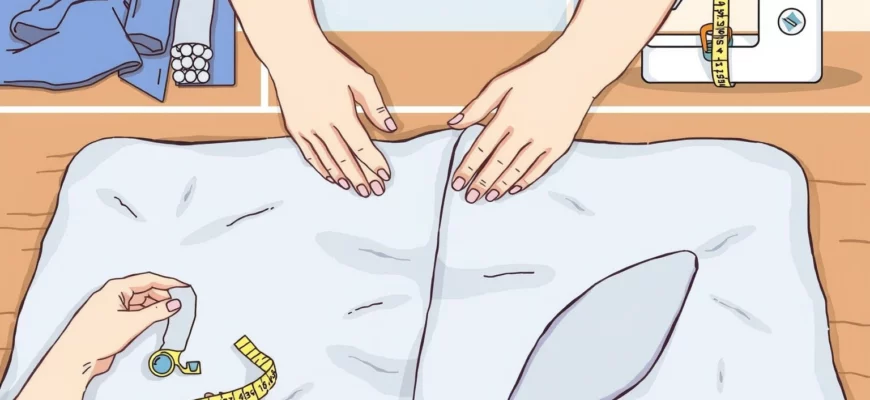
The grid method is the gold standard for DIY construction because it prevents the filler from pooling at one end of the blanket․ By creating individual pockets, you ensure the pressure remains even across your entire body․ This process requires patience and a heavy-duty sewing machine needle to handle the multiple layers of fabric․
- Prepare the Fabric: Cut two identical pieces of fabric․ Always pre-wash your fabric to prevent the blanket from shrinking and warping around the beads later․
- Sew Three Sides: Place the right sides together and sew along the two long sides and one short side․ Flip the “bag” right side out and top-stitch the edges for extra strength․
- Mark the Grid: Using a fabric pen, draw a grid of 4-inch or 5-inch squares across the entire surface․ These lines will be your sewing guides․
- Sew Vertical Channels: Stitch along the vertical lines from the closed bottom to the open top, creating long, narrow tubes․
- Fill the First Row: Divide your total weight of beads by the number of squares in your grid․ Pour the precise amount of beads into each vertical channel․
- Seal the Row: Use a zipper foot to sew a horizontal line across all channels, locking the beads into their individual pockets․ Ensure no beads are in the path of the needle to avoid breaking it․
- Repeat: Continue filling and sealing row by row until you reach the top․ Sew the final edge closed with a heavy-duty reinforced stitch․
Marking and Stitching Your Weight Pockets
When following a weighted blanket sewing pattern, the size of your pockets matters․ Smaller pockets (4×4 inches) provide the most even weight distribution but require significantly more sewing time․ Larger pockets (6×6 inches) are faster to make but may allow the beads to shift slightly within the square․ Use a quilting ruler and a disappearing ink pen to keep your lines perfectly straight․
To prevent the beads from leaking over time, use a shortened stitch length (2․0mm) and high-quality polyester thread․ Cotton thread is prone to snapping under the tension of a 15-pound load․ If you are using micro-glass beads, consider using a double-stitch on your horizontal lines to provide an extra barrier against the tiny grains escaping through the seams․
The No-Sew Alternative: How to Make a Simple Weighted Blanket
Not everyone has access to a sewing machine or the desire to manage 50 individual pockets of beads․ You can still achieve the benefits of deep pressure by using a “hack” that utilizes pre-existing items․ This is often the fastest way to test if a weighted blanket works for you before committing to a complex DIY project․
The most effective no-sew weighted blanket hack involves using a heavy-duty duvet cover and several smaller weighted “inserts․” You can buy or make small weighted lap pads or bean bags and secure them to the inside corners and edges of the duvet cover using industrial-strength fabric ties or safety pins․ While not as seamless as a sewn version, it provides the necessary downward force for relaxation․
Using a Pre-made Blanket Cover for Weight
Another method for how to make a weighted blanket using a blanket you already own is the “sandwich” technique․ You can place a layer of heavy, dense fabric—like a moving blanket or multiple layers of heavy denim—between two softer fleece blankets․ Use fabric glue or iron-on hem tape around the perimeter to seal the layers together․ While this won’t be as heavy as a bead-filled blanket, the layering of dense textiles can provide a moderate “hugging” sensation that is helpful for mild anxiety․
If you choose to use iron-on tape, apply heat for at least 15 seconds per section to ensure a permanent bond․ For added security, you can use “no-sew” snap fasteners at 6-inch intervals around the border․ This allows you to take the blanket apart for easier washing, as the dense inner layers can be cleaned separately from the soft outer shell․
Specialized Projects: Cooling, King-Size, and Lap Pads
Standard DIY guides often focus on twin-sized blankets, but specialized needs require different engineering․ If you are a “hot sleeper,” you need to prioritize airflow․ If you are sharing a bed, a how to make a king size weighted blanket approach is necessary, though it is often better to make two individual blankets to prevent the weight from dragging the blanket off the bed in the middle of the night․
For those in different climates, sourcing is key․ If you are looking for how to make a weighted blanket Australia or UK based, look for “glass microbeads” in local aquarium or industrial blasting supply shops․ These are often cheaper than craft store beads․ For cooling versions, look for bamboo or linen fabrics which have natural moisture-wicking properties and a higher rate of heat transfer than traditional cotton․
Crafting a Weighted Lap Blanket for Focus
If a full-sized blanket feels overwhelming, a DIY sensory lap pad is an excellent entry-level project․ These are typically 12×18 inches and weigh between 2 and 5 pounds․ They are perfect for students in classrooms or office workers who need grounding during long meetings․ Because they are smaller, you can use more decorative fabrics or even add a “fidget” element like a sequin patch or a soft faux-fur backing․
When determining how do you make a weighted lap blanket, use the same grid method but scale it down to 3-inch squares․ This ensures the weight stays directly on the thighs where it provides the most proprioceptive feedback․ These portable versions are also much easier to clean in a standard home washing machine compared to a full-sized 20-pound adult blanket․
Avoiding Crafting Pitfalls: Common Mistakes to Avoid
Even experienced quilters can struggle with the unique physics of weighted projects․ The most common error is underestimating the sheer mass of the finished product․ A 20-pound blanket is a heavy load for most domestic sewing machines; always support the weight of the blanket on a table while sewing to prevent the fabric from pulling and breaking your needle․
- Skipping the Backstitch: Every time you start or stop a line of stitching, you must backstitch․ If one pocket fails, you will have beads leaking throughout the entire blanket․
- Uneven Filling: Use a digital kitchen scale to weigh the beads for every single pocket․ Even a half-ounce difference per square can lead to a lopsided blanket that feels uncomfortable․
- Choosing Stretchy Fabric: Avoid knits or jerseys unless they are heavily interfaced․ The weight of the beads will cause the fabric to sag and stretch, eventually tearing the seams․
- Ignoring the “Walking Foot”: A walking foot attachment helps feed the top and bottom layers of fabric through the machine at the same rate․ This is essential for keeping your grid lines aligned when sewing through thick layers․
In my professional experience as a textile specialist working alongside occupational therapists, I cannot overstate the importance of the 10% weight limit․ While it is tempting to go heavier for “extra” relief, an overly heavy blanket can actually trigger a claustrophobic response or, worse, restrict circulation during deep sleep․ I always advise using breathable natural fibers like cotton or bamboo․ Synthetic covers like polyester minky might feel soft, but they trap body heat effectively, which can raise the user’s core temperature and disrupt the very sleep cycle you are trying to improve․ Furthermore, always ensure the user has the physical mobility to independently remove the blanket․ If they cannot, the blanket poses a safety risk rather than a therapeutic benefit․
Frequently Asked Questions
The most budget-friendly method involves sourcing glass beads or poly pellets in bulk from industrial suppliers and using upcycled 100% cotton bedsheets for the fabric shell․ This can reduce the cost by nearly 60% compared to buying pre-made blankets or craft-store kits․
Can I make a weighted blanket without a sewing machine?
Yes, you can create a no-sew version by using a duvet cover and securing small, pre-weighted pouches to the internal ties, or by using iron-on hem tape to create a multi-layered “sandwich” of heavy fabrics like denim and fleece․
How do I wash a homemade weighted blanket?
If you used glass beads or poly pellets, the blanket is machine washable․ However, always use a commercial-grade front-loading washer for blankets over 12 pounds to avoid damaging your home machine’s drum or suspension․ Air drying is recommended to preserve the integrity of the seams․
Is it safe for children to use a DIY weighted blanket?
It is safe as long as you follow the 10% of body weight rule and ensure the child is at least two years old․ The child must be physically capable of pulling the blanket off their face or body without help to prevent any risk of suffocation․
Which filler is better: rice or plastic pellets?
While rice is inexpensive, it is an organic material that can attract pests, grow mold if it gets damp, and cannot be washed․ Plastic pellets or glass beads are the superior choice because they are durable, hygienic, and fully washable․