- Why Investing in a Cold Plunge Tub with a Chiller Changes Your Recovery Game
- The Difference Between Ice-Manual and Chiller-Based Systems
- Choosing the Right Location: Cold Plunge for Garage, Patio, or Garden
- Outdoor Setups: From Patios to Winter Gardens
- Analyzing Cold Plunge Pool Costs: From DIY to Luxury Pro Units
- Is a DIY Bathtub Conversion Worth the Effort?
- Technical Specs: Electrical Requirements and Insulation Details
- Understanding Chiller Dimensions and Power Draw
- Installation Step-by-Step: Setting Up Your New Cold Plunge
- Plumbing and PEX Connections Made Simple
- Maintenance and Hygiene: Keeping Your Water Crystal Clear
- Filter Changes and Water Chemistry 101
- Expert Perspective: Long-Term Cold Plunge Ownership
- Frequently Asked Questions
Why Investing in a Cold Plunge Tub with a Chiller Changes Your Recovery Game
The transition from hauling twenty-pound bags of ice to simply pressing a button marks the evolution of home cryotherapy. For years, the barrier to consistent cold exposure was the sheer logistical friction of preparing the bath, but integrated chiller systems have effectively removed that hurdle. By maintaining a set temperature 24/7, these units transform a chore into a seamless part of a daily wellness discipline.
A dedicated cold plunge tub with a water chiller does more than just lower the temperature; it provides a controlled environment for metabolic conditioning. When the water is always ready, you are more likely to adhere to a protocol, which is where the real physiological adaptations occur. This reliability shifts the focus from preparation to the actual practice of learning how to reduce inflammation and manage the body’s stress response.
The Difference Between Ice-Manual and Chiller-Based Systems
The primary advantage of a chiller-based system is the absolute consistency of water temperature. In a manual ice bath, the temperature fluctuates wildly as the ice melts, often failing to reach the therapeutic window of 45°F to 55°F required for optimal hydrotherapy benefits. A high-quality chiller maintains your target temperature within a single degree, ensuring every session provides the exact stimulus needed for recovery timing and vascular health.
Beyond temperature, the long-term cost savings are substantial. While the upfront investment is higher, frequent users often find that the cost of ice—which can run $10 to $30 per session—quickly exceeds the price of a cooling unit within the first year of ownership. Furthermore, chiller systems usually incorporate a water filtration system and ozone sanitation, meaning you only need to change the water every few months rather than after every single use.
Choosing the Right Location: Cold Plunge for Garage, Patio, or Garden
Finding the perfect spot for your setup involves balancing convenience with technical necessity. Whether you are eyeing a cold plunge for the garage or a scenic corner of a winter garden, you must consider the weight of the water and the proximity to power. A full 100-gallon tub can weigh over 1,000 pounds, so always verify that your flooring or decking can support a concentrated load of at least 150 lbs per square foot.
Ventilation is another critical factor that many homeowners overlook. Chillers work like air conditioners; they pull heat out of the water and exhaust it into the surrounding air. If placed in a small, unventilated closet, the ambient temperature will rise, forcing the chiller to work harder and reducing its energy efficient cooling lifespan. Ensure there is at least 12 to 18 inches of clearance around the chiller’s exhaust fan to maintain proper airflow.
- Do: Place the tub near a floor drain or exterior sloped area to make water changes effortless.
- Do: Use a dedicated GFCI outlet to ensure electrical safety in wet environments.
- Don’t: Place the chiller in direct sunlight, as this significantly increases the BTU cooling capacity required to reach low temperatures.
- Don’t: Install a heavy tub on a standard second-story wooden deck without a structural engineer’s approval.
- Do: Consider the noise level; while modern units are quiet, placement near a bedroom window might be disruptive during nighttime cooling cycles.
Outdoor Setups: From Patios to Winter Gardens
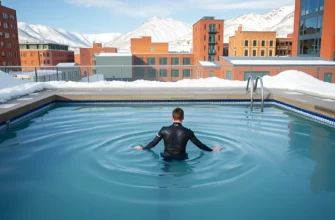
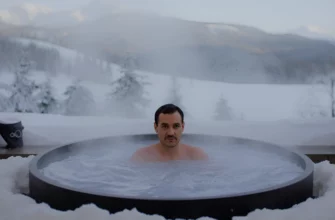
Setting up a cold plunge for a patio or a cold plunge winter garden offers a refreshing aesthetic, but it requires specific weatherproofing. Most high-end chillers are rated for outdoor use, but they still benefit from a “chiller house” or a ventilated cover to protect the electronics from heavy rain and debris. If you live in a climate where temperatures drop below freezing, ensure your system has an “auto-defrost” or “anti-freeze” mode to prevent water from expanding and cracking the internal heat exchanger.
Integrating the tub into your landscape can be done through a cold plunge pool exterior finish, such as stone cladding or cedar housing. When the unit is outside, insulation becomes even more vital. A well-insulated cover is the single most important factor in reducing energy consumption, as it prevents the water from absorbing ambient heat during the day or losing it during frigid nights. This thermal regulation keeps your monthly utility bills manageable even in extreme weather.
Analyzing Cold Plunge Pool Costs: From DIY to Luxury Pro Units
The market for home cold therapy has exploded, offering options that range from a few hundred dollars to the price of a mid-sized sedan. Understanding the cold plunge pool cost requires looking past the sticker price and considering the lifespan of the components. A budget-friendly cold plunge pool diy setup might save money today, but a professional-grade cold plunge tub wood unit often provides better thermal retention and a higher resale value.
| System Type | Estimated Cost | Primary Benefit | Main Drawback |
|---|---|---|---|
| DIY Stock Tank / Freezer | $500 ― $1,200 | Lowest entry price | High maintenance / Safety risks |
| Inflatable Portable Tub | $800 ⸺ $2,500 | Easy to move and store | Less durable / Poor insulation |
| Mid-Range Acrylic/Plastic | $3,500 ⸺ $6,000 | Balanced price/performance | Basic aesthetic / standard chiller |
| Luxury Wood (Cedar/Teak) | $7,000 ⸺ $15,000+ | Natural insulation / Beautiful | High price / Requires wood care |
Is a DIY Bathtub Conversion Worth the Effort?
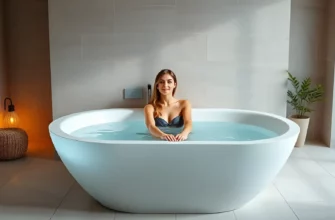
A cold plunge bathtub conversion or a chest freezer build is a popular gateway into the hobby, but it comes with significant caveats. The most pressing concern is electrical safety. Standard chest freezers are not designed to hold water or human bodies; never enter a DIY freezer plunge while it is plugged into a power source, as the risk of catastrophic electrical failure is real. You must also spend considerable time sealing seams with marine-grade silicone to prevent leaks.
When you calculate the total cost of a cold plunge pool diy project—including the tub, a separate 1/2 HP chiller, a circulating pump, a water filtration system, and PEX plumbing—the total often reaches $1,500 to $2,000. For many, the jump to a pre-built $3,000 system is worth the peace of mind, as professional units are specifically engineered for water pressure and come with integrated safety features like GFCI protection and UL-listed components.
Technical Specs: Electrical Requirements and Insulation Details
The “guts” of your cold plunge determine how fast it cools and how much it costs to run. Most residential chillers are rated by their horsepower (HP) or BTU cooling capacity. For a standard 80-100 gallon tub, a 1/2 HP chiller is the industry standard, capable of dropping water temperature by 3-5 degrees per hour. However, if you are installing the unit in a hot garage, upgrading to a 1 HP chiller will allow the motor to run for shorter intervals, extending its total lifespan.
Insulation is the silent hero of energy efficiency. A tub with a thin plastic wall will lose cold air rapidly, forcing the cooling unit to run constantly. Look for units featuring high-density spray foam or thick EPP (Expanded Polypropylene) walls. Effective insulation can reduce energy consumption by up to 70% compared to uninsulated metal stock tanks, making it a critical feature for those concerned about long-term operating costs.
- Standard Power Draw: Most 1/2 HP chillers pull between 450 and 700 watts while cooling.
- Circuit Needs: A dedicated 15-amp or 20-amp circuit is recommended to avoid tripping breakers when the compressor kicks in.
- GFCI Protection: This is mandatory. If your outlet isn’t GFCI-protected, use a portable GFCI cord adapter.
- Plumbing: Use cold plunge pex or reinforced braided hoses to handle the constant pressure of the circulating pump.
- Noise: Expect a decibel level between 50-60 dB, roughly equivalent to a modern dishwasher.
Understanding Chiller Dimensions and Power Draw
When planning your space, remember that cold plunge pool cooling unit dimensions vary significantly. A standard 1/2 HP unit is roughly the size of a large suitcase, but it requires “breathing room.” Never enclose a chiller in a tight cabinet without active exhaust fans, or the unit will overheat and fail. If you are opting for a 220v system (common in Europe or for ultra-fast commercial cooling), you will likely need a professional electrician to run a dedicated line.
For home cold plunge pool electrical setups, the startup “surge” of the compressor is what usually trips older breakers. If you live in an older home, consider installing a “soft start” kit or ensuring no other high-draw appliances (like a treadmill or space heater) are on the same circuit. This ensures that when the thermostat triggers a cooling cycle at 2:00 AM, your house power remains stable.
Installation Step-by-Step: Setting Up Your New Cold Plunge
Installing a professional cold plunge is generally a two-person job due to the weight of the tub. Once the location is prepped and leveled, the process moves relatively quickly. The goal is to create a closed-loop system where water flows from the tub, through the filter, into the chiller, and back into the tub. Always place the pump at the lowest point of the plumbing line to ensure it stays primed and never runs dry, which can burn out the motor in minutes.
- Level the Base: Use a spirit level to ensure the tub sits flat. An unlevel tub puts uneven pressure on the seams and can cause long-term structural failure.
- Connect the Hoses: Attach the cold plunge pex or flexible tubing to the “Inlet” and “Outlet” ports. Apply a thin layer of silicone grease to the O-rings to ensure a watertight seal without over-tightening.
- Install the Filter: Place the sediment filter before the chiller in the flow sequence. This prevents hair and debris from clogging the delicate cooling fins.
- Fill and Flush: Fill the tub with a garden hose. Before turning on the chiller, run the pump for 10 minutes to flush out any air bubbles in the lines.
- Power Up: Plug the unit into a GFCI outlet and set your desired temperature. For your first session, start at 55°F and gradually move colder as your cold tolerance improves.
Plumbing and PEX Connections Made Simple
The plumbing is the most common failure point for DIY and pro setups alike. Using high-quality cold plunge pex is a smart move because it resists the expansion and contraction caused by extreme temperature shifts. Always use “Quick Connect” fittings if you plan on moving the tub occasionally, as this allows you to drain the lines without tools. Ensure all cold plunge tub installation requirements are met by checking for leaks at the threaded joints during the first hour of operation.
Once the water is flowing, the initial chemical balance is key. Even with a chiller, standing water can grow bacteria quickly. Add a small amount of non-chlorine oxidizer or a specialized cold plunge water conditioner immediately after filling. If your system includes ozone sanitation, you will notice a slight “clean” scent near the return jet—this indicates the system is actively killing pathogens and keeping the water crystal clear.
Maintenance and Hygiene: Keeping Your Water Crystal Clear
A chiller system significantly reduces maintenance compared to a standard tub, but it is not “set it and forget it.” Because you aren’t emptying the water daily, you are essentially managing a tiny, very cold swimming pool. The presence of non-slip surfaces in the tub is vital for safety, but these textured areas can also trap skin cells and oils, requiring occasional scrubbing with a soft brush.
In high-use environments, such as cold plunge bath maintenance at spas, the filtration system must be more robust. For home users, the key is bio-load management. Always rinse off in a shower before plunging to remove body oils, lotions, and sweat. This simple step can extend the life of your water filter by several weeks and keep the water from becoming cloudy or developing a “biofilm” on the walls of the tub;
- Weekly: Check the filter for debris and rinse it with a high-pressure hose.
- Bi-Weekly: Test the pH levels. Water that is too acidic or too alkaline can corrode the internal components of the chiller.
- Monthly: Deep clean the filter or replace it if the water flow rate has noticeably slowed.
- Quarterly: Perform a full water change. Use this time to wipe down the interior with a diluted white vinegar solution.
- Annually: Vacuum the dust off the chiller’s condenser coils to maintain peak cooling efficiency.
Filter Changes and Water Chemistry 101
Standard 20-micron filters are the baseline for cold plunge pool maintenance. These catch hair and skin flakes, but they don’t kill bacteria. This is where ozone sanitation or UV-C light comes in. If your chiller doesn’t have built-in ozone, you must be more diligent with water stabilizers. Keep your pH between 7.2 and 7.6 to ensure the water remains comfortable for your skin and safe for the mechanical parts.
When it comes to cold plunge tub size, larger tubs (over 100 gallons) are easier to keep chemically stable than smaller ones, as the higher volume of water dilutes contaminants more effectively. However, a larger tub also requires more BTU power to cool. If the water begins to smell “musty,” do not try to fix it with chemicals; it is always safer and more hygienic to simply drain the tub and start fresh with clean, balanced water.
Expert Perspective: Long-Term Cold Plunge Ownership
In my professional experience as an installer, the biggest mistake homeowners make is “under-speccing” their cooling unit to save a few hundred dollars. I always advise clients to choose a chiller with a higher BTU than they think they need. If you live in a region where summers hit 90°F+, a 1/4 HP chiller will run 24/7 just to stay at 50°F, eventually burning out the compressor. By over-insulating the tub—using a 3-inch thick foam cover rather than a 1-inch one—you can save hundreds in annual electricity costs and ensure your motor only works half as hard. Think of your insulation as a battery that stores the “cold” your chiller produces.
Frequently Asked Questions
With a well-insulated tub and a modern 1/2 HP chiller, expect to pay between $15 and $30 per month in electricity, depending on your local rates and whether the unit is kept indoors or outdoors.
Can I put a cold plunge tub in my garage?
Yes, the garage is the most popular location. Ensure you have a flat, level surface, a dedicated GFCI outlet, and enough ventilation so the chiller’s exhaust heat doesn’t cause the room to overheat.
What is the ideal cold plunge tub size for a 6-foot person?
For a comfortable experience without cramping, look for an interior length of at least 55 to 60 inches. This allows for full leg extension and complete submersion up to the neck.
Do I need a special electrical setup for a home cold plunge?
Most standard residential chillers run on a 110-120V circuit. However, a dedicated 20-amp circuit and a mandatory GFCI outlet are required to handle the compressor’s power draw and ensure water safety.
How do I maintain a cold plunge tub without a chiller?
Without a chiller, you must add ice manually for every session and change the water every 1-2 days to prevent bacterial growth, as the water will quickly reach room temperature and become a breeding ground for pathogens.
Is a wooden cold plunge tub better than plastic or metal?
Wooden tubs, particularly cedar, offer superior natural insulation and a better aesthetic, but they require more maintenance to prevent leaks and rot compared to durable, low-maintenance high-density plastics.