- The ultimate recovery tool: Why building a cold plunge is the right move
- Finding the right spot for your DIY setup
- Choosing your path: Which DIY cold plunge method fits your budget?
- Stock tanks vs. Chest freezers: The DIY favorites
- From heat to ice: Can you turn a hot tub into a cold plunge?
- How to convert your hot tub or jacuzzi for cold therapy
- Step-by-step: Converting your old hot tub the right way
- Essential plumbing and electrical adjustments
- Starting small: How to use a bathtub for cold plunge sessions
- Maximizing the chill in a standard tub
- Maintenance 101: Keeping your DIY plunge clean and safe
- Staying safe during and after your plunge
- Expert Perspective: DIY Cold Plunge Safety
- Frequently Asked Questions
The ultimate recovery tool: Why building a cold plunge is the right move
Stop buying bags of ice every single morning. While a quick trip to the convenience store works for a one-off recovery session, the logistics of maintaining a consistent routine quickly become a nightmare for your wallet and your schedule. When you decide to construct a permanent home setup, you transition from a casual user to someone who prioritizes systemic recovery and mental resilience.
The shift toward a dedicated DIY build allows for precision control over your environment. You are no longer at the mercy of how fast your local grocery store can restock their freezer. Instead, you create a reliable sanctuary where the water is always at the perfect therapeutic temperature, ready the moment you finish a high-intensity workout or a long day at the office.
Finding the right spot for your DIY setup
Before you buy a single fitting or tank, you must evaluate where this massive volume of water will live. If you are placing your setup indoors, ensure the flooring can support the immense static load; water weighs approximately 8.34 pounds per gallon, meaning a standard 100-gallon stock tank weighs nearly 1,000 pounds once you add the weight of the vessel and the occupant.
Outdoor setups offer easier drainage but face the challenge of ambient temperature fluctuations. If you live in a climate with harsh summers, your cooling system will work overtime unless you provide shade or additional insulation. Regardless of location, position your plunge near a floor drain or a sloped exterior area to prevent localized flooding during your weekly water changes. Setting up your space correctly from day one prevents structural damage and makes the habit of how to reduce inflammation much more sustainable.
Choosing your path: Which DIY cold plunge method fits your budget?
There is no “one size fits all” approach to building a cold water immersion system. Your choice depends on your technical comfort level and how much you are willing to invest upfront to save on long-term maintenance. The three most common paths involve repurposing industrial stock tanks, modifying chest freezers, or retrofitting existing spa equipment.
| Method | Estimated Cost | Difficulty Level | Durability |
|---|---|---|---|
| Stock Tank (Steel/Plastic) | $150 ⎯ $900 | Low | Very High |
| Chest Freezer Conversion | $400 ⏤ $1,200 | Moderate | Moderate |
| Hot Tub / Jacuzzi Retrofit | $800 ⎯ $2,500 | High | High |
Stock tanks vs. Chest freezers: The DIY favorites
Galvanized steel stock tanks are the rugged veterans of the DIY world. They are nearly indestructible and offer a classic aesthetic, but they have zero native insulation. If you choose a metal tank, you will likely need to wrap the exterior in closed-cell foam or reflective wrap to prevent the water from warming up within hours. Plastic (poly) tanks are slightly better at retaining temperature and won’t corrode over time, making them one of the best materials for a cold plunge if you live in a coastal area with salt air.
Chest freezers, on the other hand, are built for one thing: keeping things cold. Their insulated walls are incredibly efficient, but they were never designed to hold thousands of pounds of liquid. To make this work, you must seal every internal seam with a marine-grade sealant like JB WaterWeld to prevent water from leaking into the electrical components. Keeping water cold in a freezer setup is effortless, but the risk of rust and electrical shorts requires meticulous preparation during the build phase.
From heat to ice: Can you turn a hot tub into a cold plunge?
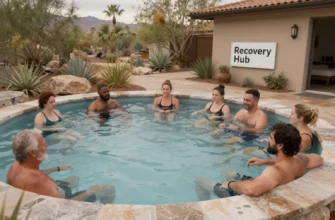
Many homeowners have an old, leaking, or unused hot tub sitting on their patio. Converting these units is an ingenious way to recycle high-end hardware for cold therapy. The shell is already designed for human weight and water volume, and the built-in filtration plumbing is often superior to anything you could build from scratch.
The logic is simple: you are essentially swapping the heating element for a cooling source. Most modern hot tubs use a 220V or 110V heater integrated into the control board. By bypassing the heater and plumbing an external water chiller into the existing circulation lines, you turn a relaxation spa into a professional-grade recovery tool. It is the ultimate “upcycling” project for the dedicated athlete.
How to convert your hot tub or jacuzzi for cold therapy
The first step in a jacuzzi conversion is identifying the “flow” path of the water. You need to tap into the PVC lines after the pump but before the water returns to the tub. If your jacuzzi has multiple jets that you don’t need, you can cap off secondary lines to increase the pressure through the remaining jets, which helps keep the water moving and prevents “thermal layers” from forming around your body during a session.
Integrating an external chiller usually requires a dedicated 1/2 HP or 1/4 HP unit. You will need to ensure that the chiller’s flow requirements match your hot tub’s circulation pump. If the pump is too powerful, it can damage the internal heat exchanger of the chiller. In these cases, installing a bypass valve allows you to bleed off excess pressure while still sending enough water through the cooling unit to drop the temperature to that crisp 45°F mark.
Step-by-step: Converting your old hot tub the right way
If you have decided to turn a hot tub into a cold plunge, you need a systematic approach to ensure the electronics remain safe and the plumbing stays watertight. This process requires basic knowledge of PVC solvent welding and electrical safety.
- Drain and Deep Clean: Remove all old water and use a biofilm cleaner to purge the internal plumbing lines of bacteria and calcium buildup.
- Isolate the Heater: Disconnect the power leads to the heating element at the control box. Always verify with a multimeter that the power is off before touching any wiring.
- Plumb the Chiller Loop: Cut the return line and install T-junctions. Use flexible, reinforced braided tubing to connect these junctions to your water chiller.
- Seal Potential Leaks: Use marine-grade epoxy or silicone to seal any air induction valves that might cause bubbles, as these can introduce warmer ambient air into your cold water.
- Install a Digital Controller: Since the tub’s internal thermostat is designed for heat, use an external Inkbird or similar digital temperature controller to manage the chiller’s power cycles.
- Test and Sanitize: Fill the tub, check for leaks at your new junctions, and add your initial dose of non-chlorine shock or hydrogen peroxide.
Essential plumbing and electrical adjustments
When you modify the water flow and cooling of a spa, the pump becomes the heart of the system. Standard hot tub pumps are designed to move a high volume of water, but they also generate their own heat. For a cold plunge, consider replacing a massive 2HP pump with a smaller, high-efficiency circulation pump (often called a “hush pump”); These move water slowly through the filter and chiller without adding unwanted BTUs to the water.
Electrical safety cannot be overstated. Any DIY build involving water and 110V/220V power must be protected by a dedicated GFCI (Ground Fault Circuit Interrupter) outlet. If there is even a minor current leak, the GFCI will trip instantly, preventing a potentially fatal shock. Never skip this step to save a few dollars on parts.
Starting small: How to use a bathtub for cold plunge sessions
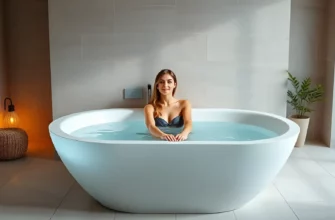
If you aren’t ready to commit to a permanent build or don’t have the space for a stock tank, your standard bathroom tub is a perfectly viable starting point. The primary challenge here isn’t the vessel; it’s the sheer amount of ice required to reach therapeutic temperatures. Tap water rarely drops below 55°F in the summer, and a standard tub requires roughly 40 to 60 pounds of ice to reach the 45°F to 50°F range.
Using a bathtub for a cold plunge is excellent for testing your mental grit before investing in a $1,000 setup. However, be mindful of the overflow drain. If you fill the tub too high before getting in, your body displacement will send your expensive ice water straight down the drain. Always fill the tub only halfway before adding ice and yourself.
Maximizing the chill in a standard tub
To make an ice bath at home more efficient, stop buying bags of ice and start freezing large blocks of ice using silicone molds or plastic gallon jugs. Large blocks have less surface area than cubes, meaning they melt slower and keep the water colder for a longer duration. This “block method” is the only way to make a bathtub session sustainable without spending $20 on ice every time.
Hygiene is also a major factor in a shared bathroom. Always shower before you enter your cold plunge to remove body oils, sweat, and skin cells. Because you likely won’t have a filtration system in a standard tub, you must drain the water immediately after your session to prevent “scum lines” from forming on the porcelain or acrylic surface.
Maintenance 101: Keeping your DIY plunge clean and safe
Owning a cold plunge is 10% plunging and 90% maintenance. Without a plan for water chemistry, your pristine pool will turn into a science experiment within a week. You need to manage the organic load (skin, hair, sweat) and prevent the growth of algae and bacteria.
- DO: Use a 20-micron pleated filter to catch physical debris and hair.
- DO: Maintain a consistent concentration of 35% food-grade hydrogen peroxide (roughly 1-2 cups per 100 gallons per week) as a cleaner alternative to chlorine.
- DO: Keep the tank covered when not in use to block UV light, which is the primary fuel for algae growth.
- DON’T: Forget to unplug the chiller and pump before you step into the water, even if you have a GFCI installed. Safety is layered.
- DON’T: Use standard pool chlorine in a metal stock tank, as it will accelerate corrosion and ruin the galvanized coating.
- DON’T: Allow the water to freeze solid in the pipes during winter, as this will crack your chiller’s heat exchanger.
Staying safe during and after your plunge
Safety isn’t just about the equipment; it’s about how your body responds to the cold stress. Always use a floating thermometer to verify the temperature before entering. Never plunge alone if you are pushing the limits of your duration or temperature, as the risk of a “cold shock” response can lead to hyperventilation.
The most dangerous part of the process is actually the “afterdrop,” where cold blood from your extremities rushes back to your core once you exit the water. To stay safe after a cold plunge, avoid taking a hot shower immediately. Instead, pat yourself dry, put on warm layers, and allow your body to generate its own heat through shivering or light movement. This gradual warm-up phase is essential for cardiovascular safety and maximizing the recovery benefits of the session. Checking water quality regularly ensures that a minor skin abrasion doesn’t turn into an infection from dirty water.
Expert Perspective: DIY Cold Plunge Safety
In my professional experience, the two most overlooked factors in DIY builds are structural integrity and electrical grounding. I have seen enthusiasts place 150-gallon stock tanks on wooden decks that were never rated for a 1,500-pound point load. Always consult a structural professional if you are building anywhere other than a concrete slab. Furthermore, I always advise a “zero-power” rule: physically disconnect the power cord from the wall before your skin touches the water. No matter how many GFCI breakers you have, a physical air gap is the only 100% guarantee against electrical failure in a DIY environment.
Frequently Asked Questions
Building a DIY setup is significantly more affordable. A high-quality DIY stock tank or freezer conversion typically costs between $500 and $1,200, whereas commercial units with similar cooling power often start at $5,000 and can exceed $10,000.
Can you really turn a hot tub into a cold plunge permanently?
Yes. By disabling the heating element and plumbing in a dedicated water chiller, a hot tub becomes an elite cold plunge. The thick insulation built into hot tub shells actually makes them more efficient at maintaining cold temperatures than uninsulated metal tanks.
How do you keep a DIY cold plunge clean without constant draining?
The best strategy is a “triple threat” approach: use a physical sediment filter (5-20 microns), an ozone generator to kill bacteria, and a weekly dose of 35% food-grade hydrogen peroxide to keep the water crystal clear.
What is the best temperature for a home cold plunge?
For most users, the therapeutic sweet spot is between 45°F and 55°F. Temperatures below 40°F significantly increase the risk of tissue damage and cold shock without providing substantial additional recovery benefits for the average person.
Will a standard bathtub get cold enough for an effective ice bath?
A bathtub can be effective, but only if you use enough ice. You will typically need at least 40-60 lbs of ice to drop standard tap water into the 50°F range, making it a labor-intensive and expensive option for daily use.
Do I need to seal the seams of a chest freezer for a cold plunge?
Absolutely. You must use a marine-grade sealant like JB WaterWeld or a high-quality pond liner. If water seeps through the metal seams into the freezer’s foam insulation, it will cause rust and eventually destroy the electrical system.