- Understanding the Science: Why a DIY Weighted Blanket Improves Sleep Quality
- Customizing for Anxiety and Sensory Needs
- Selecting Your Materials: Which Fillers and Fabrics Actually Work?
- The Great Filler Debate: Glass Beads vs․ Organic Materials
- The Step-by-Step Quilted Method for a Durable DIY Washable Weighted Blanket
- Calculating Grid Sizes and Weight Per Square
- No-Sew and Alternative Methods: Comfort Without the Sewing Machine
- Chunkey Knits and Hand-Knitted Weighted Textures
- The Duct Tape and Utility Hacks: Quick Fixes for Lap Pads
- Safety First: Determining the Ideal Weight for Adults and Children
- Special Considerations for Kids and Dementia Patients
- Maintenance and Longevity: DIY Weighted Blanket Covers and Cleaning
- Creating a Removable Duvet Cover for Easy Washing
- Expert Tips for Hot Sleepers: Crafting a Breathable, Cooling Blanket
- The Best Fabrics for Temperature Regulation
- Expert Perspective: Occupational Therapist Perspective on DIY Weighted Tools
- Frequently Asked Questions
Understanding the Science: Why a DIY Weighted Blanket Improves Sleep Quality
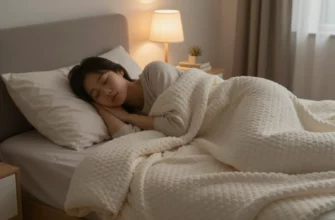
The therapeutic power of a weighted blanket is rooted in a physiological phenomenon known as deep pressure stimulation (DPS)․ By applying gentle, firm pressure across the body, these blankets encourage the nervous system to shift from a “fight or flight” sympathetic state to a “rest and digest” parasympathetic state․ This transition is vital for anyone struggling with insomnia, as it naturally lowers heart rates and promotes the production of serotonin․
When you craft a DIY weighted blanket, you are building a tool designed to provide consistent proprioceptive input․ This input helps the brain understand where the body is in space, which has a profound grounding effect for individuals dealing with trauma or high-stress environments․ Unlike standard bedding, the added mass mimics the sensation of a therapeutic hug, providing a sense of security that can significantly reduce nighttime cortisol levels․
Customizing for Anxiety and Sensory Needs
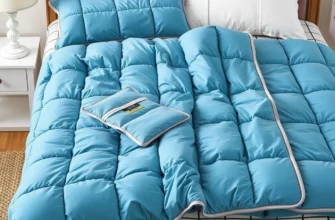
Creating a diy weighted blanket for anxiety allows for a level of precision that store-bought options rarely offer․ You can choose specific fabrics that provide the right tactile feedback, whether that is a smooth, cooling cotton or a textured minky fabric․ For those with sensory processing sensitivities, the ability to control the exact weight distribution is the difference between a calming tool and an overwhelming one․
A sensory weighted blanket works by stimulating the tactile receptors under the skin, which then send signals to the brain to release oxytocin․ This chemical reaction is particularly effective for neurodivergent individuals who may experience sensory overload during the day․ By tailoring the weight to the user’s specific tolerance, you ensure the pressure is restorative rather than restrictive, allowing the nervous system to recalibrate during sleep․
Selecting Your Materials: Which Fillers and Fabrics Actually Work?
Choosing the right components is the most critical phase of your project because the materials dictate the blanket’s breathability, weight density, and lifespan․ While many beginners consider household items for weight, professional-grade fillers are necessary for a high-quality finished product․ The fabric must also be durable enough to hold several pounds of pressure without tearing at the seams over time․
For the outer shell, 100% breathable cotton is the standard for most DIYers due to its durability and ease of sewing․ However, if you are a hot sleeper, you might consider linen or bamboo-derived fabrics which offer superior moisture-wicking properties․ If you want a more luxurious feel, minky fabric provides a soft, dimpled texture that enhances the sensory experience, though it can be more challenging to sew due to its stretch and thickness․
| Filler Type | Pros | Cons |
|---|---|---|
| Glass Microbeads | Extremely dense, cooling, smooth texture, machine washable, hypoallergenic․ | More expensive than plastic, requires very tight stitching to prevent leaks․ |
| Poly-Pellets | Affordable, widely available, durable, moisture-resistant․ | Bulkier than glass, can feel “pebbly,” tends to retain more body heat․ |
| Steel Shot | Maximum density for small blankets, very durable․ | Extremely loud when moving, can be difficult to sew around, potential for rust․ |
| Organic (Rice/Beans) | Zero cost if using pantry staples, biodegradable․ | Cannot be washed, prone to mold, attracts pests, degrades over time․ |
The Great Filler Debate: Glass Beads vs․ Organic Materials
When looking for the gold standard, diy weighted blanket glass beads are the clear winner for most therapeutic applications․ Because glass is significantly denser than plastic, you need fewer beads to reach your target weight, resulting in a much thinner and more flexible blanket․ This thinness is essential for maintaining airflow and preventing the “smothering” heat often associated with cheaper, bulkier weighted blankets․
Using recycled glass beads for weighted blankets is an excellent eco-friendly alternative that maintains all the performance benefits of virgin glass․ On the other hand, attempting a diy weighted blanket with rice or dried beans is generally discouraged for long-term use․ Organic fillers absorb moisture from the air and sweat from the body, leading to internal bacterial growth and a heavy, musty odor that is impossible to remove since these blankets cannot be submerged in water․
The Step-by-Step Quilted Method for a Durable DIY Washable Weighted Blanket
The quilted method is the most reliable way to ensure your blanket lasts for years․ By sewing the filler into individual pockets, you prevent the beads from pooling at one end, which would negate the benefits of deep pressure stimulation․ This method requires a sewing machine capable of handling multiple layers of fabric and a steady hand for precise measurements․
To ensure your creation is a diy machine washable weighted blanket, you must use synthetic or glass fillers and high-quality polyester thread․ Cotton thread can weaken when wet, leading to seam bursts during a spin cycle․ Always use a denim or heavy-duty needle (90/14 or 100/16) to penetrate the thick fabric layers and the occasional stray bead without snapping․
- Measure and cut your fabric: Cut two identical pieces of fabric, adding a 2-inch seam allowance on all sides․ For an adult blanket, 42″ x 72″ is a standard size․
- Mark your grid: Use a fabric marker to draw a grid of 4-inch or 5-inch squares across the entire surface․ These squares will become the weight pockets․
- Sew the vertical channels: Sew along the vertical lines of your grid, creating long tubes that run from the top of the blanket to the bottom․ Reinforce the bottom seam with a double stitch․
- Fill the first row: Use a funnel to pour the calculated amount of diy weighted blanket pellets into each tube․ Ensure the beads reach the bottom of the tubes․
- Sew the horizontal line: Sew across the first horizontal grid line to lock the beads into their individual squares․ Repeat this process row by row until the blanket is full․
- Close the final seam: Fold the raw edges inward and sew the top of the blanket closed using a triple-stitch pattern for maximum security․
Calculating Grid Sizes and Weight Per Square
The secret to a professional-grade quilted weighted blanket pattern is the math behind the distribution․ To find the weight per square, first decide on your total target weight (e․g․, 15 lbs)․ Convert this weight into ounces or grams for easier measuring․ If your blanket has 120 squares (a 10×12 grid), you would divide 240 ounces (15 lbs) by 120, resulting in exactly 2 ounces of filler per square․
Using a diy weighted blanket pellets calculation ensures that the pressure remains perfectly even across the body․ If the pockets are too large, the beads will shift to the corners of the squares, creating “cold spots” with no pressure․ Keep your squares between 3 and 5 inches to maintain the structural integrity of the weight distribution and prevent the filler from clumping․
No-Sew and Alternative Methods: Comfort Without the Sewing Machine
Not everyone has access to a sewing machine or the patience for complex quilting․ Fortunately, you can still achieve a high-quality result through manual construction techniques․ These methods often focus on texture and breathability, making them popular for decorative throws that still offer the benefits of deep pressure․
The diy weighted blanket no sew approach often involves using a “fleece tie” method where pre-filled weight pouches are sandwiched between two layers of fleece․ The edges are then cut into strips and knotted together․ While this method is faster, it results in a bulkier blanket that may not be as durable as a sewn version․ For a more modern look, many are turning to heavy-gauge textile arts․
Chunkey Knits and Hand-Knitted Weighted Textures
A chunky knit weighted blanket diy project is perhaps the most aesthetically pleasing option․ Instead of using beads, these blankets rely on the sheer mass of the yarn itself․ You can find “weighted yarn” which is essentially a hollow cotton tube filled with polyester fiber and glass beads․ By hand-knitting this heavy material, you create a blanket with large gaps that allow for maximum airflow and heat dissipation․
If you prefer a more traditional craft, a diy weighted blanket crochet project using multiple strands of T-shirt yarn or “Zpagetti” can also create significant weight․ The benefit of the crochet or knit approach is that the weight is integrated into the fabric fibers, meaning there is zero risk of bead leakage․ This makes them exceptionally safe for long-term use and very easy to spot-clean․
The Duct Tape and Utility Hacks: Quick Fixes for Lap Pads
For classroom environments or office use, a full-sized blanket might be impractical․ A diy weighted lap blanket is a smaller, portable version that sits on the thighs to help with focus and grounding during seated tasks․ These can be made quickly using heavy-duty duct tape and zip-lock bags filled with sand or pellets, though this is strictly a utility solution and not intended for sleeping․
While a diy duct tape weighted blanket is often cited as a “quick fix,” it lacks the breathability and comfort required for a full night’s rest․ I recommend using this method only for temporary prototypes or lap pads․ If you use tape, ensure it is completely encased in a fabric sleeve to prevent the adhesive from catching on skin or clothing․
Safety First: Determining the Ideal Weight for Adults and Children
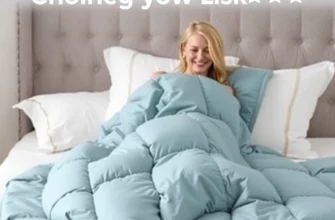
Safety is the most important consideration when building a weighted tool․ A blanket that is too heavy can cause joint pain or restrict breathing, while one that is too light will fail to provide the necessary therapeutic input․ The industry standard is the 10% of body weight plus one pound rule, but this should be adjusted based on individual comfort and physical health․
| User Weight | Recommended Blanket Weight | Safety Notes |
|---|---|---|
| 30 ─ 50 lbs | 3 ⏤ 5 lbs | Consult a pediatrician first․ User must be able to remove the blanket alone․ |
| 100 ─ 150 lbs | 10 ⏤ 15 lbs | Standard range for most teenagers and small adults․ |
| 150 ─ 200 lbs | 15 ⏤ 20 lbs | The most common weight for adult therapeutic use․ |
| 200+ lbs | 20 ─ 25 lbs | Maximum recommended weight for home-use blankets․ |
Special Considerations for Kids and Dementia Patients
When making a diy weighted blanket for a 5 year old, the weight must be strictly monitored․ It is a critical safety rule that weighted blankets should never be used for infants or toddlers who do not have the physical strength to push the blanket off their face․ For children with sensory processing disorder, the weight should be distributed specifically to avoid putting pressure on the neck or head․
For the elderly, a diy weighted blanket for dementia can help reduce the agitation and “sundowning” often associated with cognitive decline․ However, you must be cautious with patients who have respiratory issues or fragile skin․ In these cases, a diy weighted blanket for adults should be lighter—perhaps only 5% to 7% of body weight—to provide comfort without causing physical strain or overheating․
Maintenance and Longevity: DIY Weighted Blanket Covers and Cleaning
A weighted blanket is a significant investment of time and materials, so protecting it is essential․ Because the inner weighted layer is heavy and contains thousands of beads, washing it frequently can damage your washing machine’s drum and weaken the blanket’s seams․ The best solution is to create a two-part system: a weighted insert and a removable outer cover․
By using a diy weighted blanket cover, you only need to wash the outer shell regularly, similar to a standard duvet․ This keeps the weighted inner layer clean and dry, extending its life by years․ Always install internal ties or loops to keep the heavy insert from bunching up at the bottom of the cover․
- DO: Use at least 8 attachment points (corners and mid-points) to secure the insert to the cover․
- DO: Use a heavy-duty zipper or wide Velcro strips for the closure to handle the weight․
- DON’T: Use thin, cheap ribbons for the ties; they will snap under the 15-20 lb load․ Use twill tape or paracord instead․
- DON’T: Wash the weighted insert in a top-loading machine with an agitator, as it can tear the fabric․
- DO: Air dry the weighted insert whenever possible to maintain the integrity of the bead pockets․
Creating a Removable Duvet Cover for Easy Washing
You can easily adapt a diy weighted blanket using duvet cover techniques by repurposing high-quality bed sheets․ Using a twin-size flat sheet is an affordable way to get enough fabric for a custom cover․ Simply fold the sheet in half, sew two sides shut, and add your fastening system to the third side․
If you want a diy machine washable weighted blanket setup that is truly “set it and forget it,” look for moisture-wicking fabrics for the cover․ This ensures that sweat doesn’t penetrate into the glass beads․ Adding a concealed zipper along the bottom edge provides a professional finish and ensures the weighted insert stays securely inside even if you toss and turn at night․
Expert Tips for Hot Sleepers: Crafting a Breathable, Cooling Blanket
Many people abandon weighted blankets because they find them too hot․ This “sauna effect” usually happens when the blanket is made with synthetic polyester fabrics and plastic poly-pellets, both of which trap heat against the body․ To solve this, you must focus on material conductivity and airflow․
A diy cooling weighted blanket relies on the high thermal conductivity of glass․ Unlike plastic, glass beads do not insulate; they actually help pull heat away from the skin․ When paired with an open-weave design or highly breathable fabrics, you can enjoy the benefits of weight without the sweat․
The Best Fabrics for Temperature Regulation
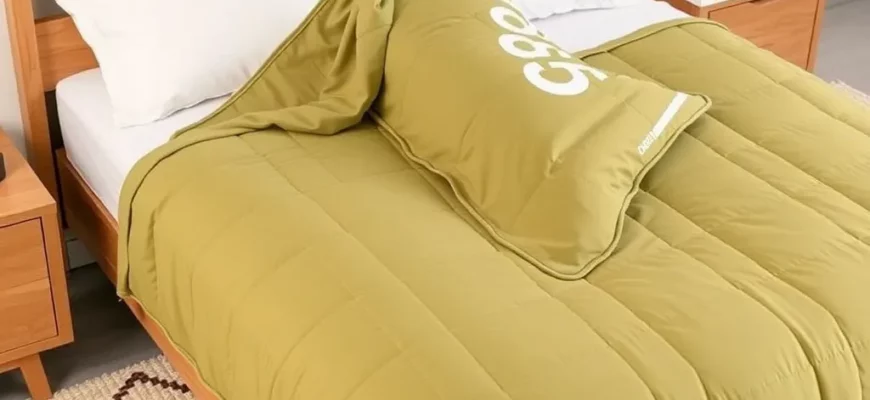
When researching how to make cool weighted blankets for hot sleepers, prioritize natural fibers․ 100% bamboo lyocell or linen are the top choices because they are naturally temperature-regulating and moisture-wicking․ Avoid “minky” or “fleece” if you tend to overheat, as these are 100% polyester and act as insulators․
A diy breathable weighted blanket can also be achieved by using the “window” method, where the grid squares are separated by unweighted fabric channels․ This creates thin strips of fabric that allow heat to escape more easily than a solid block of weighted material․ Stick to light colors like whites or light greys, as these psychologically and physically feel cooler during the warmer months․
Expert Perspective: Occupational Therapist Perspective on DIY Weighted Tools
In my professional experience working with the proprioceptive system, I cannot stress enough the importance of weight symmetry․ I have seen many DIY projects where the weight was “guestimated,” leading to an unbalanced blanket that actually caused hip and shoulder strain over time․ I always advise my clients to use a digital kitchen scale to measure every single pocket to the gram․ If you are unsure if a full blanket is right for you, start by making a small weighted lap pad․ This allows you to test your tolerance for the pressure and the texture of the beads before you commit to the 40+ hours of labor required for a king-sized version․ Remember, the goal is “grounding,” not “restricting․” If you feel like you cannot easily move your limbs, the blanket is too heavy․
Frequently Asked Questions
Glass microbeads are the superior choice․ They are smaller, denser, and more cooling than plastic poly-pellets, allowing for a thinner blanket that is easier to wash and more comfortable for hot sleepers․
Can I make a weighted blanket without a sewing machine?
Yes, the most effective no-sew method is hand-knitting with weighted tube yarn․ Alternatively, you can use the fleece-tie method, though it is significantly bulkier and less durable than sewn versions․
How do I calculate how much weight to add to my blanket?
The standard safety formula is 10% of the user’s total body weight plus one pound․ For most adults, this falls between 12 and 20 pounds, while children’s blankets are typically 5 to 7 pounds․
Is it safe to use rice or beans as a weighted filler?
No, organic fillers like rice or beans are not recommended for long-term use․ They cannot be washed, they attract pests, and they will eventually rot or grow mold due to absorbed body moisture․
How do I stop the weight from shifting to one side of the blanket?
You must use a quilted grid pattern․ By sewing the blanket into individual 4-inch or 5-inch squares, you lock the filler into place, ensuring the weight remains evenly distributed across your body․
Can a weighted blanket help with trauma or PTSD?
Yes, the grounding effect of deep pressure stimulation helps lower cortisol levels and stabilize the nervous system․ This provides a sense of physical security that can mitigate “fight or flight” responses during sleep․