- Finding Your Fit: Choosing the Best Stock Tank for a Cold Plunge
- Comparing 100-Gallon vs. 150-Gallon Stock Tank Sizes
- Stock Tank Comparison: Which Model Fits Your Space?
- Standard Tubs vs. Vertical Lit Barrels
- Leak-Proofing Your Setup: The Best Sealants and Coatings
- How to Apply a Professional-Grade Waterproof Top Coat
- The Big Chill: Selecting the Best Chiller for Your DIY Cold Plunge
- Calculating the Right Chiller Size for Your Tank Volume
- Ice Machines vs. Active Cooling Systems
- Sanitation Secrets: Keeping Your Water Clear and Safe
- Sizing Your Ozone Generator and Using Water Stabilizers
- Year-Round Maintenance: Dealing with Heat and Freezing
- Preventing Freeze-Ups with a Stock Tank Heater
- Troubleshooting Common Cold Plunge Technical Issues
- Solving the E10 Error and Other Chiller Glitches
- Frequently Asked Questions
Finding Your Fit: Choosing the Best Stock Tank for a Cold Plunge
The transition from casual ice baths to a permanent home setup often begins with the rugged‚ industrial aesthetic of a stock tank. These vessels offer a level of durability and “set-it-and-forget-it” reliability that inflatable tubs simply cannot match. Selecting the right tank requires balancing your physical height‚ available floor space‚ and the specific thermal demands of your climate.
While galvanized steel is the classic choice for its aesthetic and longevity‚ you must consider how the metal interacts with water chemistry and temperature. Plastic poly tanks are also an option‚ offering better natural insulation but requiring more structural support to prevent bowing over time. Most enthusiasts opt for steel because it provides a rigid frame that is much easier to modify with bulkheads and plumbing for a dedicated chiller system.
Comparing 100-Gallon vs. 150-Gallon Stock Tank Sizes
When determining the best size stock tank for cold plunge use‚ the primary factor is your ability to achieve full submersion without overflowing the vessel. A 100-gallon tank is generally sufficient for individuals under 6 feet tall‚ as it allows for a “knees-to-chest” posture that keeps the footprint compact. However‚ if you are taller or prefer to sprawl out‚ a 150 gallon stock tank cold plunge is the industry standard for comfort.
The 150-gallon model provides roughly 58 to 60 inches of length‚ which is critical for allowing your shoulders to stay submerged without your feet pressing against the opposite wall. From an efficiency standpoint‚ more water means more thermal mass‚ which helps the water stay cold longer once the target temperature is reached. Conversely‚ a smaller tank requires less energy to cool initially‚ making it a viable option for those using smaller 1/4 HP chillers in tight garage spaces.
Before purchasing‚ measure your entryway. A 150-gallon tank is significantly wider and may not fit through a standard 30-inch interior door. Always verify your doorway clearance and floor load capacity‚ as a filled 150-gallon tank can weigh over 1‚300 pounds once you add the weight of the water and the occupant.
Stock Tank Comparison: Which Model Fits Your Space?
Choosing between a horizontal tub and a vertical barrel depends entirely on your preferred immersion style and the dimensions of your recovery area.
| Tank Type | Footprint (Approx) | Immersion Style | Best For |
|---|---|---|---|
| 100-Gallon Oval | 53″ x 23″ | Semi-reclined / Seated | Small garages and solo users under 5’10” |
| 150-Gallon Oval | 58″ x 28″ | Full recline | Maximum comfort and taller athletes |
| Vertical Lit Barrel | 31″ x 31″ | Deep squat / Standing | Tight corners and vertical depth lovers |
Standard Tubs vs. Vertical Lit Barrels
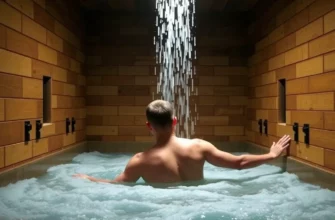
The lit barrel cold plunge style has gained massive popularity for those with limited square footage. These vertical tanks allow you to submerge up to your chin while maintaining a minimal footprint in a backyard or on a reinforced deck. Because you are sitting in a deep squat‚ the hydrostatic pressure is more evenly distributed across the lower body‚ which some athletes prefer for lymphatic drainage.
Standard oval tubs‚ however‚ are far easier to enter and exit. If you have mobility issues or simply want to relax after a hard training session‚ the best stock tank for cold plunge setups is usually the oval variety. The lower side walls (typically 24 inches) allow you to step in safely‚ whereas vertical barrels often require a step stool or a custom-built platform to navigate the higher entry point.
Leak-Proofing Your Setup: The Best Sealants and Coatings
A common mistake is assuming a galvanized tank is ready for 24/7 water storage out of the box. Over time‚ the zinc coating reacts with water stabilizers‚ leading to oxidation and eventually pinhole leaks at the seams. Sealing the interior of your tank is the single most important step for ensuring your investment lasts more than a couple of seasons.
Sealing also provides a smoother surface that is much easier to wipe down during water changes. Without a coating‚ the rough galvanized surface can trap biofilm and algae‚ making sanitation a constant uphill battle. By applying a high-quality top coat‚ you create a non-porous barrier that protects the metal and keeps the water looking crystal clear.
How to Apply a Professional-Grade Waterproof Top Coat
The secret to a long-lasting seal is 90% preparation and 10% application. You must remove the factory oily film with a vinegar wash or a TSP (trisodium phosphate) solution before you even think about painting. If the surface isn’t etched‚ the sealant will peel off in large sheets within weeks of your first plunge.
Once cleaned‚ many DIYers find that the best rustoleum topcoat for cold plunge projects is their LeakSeal or a dedicated marine-grade epoxy. If you prefer a spray-on solution‚ the best waterproof spray top coat for cold plunge tanks is a rubberized coating‚ but for maximum longevity‚ a roll-on pond liner or epoxy is superior. Allow the coating to cure for at least 72 hours in a dry environment before adding water; rushing this step is the fastest way to cause a structural failure of the seal.
When selecting the best sealant for cold plunge bulkheads‚ always use 100% silicone. Avoid “water-resistant” caulks that contain mildewcides not rated for constant submersion. Apply a generous bead around the threads and the flange of your bulkhead fittings to ensure a pressurized seal that won’t drip when the pump is running.
The Big Chill: Selecting the Best Chiller for Your DIY Cold Plunge
While dumping bags of ice into a tub is a rite of passage‚ the novelty fades quickly when you realize the cost and logistical headache involved. For a consistent 40-degree experience‚ an active cooling system is mandatory. A dedicated water chiller allows you to set a precise temperature and maintain it 24/7‚ ensuring your tub is ready the moment you wake up.
The cooling capacity you need is dictated by the volume of your tank and the ambient temperature of your environment. A tank kept in a 90-degree garage will require significantly more “heft” than one kept in a climate-controlled basement. Never undersize your chiller‚ as a unit running at 100% capacity constantly will burn out its compressor within a year.
Calculating the Right Chiller Size for Your Tank Volume
For most stock tank setups‚ a 1/4 HP chiller is the bare minimum‚ but it may struggle to drop the temperature more than 15 degrees below ambient. If you are using a 150-gallon tank‚ the best chiller for diy cold plunge enthusiasts is almost always a 1/2 HP unit. This size provides enough “pull-down” power to reach 39 degrees even during the peak of summer.
When searching for the best water chiller for cold plunge reddit threads often highlight the importance of flow rate. Your pump must be matched to the chiller’s requirements; too much flow and the water won’t stay in the heat exchanger long enough to cool; too little flow and the chiller will trigger a low-flow error. Aim for a pump that moves the entire volume of your tank through the chiller at least 2 to 3 times per hour.
Ice Machines vs. Active Cooling Systems
If you aren’t ready to invest in a chiller‚ the best ice machine for cold plunge use is a dedicated commercial nugget or flake ice maker. Residential ice makers simply cannot keep up with the 40-60 pounds of ice required to drop a 150-gallon tank from 70 degrees to 45 degrees. However‚ even a mid-range ice machine costs as much as a high-quality chiller.
The best chiller for cold plunge reddit users recommend is the active cooling route because it is “set and forget.” A 1/2 HP chiller typically costs about $15-$30 per month in electricity‚ whereas buying ice daily can easily exceed $200 a month. From a long-term financial perspective‚ the chiller is the clear winner for anyone plunging more than three times a week.
Sanitation Secrets: Keeping Your Water Clear and Safe
Cold water does not stay clean on its own. Biofilm‚ skin cells‚ and sweat will quickly turn your recovery tub into a petri dish if you don’t implement a filtration and sanitation strategy. However‚ you must be careful; the high concentrations of chlorine used in swimming pools can damage the seals in your chiller and irritate your skin during the deep breathing exercises associated with cold therapy.
- Always shower before entering to remove oils‚ lotions‚ and deodorants that clog filters.
- Use a 20-micron pleated filter to catch fine particulates and skin cells.
- Check your pH levels weekly; keeping the water slightly alkaline (7.2-7.6) prevents corrosion.
- Install an ozone generator to oxidize organic matter without the need for heavy chemicals.
- Don’t use standard chlorine tablets in a metal tank‚ as they are highly acidic and will eat through the galvanization.
- Don’t leave the tank uncovered; sunlight promotes rapid algae growth and causes the chiller to work harder.
- Don’t ignore “cloudy” water; it is a sign of high bacteria counts and requires an immediate shock treatment.
Sizing Your Ozone Generator and Using Water Stabilizers
Ozone is a powerful oxidizer that kills bacteria and viruses on contact. When deciding what size ozone generator for cold plunge use‚ look for units rated for at least 50mg/hr. This is sufficient to keep a 150-gallon tank sanitary with minimal supplemental chemicals. Ozone is particularly effective because it leaves no residue and reverts back to oxygen‚ making it the best water stabilizer for cold plunge users with sensitive skin.
To supplement the ozone‚ many professionals recommend using a non-chlorine shock‚ such as hydrogen peroxide (specifically 35% food grade‚ diluted correctly). This keeps the water “crisp” and clear without the chemical smell. Always add stabilizers while the pump is running to ensure even distribution throughout the entire water column.
Year-Round Maintenance: Dealing with Heat and Freezing
An outdoor stock tank is at the mercy of the elements. In the summer‚ the sun’s UV rays can degrade your tank’s coating and spike the water temperature. In the winter‚ the risk shifts to the plumbing. If water freezes inside your chiller’s heat exchanger or your external pump‚ the expanding ice will crack the internal components‚ leading to a total system failure.
Insulation is your best friend here. Wrapping your tank in Reflectix or a custom foam jacket can reduce your chiller’s energy consumption by up to 40%. For the plumbing‚ use foam pipe insulation on all external hoses to prevent thermal loss and protect the lines from becoming brittle in the cold.
Preventing Freeze-Ups with a Stock Tank Heater
If you live in a climate where temperatures drop below freezing‚ a stock tank heater for cold plunge setups is a mandatory safety item. You don’t want to heat the water to room temperature; you simply need a de-icer to keep the water at 34-36 degrees to prevent solid ice formation. Floating de-icers are effective‚ but ensure they have a guard to prevent them from touching the sides of the tank or your liner.
The most effective way to prevent freezing is to keep the water moving. A circulating pump creates enough kinetic energy to prevent surface ice from forming in moderately cold temperatures. However‚ in extreme sub-zero conditions‚ an inline heater integrated into your plumbing loop is the safest way to protect your expensive chiller and pump from internal ice damage.
Troubleshooting Common Cold Plunge Technical Issues
DIY setups are prone to small technical glitches that can be frustrating if you don’t know what to look for. Most issues stem from the plumbing loop rather than the chiller itself. If your system isn’t cooling‚ the first place to check is the flow rate. A restricted hose or a dirty filter will prevent the chiller from operating correctly.
Pro-Tip: Always install a “bypass” valve in your plumbing. This allows you to service the filter or the pump without having to drain the entire tank‚ saving you hours of downtime and gallons of water.
Solving the E10 Error and Other Chiller Glitches
One of the most frequent complaints among DIYers is the error e 10 ideal cold plunge chiller message. This is almost universally a flow-related issue. If the internal sensor detects that water isn’t moving fast enough‚ it shuts down the compressor to prevent the unit from freezing internally. Check for air locks in the lines by slightly loosening a fitting to let trapped air escape.
Another common cause of the E10 error is a clogged filter. If you haven’t changed your 20-micron filter in a month‚ the buildup of debris creates enough backpressure to trigger the sensor. Clean your internal chiller filter every two weeks and replace the external pleated filter monthly. If the error persists‚ ensure your pump hasn’t lost its prime‚ which often happens after a water change or if a hose has been moved.
In my professional experience‚ the biggest mistake beginners make isn’t the equipment choice—it’s the ego. I always advise starting at 55 degrees and moving down only when you can maintain a calm‚ nasal-breathing pattern. Furthermore‚ I cannot stress enough the importance of maintaining your water chemistry; dirty water is a vector for skin infections that can sideline your recovery faster than an injury. Lastly‚ never plunge alone if you are pushing your limits. The cold shock response is a powerful physiological event‚ and having a spotter or at least someone nearby is a non-negotiable safety standard for high-level cold therapy;
Frequently Asked Questions
For most users‚ 100 gallons is sufficient for those under 6ft‚ while 150 gallons is the gold standard for taller individuals who want full shoulder submersion.
How do I fix an E10 error on my cold plunge chiller?
This is usually a flow issue; check for kinks in the hoses‚ clear trapped air from the pump‚ and replace dirty filters to restore proper water movement.
Do I need to seal a galvanized stock tank?
Yes‚ sealing is vital to prevent rust and corrosion caused by constant water contact and sanitation chemicals‚ significantly extending the tank’s lifespan.
Which water stabilizer is safest for frequent use?
Hydrogen peroxide-based stabilizers or mineral sticks are the best options to avoid skin irritation and the harsh chemical smells associated with chlorine or bromine.
Can I leave my stock tank cold plunge outside in the winter?
Yes‚ but you must use a stock tank heater or keep the pump running 24/7 to prevent water from freezing and damaging the plumbing or chiller.
How often should I change the water in my cold plunge?
With an ozone generator and a high-quality filter‚ water can stay clean for 3 to 6 months; without these‚ you should change it weekly for safety.