- Understanding How to Start Cold Plunge Therapy Safely
- Preparing Your Mind for the Initial Cold Shock
- Setting Up Your Space: How to Start Cold Plunging at Home
- From Cold Showers to Dedicated Tubs
- The Proper Way to Cold Plunge: A Step-by-Step Protocol
- Mastering the First 30 Seconds
- How to Stay in Cold Plunge Without Overdoing It
- How to Cold Plunge Safely and Avoid the Afterdrop
- Recognizing Your Limits and Warming Up Naturally
- Maximizing Results: Weight Loss and Contrast Therapy
- How to Cold Plunge for Weight Loss and Metabolic Health
- The Fire and Ice Method: How to Cold Plunge and Hot Tub
- Building the Habit: How to Integrate Cold Plunges into Your Routine
- Consistency Over Intensity: Easing Into Your Routine
- Expert Perspective: Expert Perspective on Cold Water Acclimation
- Frequently Asked Questions
Understanding How to Start Cold Plunge Therapy Safely
Stepping into a pool of near-freezing water is more than just a fitness trend; it is a physiological reset that forces your body to adapt to extreme thermal stress. When you begin getting started with cold plunge practices, you are essentially training your nervous system to remain calm under pressure while triggering an immediate chemical cascade.
The initial sensation is often described as an invigorating shock that clears mental fog and sharpens focus instantly. By learning how to handle cold plunge entry correctly, you move from a state of panic to one of controlled resilience, allowing the body to harvest benefits like reduced inflammation and enhanced mood.
Preparing Your Mind for the Initial Cold Shock
The biggest hurdle for most beginners is not the water temperature itself, but the psychological anticipation of the discomfort. Your brain is hardwired to view extreme cold as a threat, which triggers a “fight or flight” response before your big toe even touches the surface.
To overcome this, you must set a clear, unwavering intention. Decide exactly how long you will stay in before you approach the water to prevent your survival instincts from talk you out of the experience mid-way through. This mental preparation builds the “top-down” control necessary to override the gasping reflex.
Focusing on a specific goal—whether it is recovery from a workout or a dopamine boost—transforms the experience from a chore into a tool for self-mastery. Visualizing your breath as a slow, steady anchor helps bridge the gap between the initial panic and the eventual state of calm that occurs after the first sixty seconds.
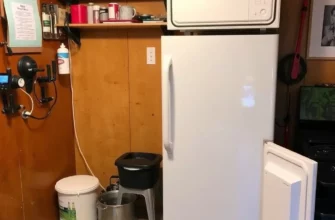
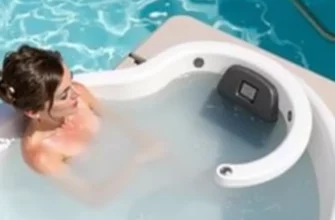
Setting Up Your Space: How to Start Cold Plunging at Home
You do not need a professional-grade laboratory or an expensive custom-built tub to begin your journey into cold water immersion. The most effective setup is the one you will actually use consistently, whether that is a basic bathroom fixture or a dedicated outdoor vessel.
The goal of setting up a home station is to minimize friction. If the process of getting the water cold takes two hours of hauling ice bags, you are much less likely to stick to the routine during the winter months or on busy mornings.
| Method | Initial Cost | Ease of Use | Temperature Control |
|---|---|---|---|
| Cold Showers | Zero | High | Low (depends on tap) |
| Stock Tank / Bin | $100 ― $300 | Medium | Manual (requires ice) |
| Chest Freezer Conversion | $500 ⎻ $800 | High | Excellent (via thermostat) |
| Dedicated Cold Plunge Tub | $2,000+ | Excellent | Precision Digital Control |
From Cold Showers to Dedicated Tubs
For many, the best way to start cold plunge habits is by simply turning the handle to the coldest setting at the end of a regular shower. While this does not offer the full hydrostatic pressure of total immersion, it builds the necessary mental calluses and introduces your skin to the sensation of thermal cooling.
If you are looking for how to start cold plunging at home safely with more intensity, a galvanized stock tank or a heavy-duty plastic bin is a great second step. These setups allow for full neck-deep immersion, which is critical for stimulating the vagus nerve and activating brown adipose tissue located around the collarbones and upper back.
When using a manual tub, aim for a starting temperature between 50°F and 59°F. Going colder too quickly can lead to unnecessary pain and may discourage you from continuing the practice before your body has had a chance to acclimate to the stimulus.
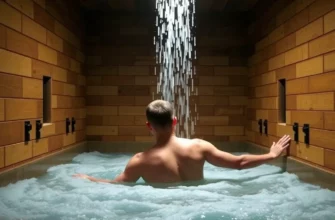
The Proper Way to Cold Plunge: A Step-by-Step Protocol
Success in the cold is determined by how you manage your transition into the water. A chaotic entry leads to a chaotic physiological response, whereas a structured protocol allows you to maintain sovereignty over your autonomic nervous system.
Following a repeatable set of steps ensures that you are not just “surviving” the cold, but actually training your body to thrive within it. This process involves more than just jumping in; it requires a deliberate synchronization of movement and respiration.
- Pre-Plunge Check: Ensure your towel and warm clothes are within arm’s reach. Never plunge in a locked room or alone if you are testing a new, lower temperature for the first time.
- The Controlled Entry: Walk into the water slowly but without hesitation. Submerge yourself up to the neck in one fluid motion to avoid “creeping” in, which only prolongs the shock.
- The Initial Exhale: As the water hits your chest, force a long, slow exhale through your mouth to counter the natural urge to gasp for air.
- The Stillness Phase: Once submerged, keep your hands and feet still. Moving creates a “thermal layer” break that makes the water feel significantly colder than it actually is.
- The Exit and Drip: Exit the water slowly. Stand for 30 seconds to let the water drip off before reaching for a towel, allowing your body to begin the rewarming process naturally.
Mastering the First 30 Seconds
The “Cold Shock Response” is a massive sympathetic nervous system flare-up that happens the moment your skin temp drops. To understand how to cold plunge correctly, you must treat these first 30 seconds as a meditative challenge rather than a physical endurance test.
When the gasp reflex hits, your brain screams for air. Focusing on nasal breathing during this window sends a signal to your brain that you are safe, effectively “hacking” your stress response. This is the moment when mental resilience is forged, as you choose to remain calm while your body is in a state of high alert.
If you find yourself hyperventilating, try to double the length of your exhalations compared to your inhalations. This specific breathing pattern activates the parasympathetic nervous system, which acts as a brake on the heart rate and helps you settle into the water for the remainder of your session.
How to Stay in Cold Plunge Without Overdoing It
A common mistake for beginners is staying in too long as a badge of honor. When learning how to stay in cold plunge, remember that the goal is a hormetic response—a “good” stress—not a dangerous level of core cooling that leads to hypothermia.
For your first few weeks, limit your sessions to 2 or 3 minutes. Research suggests that the metabolic and mood-boosting benefits, such as the massive dopamine spike, occur relatively quickly and do not require 10-minute sessions to be effective.
Pay close attention to your fingers and toes; if they become numb or lose motor control, it is time to get out. As you learn how to get used to cold plunge, you will notice your “shiver threshold” moves, allowing you to stay in longer comfortably, but consistency is always more valuable than duration.
How to Cold Plunge Safely and Avoid the Afterdrop
The danger of cold immersion doesn’t always happen while you are in the water; it often occurs five to ten minutes after you have exited. This phenomenon, known as “Afterdrop,” happens when the cold blood from your extremities begins to circulate back to your core as you warm up.
Understanding how can i safely start a cold plunge routine requires a deep respect for this delayed cooling. If your core temperature continues to slide after you are out, you may experience intense shivering, dizziness, or even fainting. Safety must be the foundation of your practice.
- Don’t Plunge Alone: Especially as a beginner, have someone nearby who can assist if you become disoriented.
- Skip the Hot Shower: Jumping straight into a hot shower causes rapid vasodilation, which can worsen the Afterdrop and lead to a drop in blood pressure.
- Monitor Your Skin: If your skin is pale or blue-ish, your body is effectively shunting blood to the core. This is a sign to end the session.
- Dry Off Quickly: Remove wet clothes immediately, as conductive heat loss (wet skin to air) is significantly faster than convective heat loss.
Recognizing Your Limits and Warming Up Naturally
Knowing how to cold plunge safely involves a proactive rewarming strategy. Instead of relying on external heat sources like a sauna or shower right away, use low-impact movement to generate heat from the inside out. This allows the body to stabilize its temperature gradually and safely.
The “Horse Stance”—a wide, squatting position with rhythmic arm movements—is a favorite among cold exposure experts. By engaging the large muscles of the legs and glutes, you force the body to produce metabolic heat without the jarring impact of high-intensity exercise, which could be dangerous while your muscles are stiff from the cold.
If you find yourself shivering uncontrollably, sip a lukewarm (not boiling) beverage and wrap yourself in wool or fleece. Shivering is your body’s natural way of generating heat; embrace it rather than trying to suppress it immediately, as it is a sign your metabolism is working at its peak.
Maximizing Results: Weight Loss and Contrast Therapy
Beyond the mental benefits, cold exposure is a potent tool for metabolic optimization. When the body is exposed to cold, it must burn energy to maintain its core temperature, a process known as thermogenesis. This is where the physiological “magic” of cold immersion really happens for those looking to change their body composition.
Furthermore, combining cold with heat—known as contrast therapy—can amplify these effects by creating a “vascular pump” that flushes the lymphatic system and accelerates muscle recovery after intense physical exertion.
How to Cold Plunge for Weight Loss and Metabolic Health
If you are looking for how to cold plunge for weight loss, you need to understand the role of Brown Adipose Tissue (BAT). Unlike white fat, which stores energy, brown fat is packed with mitochondria and actually burns calories to create heat in a process called non-shivering thermogenesis.
Regular cold exposure increases the density and activity of your brown fat stores. To maximize cold plunge benefits for metabolism, try to stay in until the point where you just begin to shiver. This “Soberg Principle” suggests that the metabolic peak occurs when the body has to work hardest to rewarm itself without external help.
While the direct calorie burn during a 3-minute plunge is modest, the long-term metabolic signaling is significant; Regular exposure improves insulin sensitivity and can help regulate blood sugar levels, making it a powerful adjunct to a healthy diet and exercise routine.
The Fire and Ice Method: How to Cold Plunge and Hot Tub
For those who have access to both, learning how to cold plunge and hot tub (or sauna) provides a unique cardiovascular workout. This contrast causes your blood vessels to rapidly constrict in the cold and dilate in the heat, which acts as a “workout” for your entire circulatory system.
The correct way to cold plunge in a contrast routine is to always end on the cold cycle. Ending on cold ensures that your body has to work to rewarm itself, sustaining the metabolic boost and keeping your pores closed, which can help with skin health and systemic inflammation.
A typical ratio is 15 minutes of heat followed by 2-3 minutes of cold, repeated for three rounds. This method is exceptionally effective for flushing metabolic waste from muscle tissue, making it a favorite for professional athletes who need to recover quickly between training sessions.
Building the Habit: How to Integrate Cold Plunges into Your Routine
The true power of cold water therapy is found in consistency, not intensity. A single ten-minute plunge once a month is far less effective than three-minute plunges three times a week. The goal is to make the cold a familiar friend rather than a traumatic event.
To ensure long-term adherence, you must find a way to integrate these sessions into your daily life so they become as automatic as brushing your teeth. This often means finding the “Minimum Effective Dose” that gives you the results you want without burning out your willpower.
Pro Tip: To avoid the “willpower drain,” try habit-stacking. Cold plunge immediately after your morning workout or right before your first cup of coffee to anchor the new behavior to an existing one.
Consistency Over Intensity: Easing Into Your Routine
A widely cited benchmark for metabolic health is the 11-minute per week rule. This total time should be spread across 2 to 4 sessions. Following this guideline helps you avoid the “more is better” trap while ensuring you hit the threshold for significant physiological change.
When deciding on the best way to start cold plunging, consider the time of day; Morning plunges are ideal for focus and energy due to the sustained release of norepinephrine and dopamine. However, avoid plunging too close to bedtime, as the increase in core temperature that follows the plunge can interfere with your body’s natural sleep-cooling cycle.
Remember that your tolerance will fluctuate. On days when you are stressed, sleep-deprived, or under the weather, it is perfectly okay to reduce the duration or slightly increase the temperature. The most important part of how to integrate cold plunges into your routine is simply showing up and getting wet.
Expert Perspective: Expert Perspective on Cold Water Acclimation
In my professional experience, the most common mistake beginners make is treating the cold plunge like a competitive sport. I always advise my clients that the “minimum effective dose” is the gold standard. You aren’t trying to win a trophy for the longest soak; you are trying to trigger a hormetic response. If you stay in until you are blue, you have moved past “healthy stress” and into “systemic trauma.” I find that nasal breathing is the ultimate bridge between the nervous system and the water. If you cannot maintain a steady nasal breath, the water is either too cold or you have been in too long. Listen to your breath—it will tell you exactly when it’s time to get out.
Frequently Asked Questions
For your first session, aim for 30 seconds to 2 minutes. This is long enough to move past the initial shock reflex but short enough to ensure you can safely rewarm without the risk of Afterdrop.
What is the best temperature for a cold plunge beginner?
A safe and effective starting range is between 50°F and 59°F (10°C ― 15°C). This temperature is cold enough to trigger beneficial chemical releases without being dangerously overwhelming for a novice.
Can I cold plunge if I have a heart condition?
You must consult with a physician before starting cold water immersion if you have any cardiovascular issues. The cold shock response causes an immediate spike in heart rate and blood pressure that can be dangerous for those with underlying conditions.
Should I hold my breath when I get in?
No, you should never hold your breath upon entry. Instead, focus on a long, controlled exhalation to suppress the gasp reflex and signal to your brain that you are in control of the stressor.
How many times a week should I cold plunge for weight loss?
To see metabolic benefits, aim for a total of 11 minutes per week, divided into 3 or 4 sessions of roughly 3 minutes each. This frequency is sufficient to stimulate brown fat activity and metabolic signaling.