- Finding the Best Home Cold Plunge for Your Recovery Routine
- Why Professional Recovery is Moving Into the Home
- Comparing the Top-Rated Cold Plunge Systems for 2026
- Performance Breakdown: Budget vs. Premium Systems
- The Best Affordable Cold Plunge Options That Actually Last
- Top Picks for a High-Quality Budget Cold Plunge
- Maximizing Tight Spaces with the Best Vertical Cold Plunge
- Why an Upright Cold Plunge is Better for Small Spaces
- The Tech-Forward Choice: Best Cold Plunge with Chiller and Filter
- Maintaining Crystal Clear Water with Ozone and Filtration
- Essential Accessories to Complete Your Home Setup
- From Thermal Socks to Precision Thermometers
- Common Mistakes to Avoid When Buying a Home Ice Bath
- Placement and Power Requirements
- Expert Perspective: Safe Cold Immersion
- Frequently Asked Questions
Finding the Best Home Cold Plunge for Your Recovery Routine
The era of driving to a high-end recovery center just to sit in a freezing tub is quickly coming to an end. As the science surrounding cold water immersion becomes more accessible, the market for home-based systems has exploded, offering everything from basic inflatable pods to professional-grade stainless steel tanks. Choosing the right setup is no longer just about picking the coldest option; it is about finding a balance between your available square footage, your dedicated recovery budget, and how much maintenance you are willing to perform.
If you are a marathon runner, a weightlifter, or someone simply looking to boost metabolic health, the “best” cold plunge is a moving target. A dedicated athlete might require a system that stays at a constant 39 degrees Fahrenheit around the clock, while a weekend warrior might be perfectly happy with a portable setup that they fill with ice on Sunday afternoons. The goal of this guide is to strip away the marketing jargon and look at the technical specifications that actually dictate your daily experience.
Why Professional Recovery is Moving Into the Home
The shift toward home-based hydrotherapy is driven by a simple realization: consistency is the only thing that actually produces results. While a single plunge can provide a temporary dopamine spike, the real benefits—such as improved insulin sensitivity and cardiovascular resilience—require a regular schedule. Having a unit in your garage or on your patio removes the friction of travel, making it far more likely that you will stick to a protocol of 11 to 15 minutes of total weekly exposure.
Beyond convenience, the long-term economics of owning a unit are hard to ignore. If a local recovery studio charges $50 per session, a high-quality $1,500 home unit pays for itself in just 30 visits. When you consider that many modern home units are built with durable materials like military-grade drop-stitch PVC or reinforced acrylic, these systems can easily provide five to ten years of service, making the cost-per-plunge negligible over the life of the product.
Comparing the Top-Rated Cold Plunge Systems for 2026
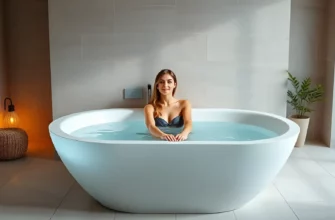
The landscape of cold therapy equipment has branched into three distinct categories: inflatable pods, vertical barrels, and horizontal luxury tubs. Each serves a specific demographic, and understanding the engineering behind them is key to making a smart investment.
| System Type | Primary Material | Best Use Case | Insulation Quality |
|---|---|---|---|
| Inflatable Pod | Drop-Stitch PVC | Budget-conscious / Portable | Moderate (Needs Lid) |
| Vertical Barrel | Rotomolded Plastic | Small Patios / Apartments | High (Double-Walled) |
| Horizontal Tub | Acrylic / Stainless Steel | Full Body Recline / Pro-Grade | Elite (Vacuum Sealed) |
| Stock Tank DIY | Galvanized Steel | Budget DIY Enthusiasts | Low (Requires Custom Wrap) |
Performance Breakdown: Budget vs. Premium Systems
The biggest differentiator between a $500 setup and a $5,000 setup is the thermal regulation efficiency; High-end premium systems utilize thick, high-density foam insulation or double-walled vacuum seals that prevent the ambient air temperature from warming the water. This is particularly vital if you plan to keep your plunge in a garage that reaches 90 degrees in the summer. A poorly insulated tub will force your chiller to run 24/7, leading to significant spikes in your monthly electricity bill and premature wear on the cooling motor.
Drainage and filtration also separate the tiers. Budget systems often rely on a simple gravity drain at the bottom, which can be a nightmare to manage if you don’t have a floor drain nearby. Premium systems typically include built-in pumps that can push water through a garden hose, allowing you to water your lawn with the gray water while cleaning the tank. Furthermore, the cooling speed matters; a 1/2 HP chiller can drop water temperature by 10 degrees in under two hours, whereas a 1/4 HP unit might struggle to maintain 45 degrees during a heatwave.
The Best Affordable Cold Plunge Options That Actually Last
You do not need to spend the equivalent of a used car down payment to get high-quality cold therapy. The “entry-level” market has matured significantly, moving away from flimsy “kiddie pools” toward rugged, inflatable drop-stitch technology. These units are surprisingly rigid—enough to sit on the edge without the walls collapsing—and offer a legitimate path toward setting up a home ice bath for under $1,000.
When shopping in the budget tier, the primary trade-off is often manual labor versus automation. Most units under $800 are “ice-only,” meaning you are responsible for buying or freezing the ice required to reach therapeutic temperatures. While this saves money upfront, buying 40 pounds of ice for every session can quickly become more expensive than buying a chiller within the first year of use. If you choose an affordable pod, ensure it has the standard 3/4-inch ports so you can upgrade to a chiller later.
Top Picks for a High-Quality Budget Cold Plunge
The most successful budget models for 2026 utilize triple-layered thermal walls. Look for pods that include a “thermal bridge” cover, which is an insulated lid that snaps into place. Without a high-quality lid, you can lose up to 15 degrees of coldness overnight due to evaporation and convection. Always check the denier rating of the outer fabric; a rating of 1000D or higher indicates the material is thick enough to resist punctures from gravel or pet claws.
Another excellent value play is the modified stock tank. While these require a bit of DIY spirit to seal the seams and add insulation, they offer a level of durability that plastic pods cannot match. For those looking for the best inexpensive cold plunge, an inflatable pod made of high-grade PVC remains the gold standard because it can be deflated and stored in a closet during the winter months, protecting your investment from the elements.
Maximizing Tight Spaces with the Best Vertical Cold Plunge
For apartment dwellers or those with crowded garages, the traditional “coffin-style” horizontal tub is often a non-starter. This is where the vertical cold plunge shines. By utilizing a smaller footprint and increasing the depth, these units allow for full submersion without taking up the space of a loveseat. A vertical tank typically occupies less than 9 square feet of floor space, making it the ideal choice for a balcony or a corner of a home gym.
| Feature | Vertical (Upright) | Horizontal (Traditional) |
|---|---|---|
| Footprint | Small (Approx 3′ x 3′) | Large (Approx 6′ x 3′) |
| Submersion Style | Fetal / Seated | Full Recline |
| Water Volume | 70-90 Gallons | 100-120 Gallons |
| Hydrostatic Pressure | Higher (Deep Water) | Lower (Shallow Water) |
Why an Upright Cold Plunge is Better for Small Spaces
The physics of a vertical plunge offer a unique physiological advantage: hydrostatic pressure. Because the water column is deeper, there is more pressure exerted on the lower extremities, which can assist with lymphatic drainage and reducing peripheral edema. From a comfort perspective, sitting upright in a “fetal position” is often more psychologically manageable for beginners than lying flat on their back, as it allows for a more controlled breathing pattern and a sense of stability.
When looking for a vertical cold plunge for an apartment, weight is your biggest concern. A 100-gallon tank weighs approximately 834 pounds plus the weight of the user. Before installing a vertical unit on a balcony, verify that the floor load capacity exceeds 150 lbs per square foot. Most modern apartment balconies are built to handle this, but older structures may require a structural assessment; Additionally, vertical units with integrated chillers are now available, meaning you don’t need extra space for a separate cooling motor sitting on the floor.
The Tech-Forward Choice: Best Cold Plunge with Chiller and Filter
If you want a “set it and forget it” experience, a chiller-integrated system is the only way to go. These systems function like a miniature, high-powered refrigerator for your water. Instead of lugging bags of ice, you simply set your desired temperature on a digital display—usually between 39 and 55 degrees—and the system maintains it indefinitely. This ensures that the water is ready for you the moment you wake up, removing the biggest barrier to consistency.
The heart of these systems is the chiller unit, typically rated in Horsepower (HP). For most indoor setups, a 1/4 HP chiller is sufficient, but if your unit is outdoors or in a hot garage, a 1/2 HP or 1 HP chiller is necessary to overcome the ambient heat load. High-quality chillers also include a built-in circulation pump, which keeps the water moving. Moving water feels significantly colder than still water because it breaks down the “thermal layer” your body creates, leading to a more intense and effective session.
Maintaining Crystal Clear Water with Ozone and Filtration
One of the most common complaints about home ice baths is the water becoming murky or slimy after just a few uses. To combat this, tech-forward units utilize a dual-stage sanitation system consisting of a 20-micron sediment filter and an ozone generator. The filter catches hair, skin cells, and debris, while the ozone (O3) acts as a powerful natural oxidizer that kills bacteria and viruses without the need for heavy chlorine or bromine.
Ozone sanitation is a game-changer for home users because it is “active” sanitation. As the water cycles through the chiller, the ozone is injected, cleaning the water and then dissipating back into oxygen (O2) within minutes. Using an ozone system can extend the life of your water from two weeks to over three months, saving you thousands of gallons of water per year. For the best experience, look for a system that allows you to program the filtration cycles to run during off-peak electricity hours.
Essential Accessories to Complete Your Home Setup
Buying the tub is only the first step. To make cold water immersion a sustainable habit, you need to address the “pain points” of the experience—specifically the freezing of your extremities and the mess of water on the floor. A well-equipped setup increases safety and ensures that your home remains dry and organized.
- Neoprene Boots and Gloves: Your fingers and toes have the highest surface-area-to-mass ratio and will freeze first. Using 3mm or 5mm neoprene socks can extend your sessions by protecting these sensitive areas from the “pain phase” of the plunge.
- Floating Digital Thermometer: Never trust the temperature reading on a budget chiller alone. A secondary, calibrated thermometer ensures you are hitting your target therapeutic range safely.
- High-Impact Rubber Floor Mats: Cold plunges are heavy and vibrate slightly when the chiller is running. A 3/4-inch rubber horse stall mat will protect your garage floor and dampen the noise.
- Skimmer Net: Even with a filter, small debris like hair or dust will settle on the surface. A quick 10-second skim before you enter keeps the water inviting.
From Thermal Socks to Precision Thermometers
While the goal is to get cold, excessive pain in the toes and fingers can trigger a premature “flight” response, causing you to exit the water before you have achieved the desired metabolic effect. Thermal socks allow you to keep your core submerged longer while keeping the extremities manageable. This is particularly important for those using the “best cold plunge socks” designed specifically for thinness and grip, preventing slips when exiting the tub.
Precision is also key for safety. If you are aiming for a “Minimum Effective Dose,” you need to know exactly how cold the water is. A difference of five degrees (45 vs 40) might not sound like much, but it represents a significant increase in the physiological stress on the body. Always place your thermometer at the midpoint of the tank’s depth to get an accurate reading, as the surface water is usually slightly warmer than the bottom.
Common Mistakes to Avoid When Buying a Home Ice Bath
The most expensive cold plunge is the one you buy twice. Many people jump into a purchase based on an Instagram ad without considering the logistical realities of housing 1,000 pounds of water. Failure to plan for drainage, electrical loads, and floor leveling can turn a recovery tool into a structural headache.
Critical Warning: Never plug a high-powered chiller into a standard extension cord. Most chillers pull significant amperage during the startup phase of the compressor. Always use a dedicated 15-amp or 20-amp circuit with a GFCI outlet to prevent electrical fires or shocks in the event of a leak.
Placement and Power Requirements
If you are setting up your unit in a garage, check the slope of the floor. Most garage floors are slanted toward the door to allow for water runoff. If your tank is not level, the water will put uneven pressure on the seams, which can lead to a structural failure over time. Use shims or a leveling platform to ensure the water line is perfectly even across the top of the tank;
Furthermore, consider the humidity. A cold tank in a warm room will produce significant condensation on the outside of the walls. If you are placing your unit on a wood floor or in a finished basement, you must use a waterproof tray or a high-capacity dehumidifier to prevent mold growth and subfloor rot. For a garage setup, ensure there is at least 12 inches of clearance around the chiller’s intake and exhaust fans to prevent the motor from overheating.
Expert Perspective: Safe Cold Immersion
In my professional experience working with high-performance athletes, I have found that the most common mistake is “chasing the freeze” rather than focusing on the protocol. You do not need to sit in 34-degree water to see results. I always advise my clients to aim for a Minimum Effective Dose of 11 to 15 minutes per week, spread across 3 or 4 sessions. The water should be “uncomfortably cold,” but you should still be able to maintain a steady, rhythmic breath. If you are gasping or shivering uncontrollably during the plunge, the water is too cold for your current level of adaptation. Remember, the best unit is the one that is easy enough to use that you actually get in it every single morning.
Frequently Asked Questions
For most users, the best value is found in high-quality inflatable pods paired with a 1/2 HP external chiller. This setup provides the durability of professional units at roughly half the cost, offering excellent insulation and portability.
Can I use a cold plunge inside my apartment?
Yes, but you must prioritize a vertical model with a small footprint and verify your balcony or floor’s weight capacity. Using a specialized mat to catch condensation and a quiet chiller is essential for apartment living.
How often should I change the water in my cold plunge?
Without a filtration system, water should be changed every 3-5 days. If you use a system with a 20-micron filter and ozone sanitation, you only need to change the water every 3 to 4 months.
Are vertical cold plunges better than horizontal tanks?
Vertical plunges are better for space-saving and provide higher hydrostatic pressure, which helps with circulation. Horizontal tanks are superior for users who prefer a full-body recline and have ample space.
Do I really need a chiller, or is ice enough?
While ice works, a chiller is vastly more convenient and cheaper in the long run. Buying ice for daily plunges can cost $200+ per month, whereas a chiller costs pennies per day to run and ensures the water is always ready.
What is the best temperature for a home cold plunge?
Beginners should start between 50 and 55 degrees Fahrenheit. As you adapt, you can move down to the 40-45 degree range. Advanced users often prefer 39 degrees, but the benefits plateau below that point.