- How to Cold Plunge: Navigating Your First Session with Confidence
- A Beginner’s Guide to Cold Plunge Basics
- Step-by-Step Instructions: How to Do a Cold Plunge Properly
- Setting Up Your Sanctuary: How to Make a Cold Plunge at Home
- Budget-Friendly DIY: How to Make a Cold Plunge from a Freezer
- Creative Solutions: How to Cold Plunge in an Apartment or Without a Tub
- Breathing Techniques for Cold Plunge: Staying Calm Under Pressure
- How to Control Breathing in Cold Plunge to Prevent Panic
- The Best Way to Cold Plunge: Comparing Methods and Environments
- Choosing Your Method: Freezer vs. Tub vs. Nature
- Safety Protocols: How to Safely Do a Cold Plunge and Avoid Common Mistakes
- Staying Safe After a Cold Plunge: Managing the Afterdrop
- The Mental Game: How to Mentally Prepare for Cold Plunge Challenges
- How to Make Cold Plunge Easier Over Time
- Maintenance 101: How to Get Your Cold Plunge Cold and Keep It Clean
- Keeping It Chilly: How to Get Cold Plunge Colder in Summer
- Frequently Asked Questions
How to Cold Plunge: Navigating Your First Session with Confidence
Stepping into a tub of near-freezing water is a visceral experience that defies the modern urge for constant comfort. While it might seem like a fitness fad, cold water immersion is a practice rooted in thousands of years of human history, designed to trigger a powerful biological reset.
The goal isn’t just to endure the cold but to learn how to master your physiological response to it. By intentionally exposing your body to this specific type of stress, you are training your nervous system to remain calm under pressure, a skill that carries over into every aspect of life.
A Beginner’s Guide to Cold Plunge Basics
For most people, getting started with a cold plunge begins with a simple question: why would anyone do this to themselves? The answer lies in hormetic stress, a biological phenomenon where a small dose of a stressor actually makes the body stronger and more resilient over time.
When you first submerge, your body will scream at you to get out; this is the cold shock response. You should know that the first 30 seconds are the hardest part of the entire experience, as your skin receptors send a frantic signal to your brain that you are in danger.
Once you push past that initial half-minute, your breathing will begin to level out, and a strange sense of calm often follows. This transition marks the moment your body switches from panic mode to vagus nerve stimulation, helping to lower your heart rate even while submerged in the ice.
Step-by-Step Instructions: How to Do a Cold Plunge Properly
Success in the ice is determined long before your skin touches the water. It requires a methodical approach that prioritizes safety and mental fortitude over bravado or ego.
Approaching the water with a chaotic mindset usually leads to a chaotic exit. By following a structured protocol, you ensure that you stay in long enough to reap the metabolic benefits, such as the activation of brown adipose tissue, without overtaxing your system.
- Hydrate and Ground Yourself: Drink a glass of room-temperature water and spend two minutes practicing slow, rhythmic breathing. Avoid caffeine immediately before your plunge, as it can artificially elevate your heart rate and make the cold shock feel more intense.
- The Controlled Entry: Walk into the water with purpose. Do not jump or dive, as this can exacerbate the gasp reflex. Submerge your body up to the collarbone as quickly as possible to ensure the most significant surface area of your skin is exposed simultaneously.
- Hand and Foot Management: Many beginners find that their hands and feet hurt the most. You can keep your hands tucked into your armpits or resting on your thighs to preserve some heat, but eventually, you want them exposed to fully adapt to the temperature.
- The Three-Minute Mark: Focus on staying still; Moving around creates a “thermal layer” break, making the water feel much colder. Aim for three minutes, which is widely considered the sweet spot for triggering a robust norepinephrine release.
- The Mindful Exit: When your time is up, stand up slowly. Your blood vessels have undergone significant vasoconstriction, and standing too quickly can cause lightheadedness. Squeeze the water off your skin with your hands before reaching for a towel to help stimulate blood flow back to the extremities.
Setting Up Your Sanctuary: How to Make a Cold Plunge at Home
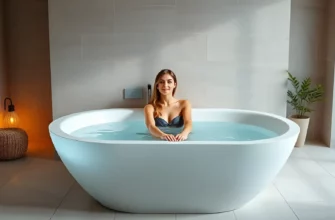
Creating a dedicated space for your practice is the best way to ensure consistency. You don’t need a five-figure custom tub to get professional-grade results; you just need a vessel that holds water and a way to keep it cold.
Whether you have a sprawling backyard or a cramped city apartment, there is a configuration that works for your budget. The key is to focus on water temperature management and ease of drainage, as a setup that is difficult to maintain will eventually be ignored.
Budget-Friendly DIY: How to Make a Cold Plunge from a Freezer
Converting a chest freezer is the gold standard for many DIY enthusiasts because it offers incredible insulation and built-in cooling. However, you must never plug the freezer in while you are inside it due to the extreme risk of electrocution.
To seal the unit, use a high-quality marine-grade sealant on all internal seams to prevent water from leaking into the insulation. Most builders recommend using an external temperature controller like an Inkbird, which allows you to set a specific temperature range and keeps the water from freezing into a solid block of ice.
Grounding is non-negotiable. Always use a GFCI (Ground Fault Circuit Interrupter) outlet or adapter for any electronic components associated with your tub. This simple safety measure is the difference between a successful recovery tool and a lethal hazard.
Creative Solutions: How to Cold Plunge in an Apartment or Without a Tub
If you are short on space, look into vertical stock tanks or inflatable portable pods. These take up a fraction of the floor space of a horizontal tub and allow you to sit upright, which many find more comfortable for deep breathing exercises.
For those living in apartments, verify the weight capacity of your balcony or floor before filling a large vessel. A 100-gallon tank weighs over 800 pounds when full, which can exceed the structural limits of some residential buildings. Using a heavy-duty pond liner inside a secondary container can also provide an extra layer of protection against accidental leaks.
Breathing Techniques for Cold Plunge: Staying Calm Under Pressure
Your breath is the remote control for your nervous system. When you hit the cold water, your body naturally wants to take short, shallow sips of air, which signals to the brain that you are under attack.
By overriding this reflex, you are effectively telling your brain that despite the environmental stress, you are safe. This “top-down” regulation is what builds the mental resilience that makes cold therapy so effective for stress management in daily life.
How to Control Breathing in Cold Plunge to Prevent Panic
The most effective technique for beginners is the extended exhale. Try to make your exhale twice as long as your inhale. This specific ratio stimulates the parasympathetic nervous system, helping to counteract the “fight or flight” surge of adrenaline.
Box breathing—inhaling, holding, exhaling, and holding for equal counts of four—is another excellent tool for maintaining focus. If you are planning to dip your face or head, ensure you have fully regained control of your breath before doing so to avoid the risk of involuntary inhalation underwater.
The Best Way to Cold Plunge: Comparing Methods and Environments
Not all cold water experiences are created equal. The method you choose will depend on your tolerance for maintenance, your budget, and how much you value the “wild” aspect of the practice.
While a controlled home environment is great for daily consistency, nothing beats the sensory experience of a natural body of water. However, each has its own set of technical requirements and safety considerations.
| Method | Setup Cost | Temperature Control | Maintenance Level |
|---|---|---|---|
| Chest Freezer DIY | Moderate ($300-$800) | Excellent (Digital) | High (Weekly cleaning) |
| Portable Inflatable Pod | Low ($100-$300) | Poor (Requires ice) | Moderate (Manual drain) |
| Commercial Chiller Tub | High ($3k-$10k) | Perfect (Auto-set) | Low (Integrated filters) |
| Natural Lake/River | Zero | None (Seasonal) | None |
Choosing Your Method: Freezer vs. Tub vs. Nature
If you value precision, a chest freezer or dedicated chiller tub is the way to go. These allow you to track your progress by slowly lowering the temperature by one degree every week as you adapt. This incremental progression is vital for long-term success.
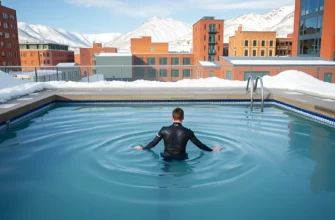
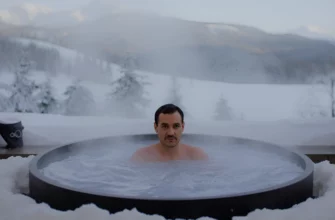
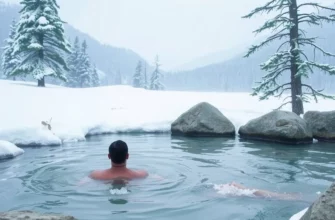
Nature plunges offer the benefit of thermal recovery in a moving environment, which is often more challenging because the water doesn’t “warm up” around your body. If you choose a lake or river, always scout the exit point first to ensure you can get out quickly if you start to lose motor control in your hands.
Safety Protocols: How to Safely Do a Cold Plunge and Avoid Common Mistakes
Cold water is a powerful tool, but it demands respect. The most dangerous mistake people make is staying in too long to “prove” something. Hypothermia doesn’t always feel like shivering; it can manifest as confusion or a false sense of warmth.
Safety starts with understanding your own limits. If you have a history of heart issues, the sudden vasoconstriction caused by the cold can put significant stress on your cardiovascular system. Always consult a professional if you have underlying health concerns.
- Never Plunge Alone: Especially as a beginner, have a spotter nearby who can help you out of the tub if your muscles lock up or you feel faint.
- Avoid the Hot Shower Trap: Jumping into a hot shower immediately after a plunge can cause vasodilation too quickly, leading to a drop in blood pressure and fainting.
- Dress for the Afterdrop: The “afterdrop” occurs when cold blood from your extremities rushes back to your core. Put on a hat and warm layers immediately after drying off to stabilize your temperature.
- No Alcohol: Never use alcohol to “warm up” before or after a plunge. It thins the blood and impairs your body’s ability to regulate its core temperature correctly.
Staying Safe After a Cold Plunge: Managing the Afterdrop
The ten minutes following your plunge are just as important as the time in the water. Instead of relying on external heat like a sauna or shower, try to rewarm using movement. Doing a few air squats or a “horse stance” helps your body generate internal heat through shivering thermogenesis.
If you start to shiver uncontrollably, don’t panic. Shivering is your body’s natural and highly effective way of producing heat. Sip a warm (not hot) tea and stay in a draft-free room until your heart rate returns to its resting state.
The Mental Game: How to Mentally Prepare for Cold Plunge Challenges
The physical benefits of cold water are vast, but the mental benefits are arguably more impactful. Every time you step into the water, you are practicing the act of doing something difficult. This builds a “mental muscle” that makes other life challenges feel more manageable.
Consistency is the hardest part of the journey. The novelty of the ice wears off after a week, and that is when the real work begins. To stay consistent, you need to stop viewing it as a chore and start viewing it as a 30-day cold plunge challenge to reset your baseline of comfort.
How to Make Cold Plunge Easier Over Time
One of the best ways to stay in the game is to use mental anchors. This could be a specific song you play every time or a mantra you repeat during the first 60 seconds. Having a routine reduces the “decision fatigue” of whether or not to get in the water.
Visualization also plays a huge role. Before you even open the lid of your tub, visualize yourself sitting calmly in the water and exiting feeling energized. If you can win the battle in your mind before your feet get wet, the physical sensation becomes much easier to handle.
Maintenance 101: How to Get Your Cold Plunge Cold and Keep It Clean
A dirty or lukewarm plunge is the fastest way to kill your motivation. If you are using a DIY setup, you are the head of water chemistry. Without proper filtration, bacteria can bloom quickly in the standing water, leading to skin irritation or worse.
Maintaining a temperature of 50°F or lower is also a challenge in the summer months. Without a dedicated chiller, you’ll need to get creative with how you manage the thermal load of the environment.
Keeping It Chilly: How to Get Cold Plunge Colder in Summer
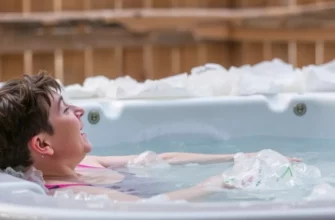
To keep costs down, freeze large blocks of ice in silicone molds or recycled plastic containers rather than buying bags of ice. Large blocks have less surface area and melt much slower, providing a more sustained cooling effect for your tub.
Insulation is your best friend. If your tub is outdoors, wrap it in a thermal pool cover or even a layer of Reflectix insulation. Keeping the tub in a shaded area and adding a tight-fitting lid will significantly reduce the energy needed to keep the water at your target temperature.
In my professional experience, the biggest mistake people make is chasing “colder and longer” as if it’s an Olympic sport; I always advise my clients to focus on the Minimum Effective Dose. You don’t need to stay in for 10 minutes at 33°F to see results; for the vast majority of people, 2 to 3 minutes at 50°F to 55°F is the sweet spot for metabolic and mental benefits. This practice should have a sobering, clarifying effect on your day, not leave you shivering for three hours. If you have any history of heart conditions, please get medical clearance first, as the initial shock is a significant cardiovascular event.
Frequently Asked Questions
Start with 30 to 60 seconds to assess your tolerance. As your body adapts to the cold shock, gradually build up to 2-3 minutes, which is sufficient for most health benefits.
What is the best temperature for a cold plunge at home?
For beginners, a range of 50°F to 59°F (10°C to 15°C) is ideal. You will still experience significant physiological benefits at these temperatures without the extreme risks of near-freezing water.
Can I cold plunge every day?
Yes, daily plunging is safe for most people, but it is not strictly necessary. Aiming for 3 to 4 sessions per week is usually enough to achieve long-term recovery and mental health goals.
Should I cold plunge before or after a workout?
Plunge before a workout for a mental boost and increased focus. If plunging for recovery, wait at least 4 hours after hypertrophy (muscle growth) training, as the cold can blunt the inflammatory response needed for muscle repair.
How do I keep the water clean without a filter?
Use food-grade hydrogen peroxide (roughly 1 cup per 100 gallons) and Epsom salts to inhibit bacterial growth. Additionally, ensure you shower before entering and change the water every 7 to 10 days.
Is it safe to cold plunge alone?
It is strongly discouraged for beginners to plunge alone. The risk of cold shock, fainting, or “the gasp reflex” leading to water inhalation is real; always have someone nearby until you are highly experienced.