- The Great Debate: DIY Cold Plunge Stock Tank or Chest Freezer?
- Why the DIY Cold Plunge Stock Tank is the Ultimate Beginner Build
- Watertight Secrets: How to Seal a Chest Freezer for Cold Plunge Use
- Choosing the Right Size: What Size Chest Freezer for Cold Plunge?
- Crystal Clear Water: Building a DIY Cold Plunge Pump and Filter System
- Circulation and Drainage: How Does the Odin Cold Plunge Drain?
- Mastering the Chill: How to Use an Inkbird Thermostat for Precision Cooling
- The Ice Dilemma: How to Make Ice for Cold Plunge vs. Using a Chiller
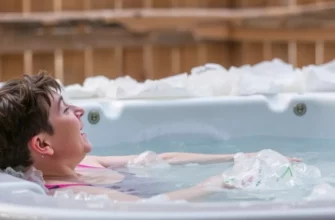
- From Heat to Ice: How to Turn a Hot Tub into a Cold Plunge
- Retrofitting the Plumbing for Cold Water Recovery
- High-Retention Safety Checklist: Why You Must Unplug Your Cold Plunge
- Maintaining Your Chest Freezer Cold Plunge
- Expert Perspective: The Safety-First Approach to DIY Cold Plunges
- Frequently Asked Questions
The Great Debate: DIY Cold Plunge Stock Tank or Chest Freezer?
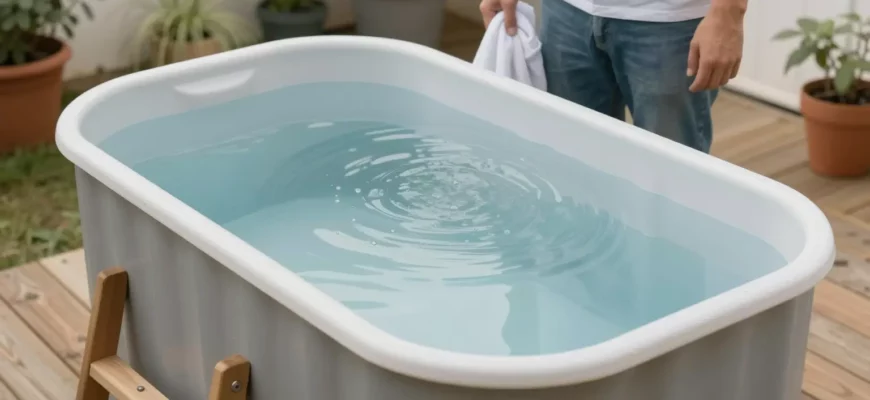
Choosing between a galvanized stock tank and a converted chest freezer is the first major fork in the road for any home recovery enthusiast. While both serve the same purpose of providing therapeutic cold stress, they operate on entirely different mechanical principles and require unique maintenance schedules.
Your decision should hinge on whether you prioritize ease of setup and structural durability or superior thermal insulation and energy efficiency. A stock tank is essentially a blank canvas that requires external cooling, whereas a freezer is a self-contained cooling unit that requires extensive waterproofing.
| Feature | Galvanized Stock Tank | Converted Chest Freezer |
|---|---|---|
| Initial Setup Difficulty | Low ⎯ Just fill it up or add a simple pump. | High ⎼ Requires 48-72 hours of sealing and curing. |
| Insulation | Poor ⎼ Requires DIY foam wrapping to hold temp. | Excellent ⎯ Factory-insulated walls keep water cold. |
| Cooling Method | Manual ice or expensive external chiller. | Built-in refrigeration compressor. |
| Durability | Indestructible ⎯ Can be left outdoors year-round. | Moderate ⎯ Vulnerable to rust and electrical failure. |
| Cost | $150 ⎼ $1,200 (depending on chiller). | $300 ⎯ $800 (including sealing supplies). |
Why the DIY Cold Plunge Stock Tank is the Ultimate Beginner Build
The primary appeal of the stock tank lies in its “set it and forget it” structural integrity. Unlike a freezer, which was never designed to hold the lateral pressure of 100 gallons of water, a galvanized steel or heavy-duty plastic stock tank is built to withstand livestock and the elements.
For most beginners, the ease of entry and exit is a significant safety factor; stock tanks generally have lower walls and a wider footprint, reducing the risk of slipping while in a state of cold shock. If you choose a metal tank, you gain a classic “industrial” aesthetic, though you must be aware that metal conducts heat rapidly, meaning your ice will melt faster unless you invest in a dedicated water chiller.
When you pair a stock tank with a 1/4 HP or 1/2 HP chiller, you create a professional-grade recovery station. This setup allows for precise temperature control without the daily chore of hauling ice bags. However, if you are on a budget, a plastic (poly) tank is often better for ice retention because plastic has a lower thermal conductivity than steel;
Watertight Secrets: How to Seal a Chest Freezer for Cold Plunge Use
Converting a chest freezer is the gold standard for budget-conscious biohackers, but it is a project that demands 100% precision. The internal seams of a freezer are designed to hold air, not pressurized water, and a single pinhole leak can lead to corrosion of the cooling coils or catastrophic electrical failure.
Success depends entirely on the preparation phase. You cannot simply squeeze silicone into the corners and hope for the best; you must mechanically etch the surface with sandpaper to ensure the sealant creates a permanent bond with the plastic or metal liner.
- Deep Clean and Degrease: Scrub every inch of the interior with 90% isopropyl alcohol to remove factory oils and residues.
- Sand the Seams: Use 120-grit sandpaper to roughen the areas where the floor meets the walls, as this provides the “tooth” needed for the sealant.
- Apply JB WaterWeld: Use this specialized epoxy putty for the main corner joints, as it cures rock-hard even in damp conditions.
- Layer with Marine-Grade Silicone: Apply a generous bead of 100% silicone over the epoxy, smoothing it with a gloved finger to ensure no air bubbles are trapped.
- The 72-Hour Rule: You must allow the sealant to cure completely in a dry environment before adding a single drop of water.
- Leak Testing: Fill the unit only 25% of the way and wait 12 hours before proceeding to a full fill to check for structural weeping.
Choosing the Right Size: What Size Chest Freezer for Cold Plunge?
Selecting a freezer that is too small leads to a cramped, uncomfortable experience that discourages daily use, while a unit that is too large wastes electricity and takes longer to cool. For the average adult, a 14.8 cubic foot freezer is the “Goldilocks” size, providing enough length to sit with legs extended without feeling like you are in a sardine can.
If you are under 5’8″, a 7 or 10 cubic foot unit might suffice, but remember that water displacement is a major factor. When you sit in the tank, the water level will rise significantly; therefore, you should only fill a freezer to about 60-70% capacity to avoid overflowing the sensitive electrical components near the top rim.
Compared to a portable cold plunge, which often holds about 75-80 gallons, a 14 cubic foot freezer holds roughly 100 gallons. This extra volume provides greater thermal mass, meaning the water temperature will stay more stable when you enter, rather than warming up immediately from your body heat.
Crystal Clear Water: Building a DIY Cold Plunge Pump and Filter System
Without a filtration system, your cold plunge will become a breeding ground for bacteria and biofilm within 72 hours. While the cold temperatures slow down microbial growth, they do not stop it entirely. A robust circulation system is the difference between a pristine home spa and a stagnant swamp.
A basic setup involves a submersible pump rated for at least 500 gallons per hour (GPH) connected to a 20-micron sediment filter. This setup ensures that skin cells, hair, and dust are physically removed from the water. For those who want to minimize water changes to once every few months, adding an ozone generator or a UV-C light sterilizer is highly recommended to kill pathogens at a molecular level.
Circulation and Drainage: How Does the Odin Cold Plunge Drain?
Professional units like the Odin have set the standard by using integrated bottom-drainage systems that utilize gravity and internal pressure to clear the tank. In a DIY build, you can replicate this by installing a high-quality stainless steel bulkhead through the side of your tank or freezer.
Constant water movement is vital because moving water cannot grow a “thermal layer” around your body. This layer of slightly warmed water acts as insulation, making the plunge feel easier; by using a pump to keep the water circulating, you ensure the cold stays “aggressive” and effective.
To prevent biofilm from forming in the corners, position your pump outlet so it creates a gentle vortex or circular flow pattern. When it comes time to change the water, having a dedicated drainage valve allows you to attach a garden hose and direct the water to a nearby drain or your garden, rather than using a bucket.
Mastering the Chill: How to Use an Inkbird Thermostat for Precision Cooling
The biggest risk to a chest freezer build isn’t just leaks—it’s the unit working too well. Freezer compressors are designed to reach sub-zero temperatures, which will eventually turn your water into a solid block of ice, potentially cracking the frame of the unit.
An external temperature controller, such as the Inkbird ITC-308, acts as a “brain” for your setup. You plug the freezer into the Inkbird, and the Inkbird into the wall. A waterproof probe sits in the water, and when the temperature rises above your set point (e.g., 39°F), the controller allows power to the freezer until the target is reached, then cuts the power immediately.
- DO: Set a temperature differential of at least 2-3 degrees to prevent the compressor from “short-cycling” (turning on and off too frequently).
- DO: Place the temperature probe in the middle of the water column for the most accurate reading.
- DONT: Trust the built-in freezer dial; these are notoriously inaccurate for liquid temperatures.
- DO: Use a GFCI-protected outlet for the Inkbird to ensure electrical safety.
- DONT: Set the temperature below 34°F, as this increases the risk of the water freezing around the cooling coils and causing permanent damage.
The Ice Dilemma: How to Make Ice for Cold Plunge vs. Using a Chiller
If you are using a stock tank without a refrigeration unit, you face the daily logistics of ice. Buying bagged ice is a “convenience trap” that can cost upwards of $20 per session. A more sustainable DIY approach is to use large silicone bread molds or 5-gallon buckets to freeze massive blocks of ice.
Large blocks have less surface area relative to their mass, meaning they melt much slower than small cubes. This provides a more consistent temperature drop and allows you to stay in the water longer. However, if you find yourself plunging more than three times a week, the labor of managing ice blocks usually justifies the cost of a dedicated 1/4 HP chiller.
To maximize your ice efficiency, insulate the exterior of your tank with 2-inch rigid foam board. By wrapping the tank and adding a heavy, insulated lid, you can maintain a temperature of 45°F for up to 24 hours even in moderate climates, drastically reducing the amount of ice needed for your next session.
From Heat to Ice: How to Turn a Hot Tub into a Cold Plunge
Many homeowners have an old, “dead” hot tub sitting in their backyard with a broken heater or leaking jets. These units are actually perfect candidates for a cold plunge conversion because they are already ergonomically designed, heavily insulated, and equipped with built-in plumbing and drainage.
The conversion process involves bypassing the heater manifold entirely. Since hot tub pumps are often too powerful (and loud) for a simple cold plunge, most DIYers choose to install a smaller, energy-efficient pond pump that feeds into a water chiller. You can reuse the existing jet holes to create a seamless “inflow” and “outflow” system for your chilled water.
Retrofitting the Plumbing for Cold Water Recovery
When repurposing an old spa, the first step is to flush the lines with a heavy-duty pipe cleaner to remove years of calcium buildup and “bio-junk” hidden in the PVC. Once the lines are clear, you can cap off unnecessary jets to focus the water pressure where you want it.
Outdoor tubs require extra attention to the lid. A high-quality marine-grade vinyl cover is essential to keep the sun’s UV rays from heating the water. By turning a hot tub into a cold plunge, you are essentially getting a $5,000 insulated shell for free, making it one of the most cost-effective ways to build a high-end “home recovery lab.”
High-Retention Safety Checklist: Why You Must Unplug Your Cold Plunge
Safety in the DIY cold plunge community is not a suggestion—it is a life-saving requirement. Mixing water and high-voltage appliances is inherently dangerous, especially when dealing with a chest freezer that was never intended for human submersion.
The most critical rule in the industry is the “Unplug Before You Plunge” policy. Even with a GFCI (Ground Fault Circuit Interrupter) outlet, there is a non-zero risk of electrical “stray current” leaking into the water through the freezer walls or a failing pump.
Critical Warning: Never rely solely on a thermostat or a power switch to keep you safe. Physically remove the plug from the wall socket before your skin touches the water. This eliminates the possibility of mechanical failure leading to electrocution.
Maintaining Your Chest Freezer Cold Plunge
A DIY build requires active management to stay safe and sanitary. Because a freezer is a sealed environment, humidity can build up under the lid, leading to mold growth on the upper rim where the sealant meets the plastic.
Weekly water testing is mandatory. Use standard pool test strips to check for pH and sanitizer levels. If you are using an ozone system, you may only need to add a tiny amount of hydrogen peroxide or chlorine once a week to maintain clarity. Additionally, clean your sediment filter every 14 days; a clogged filter puts unnecessary strain on your pump and reduces the cooling efficiency of your chiller.
Expert Perspective: The Safety-First Approach to DIY Cold Plunges
In my professional experience as someone who has consulted on dozens of custom recovery builds, I cannot overstate the electrical risks of DIY appliance wiring. Most people assume a standard GFCI outlet is a “bulletproof” shield, but those devices can fail or be wired incorrectly. I always advise my clients to install a dedicated 20-amp circuit for their plunge setup to avoid overloading household lines. Furthermore, the non-negotiable rule of disconnecting all power sources before entering the water is the only way to achieve 100% safety. Beyond the electricity, pay close attention to water chemistry; using too much chlorine in a small, unventilated freezer can lead to harmful off-gassing that irritates your lungs while you are trying to focus on your breathing.
Frequently Asked Questions
Yes, provided you seal all interior seams with marine-grade sealant to prevent leaks and completely unplug the unit from the wall before entering the water to eliminate electrocution risks.
How much water does a standard stock tank cold plunge hold?
Most DIYers use a 100-gallon to 150-gallon tank, which offers enough depth for a 6-foot adult to achieve full neck-deep submersion while remaining easy to drain and clean.
How do you make enough ice for a stock tank plunge?
The most effective method is freezing large 5-gallon buckets or silicone molds to create massive ice blocks, which have a much slower melt rate than standard bagged ice cubes.
How does the Odin cold plunge drain and circulate water?
The Odin features a built-in filtration and ozone system that constantly pulls water through a filter; it includes a dedicated drainage valve at the base for quick, tool-free water changes.
What is the best way to insulate a DIY cold plunge?
For stock tanks, wrap the exterior in 2-inch rigid foam insulation and build a cedar or pressure-treated wood frame around it to create an air gap that significantly slows heat transfer.
Why should I use an Inkbird thermostat for my freezer plunge?
An Inkbird overrides the factory cooling settings, allowing you to maintain a precise temperature like 39°F, which prevents the unit from running non-stop and turning the water into a block of ice.