- Choosing the Right Cold Plunge for Your House Based on Space and Budget
- Evaluating the Cold Plunge Home Unit vs․ DIY Solutions
- The High-Performance DIY Build: Using a Trash Can, Barrel, or Stock Tank
- Why the Cold Plunge Tub Barrel is a Classic Choice
- Technical Essentials: Understanding Your Cold Plunge Plumbing Diagram
- Installing a Cold Plunge Drain and Hose System
- Cold Plunging in Small Spaces: Solutions for Apartments and Bathrooms
- The Cold Plunge for Apartment No Ice Strategy
- Temperature Control: From Basic Coolers to All-in-One Chillers
- How a Cold Plunge Tub Cooler Saves Money and Time
- Maintenance and Longevity: Keeping Your Home Setup Pristine
- Finding Cold Plunge Repair Near Me and Routine Troubleshooting
- Expert Perspective: Residential Hydrotherapy Integration
- Frequently Asked Questions
Choosing the Right Cold Plunge for Your House Based on Space and Budget
The shift toward residential hydrotherapy has transformed the standard garage or backyard into a high-performance recovery zone․ Bringing a cold water plunge into your house is no longer reserved for professional athletes; it is a practical addition for anyone serious about metabolic health and inflammation control․
The first step in your journey involves a realistic assessment of your environment and your wallet․ You must decide whether you want a “plug-and-play” luxury unit that manages its own chemistry and temperature or a rugged, DIY setup that requires a bit more elbow grease but saves thousands of dollars upfront․
Evaluating the Cold Plunge Home Unit vs․ DIY Solutions
Commercial cold plunge units for your home often come with price tags ranging from $4,000 to $15,000․ These systems are engineered with integrated 20-micron filters, ozone sanitation, and high-efficiency chillers that can hold water at a steady 39 degrees Fahrenheit indefinitely․ For a busy professional, the primary “pro” here is the elimination of the maintenance mental load, as the machine does the heavy lifting․
On the other side, DIY solutions like a modified chest freezer or a stock tank offer a gateway into cold water therapy for under $1,000․ While the initial cost is lower, you must account for the ongoing expense and logistical headache of buying 40 to 60 pounds of ice for every session if you don’t invest in a dedicated chiller․ Over two years, a $500 DIY tub plus ice costs can easily exceed the price of a mid-range $2,500 dedicated home unit․
The High-Performance DIY Build: Using a Trash Can, Barrel, or Stock Tank
If you are a weekend warrior looking for a budget-friendly entry point, the “trash can” method is surprisingly effective․ This approach focuses on vertical immersion, which allows for a smaller footprint and better hydrostatic pressure on the lower limbs․ Choosing the right material is the difference between a tub that lasts one season and one that survives a decade․
| Container Type | Durability | Insulation Quality | Estimated Cost |
|---|---|---|---|
| Heavy-Duty Trash Can (HDPE) | Moderate | Low (Requires Wrap) | $60 ⎻ $150 |
| Reconditioned Wine Barrel | High | Natural (Wood) | $150 ⎻ $300 |
| Galvanized Stock Tank | High | Very Low (Condensation Risk) | $200 ⎻ $500 |
Why the Cold Plunge Tub Barrel is a Classic Choice
The vertical barrel setup is the gold standard for many DIY enthusiasts because it forces the body into a compact, seated position․ This position ensures the vagus nerve is fully submerged, which is a primary trigger for the parasympathetic nervous system response․ When using a wooden barrel, you must first “swell” the wood by keeping it filled with water for several days to ensure the staves expand and create a watertight seal․
A common pitfall with a cold plunge garbage can setup is the lack of structural reinforcement․ When you fill a 100-gallon plastic bin with water, the sides will bow outward significantly․ To prevent a structural failure, always use a bin rated for heavy-duty storage or reinforce the exterior with ratchet straps to maintain the container’s integrity over time․
Technical Essentials: Understanding Your Cold Plunge Plumbing Diagram
Plumbing is the most intimidating phase of any home installation, especially when moving water through expensive chillers․ A standard setup follows a specific loop: the tub acts as the reservoir, a submersible or external pump pulls water through a sediment filter, and then the water passes through the chiller before returning to the tub․ Always place the filter before the chiller to prevent debris from clogging the delicate heat exchanger fins inside the cooling unit․
- Install the Bulkhead Fitting: Drill a hole near the bottom of your tub and install a 3/4-inch or 1-inch bulkhead fitting with rubber gaskets on both sides․
- Connect the Pump: Attach a reinforced suction hose from the bulkhead to your water pump, ensuring all threaded connections use Teflon tape․
- Inline Filtration: Route the pump’s output into a 10-inch or 20-inch canister filter housing containing a pleated polyester filter․
- Chiller Integration: Connect the filter’s output to the “Inlet” port of your chiller using high-pressure braided tubing․
- Return Line: Run the final hose from the chiller’s “Outlet” back over the top of the tub or through a second bulkhead fitting․
Installing a Cold Plunge Drain and Hose System
For indoor setups, the drainage strategy is the most critical safety component․ You cannot simply pull a plug and let 100 gallons of water hit your floor․ Most high-end installations utilize a dedicated cold plunge plumbing manifold that allows you to toggle between “Loop Mode” (filtering) and “Drain Mode” (emptying)․
When selecting a cold plunge drain hose, avoid cheap garden hoses that can kink under the vacuum pressure of a pump․ Instead, opt for 1-inch ID (Inner Diameter) non-kink pond tubing or a professional-grade hose․ If you are using premium fixtures like a Dornbracht cold plunge hose, ensure your fittings are compatible with NPT (National Pipe Thread) standards to avoid slow drips that can cause long-term subfloor rot․
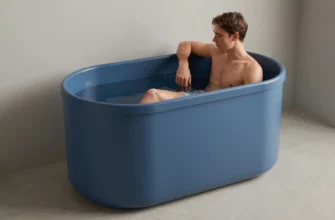
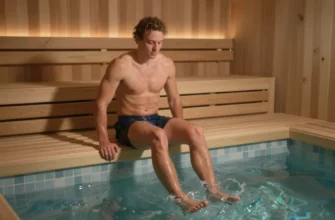
Cold Plunging in Small Spaces: Solutions for Apartments and Bathrooms
Setting up a cold plunge for small spaces requires a shift in perspective from “permanent installation” to “modular efficiency․” In an apartment, the primary enemies are weight and moisture․ A 100-gallon tub weighs approximately 830 pounds plus the weight of the occupant․ Always verify your floor’s load-bearing capacity with your building manager before placing a large tub in an upstairs unit․
- Do: Use a high-quality drip tray or an industrial pond liner underneath the tub to catch condensation and splashes․
- Do: Invest in a dehumidifier for the room to manage the moisture created by the temperature differential between the water and the air․
- Don’t: Place a cold plunge directly on carpet; the trapped moisture will create a mold colony within weeks․
- Don’t: Leave the unit uncovered, as this increases humidity levels and allows the water to warm up faster․
The Cold Plunge for Apartment No Ice Strategy
If you lack the space for a massive chiller and a 100-gallon tank, consider a bathtub attachment system․ These compact units use a small-scale chiller that hooks directly to your existing porcelain tub via suction cups and a portable pump․ This allows you to transform your standard bathroom into a recovery suite without a permanent footprint․
To protect your bathroom floor, always use a cold plunge drip tray with at least a 2-inch lip․ This tray serves as a secondary containment zone for the “sweat” or condensate that naturally forms on the outside of non-insulated tubs․ Without this, water will seep under your baseboards, leading to expensive structural damage and potential lease violations․
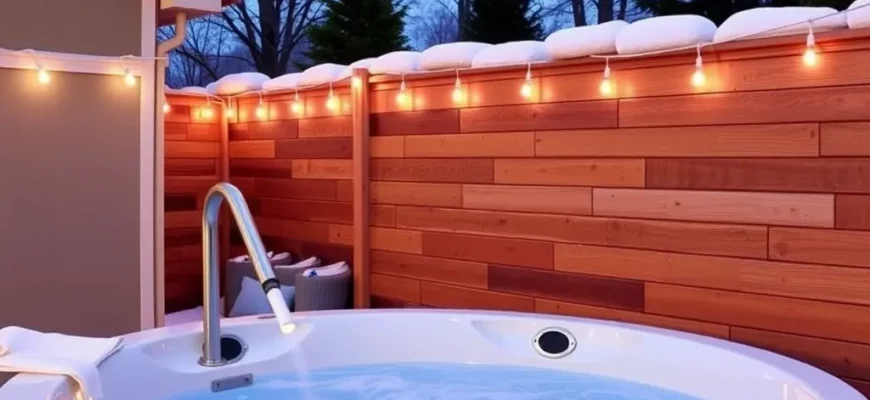
Temperature Control: From Basic Coolers to All-in-One Chillers
The “science of the chill” is about more than just cold water; it is about thermal mass․ A human body at 98․6 degrees is a massive heat source․ When you step into a 45-degree tub, the water temperature will immediately spike․ This is why a simple cold plunge tub cooler or an insulated chest freezer is superior to an uninsulated plastic bin—it maintains the “thermal inertia” required for an effective session․
Some high-end residential units now incorporate a cold plunge water heater․ While this sounds counterintuitive, it serves two purposes: first, it allows for “contrast therapy” (switching between hot and cold), and second, heating the water to 104 degrees periodically helps kill bacteria that cold water alone cannot eliminate․
How a Cold Plunge Tub Cooler Saves Money and Time
Dedicated chillers are rated by horsepower (HP), with 1/2 HP being the sweet spot for home use․ A 1/2 HP chiller can pull 100 gallons of water down from 75 degrees to 40 degrees in about 4 to 6 hours․ While the upfront cost is higher than buying ice, the electricity cost to run a chiller is typically less than $1 per day, whereas a single bag of ice can cost $3 to $5․
If you are looking for ultimate convenience, some premium units make their own ice․ These systems use an evaporator plate inside the tub walls to create a thin layer of ice․ This ensures the water stays at a true 32․1 degrees, providing the most intense cold shock response possible without the logistical nightmare of hauling heavy bags from the grocery store․
Maintenance and Longevity: Keeping Your Home Setup Pristine
A cold plunge is a living ecosystem․ Without proper maintenance, the water will become a breeding ground for biofilm and bacteria within days․ Because the water is cold, traditional chlorine is less effective and can be harsh on the skin․ Instead, many home users prefer food-grade hydrogen peroxide (35% concentration) combined with a UV-C light sterilizer to keep the water crystal clear without the “pool smell․”
- Weekly: Check the filter canister and rinse the pleated filter; replace it if it shows signs of grey or brown staining․
- Weekly: Test the water pH; aim for a neutral 7․2 to 7․6 to prevent corrosion of the chiller’s internal coils․
- Monthly: Vacuum the bottom of the tub to remove skin cells and debris that the filter might have missed․
- Quarterly: Deep clean the chiller’s condenser fins using compressed air to ensure maximum airflow and cooling efficiency․
Finding Cold Plunge Repair Near Me and Routine Troubleshooting
Even the best setups face technical hurdles․ The most common point of failure is the water pump․ If you hear a high-pitched grinding noise, it usually indicates that air is trapped in the lines (cavitation) or the impeller is clogged with hair․ Before calling a professional, try “burping” the system by loosening a fitting slightly while the pump is running to let the air escape․
If your chiller stops cooling but the fan is still spinning, you may have a refrigerant leak or a failed compressor․ For these issues, searching for “cold plunge repair near me” might be difficult as the industry is niche․ Instead, contact a local aquarium specialist or a commercial refrigeration technician, as the internal components of a cold plunge chiller are nearly identical to those used in high-end reef tanks․
Expert Perspective: Residential Hydrotherapy Integration
In my professional experience as a residential contractor specializing in wellness retrofits, the single most overlooked factor in home cold plunges is vapor management and structural loading․ I have seen enthusiasts place 150-gallon stock tanks on second-story wooden decks without realizing they are adding over 1,200 pounds of static weight to a localized 15-square-foot area․ I always advise clients to consult a structural engineer or stick to ground-floor garage installations where concrete slabs can easily handle the load․ Furthermore, if you are installing a unit in a bathroom, you must upgrade your exhaust fan to a high-CFM (Cubic Feet per Minute) model․ The temperature differential between the cold water and a warm shower creates significant condensation that, if not vented, will lead to mold growth behind your drywall within the first six months of use․
Frequently Asked Questions
Yes, but you must verify that your floor joists can support the weight․ A standard tub holds about 40-60 gallons, but a cold plunge often holds 100+ gallons, weighing over 800 lbs․ Use a drip tray to protect against floor damage․
What is the best way to drain a cold plunge inside an apartment?
Use a submersible utility pump connected to a long 1-inch drainage hose․ Run the hose directly into your shower drain or toilet to ensure the water is disposed of safely without flooding the bathroom floor․
How do I keep my homemade cold plunge water clean without a filter?
Without a filter, you must change the water every 2-3 days․ Use 35% food-grade hydrogen peroxide (roughly 1 cup per 100 gallons) to oxidize organic matter and always shower before entering the tub․
Is a trash can actually effective for cold plunging?
Absolutely; A 55-gallon heavy-duty trash can provides excellent vertical immersion, which is ideal for the “vagus nerve soak․” However, you will need more ice than an insulated tub because the plastic walls have zero R-value․
Does a cold plunge that makes its own ice require special plumbing?
Most self-icing units are “plug-and-play” and only require a standard 110V/15A dedicated circuit․ They do not need a permanent water line, as you can fill them with a garden hose, but they do require a nearby drain for periodic cleaning․