- Crystal Clear Recovery: Why an Ozone Generator for Cold Plunge Systems is the Ultimate Sanitizer
- How a Water Ozone Generator Keeps Your Ice Bath Chemical-Free
- Comparison: Ozone vs. Traditional Chemicals for 100-Gallon Tubs
- Achieving the Perfect Chill: Ice Makers, Molds, and Water Coolers
- Choosing Between a Dedicated Chiller and High-Volume Ice Molds
- Mastering Water Movement: Inline Pumps and Bubbler Systems
- Setting Up an Inline Circulation System for Consistent Cooling
- Step-by-Step: Installing Your Water Circulation and Ozone Kit
- Durability and Tracking: Stainless Steel Tubs and Precision Timers
- Why Material Choice Matters for Your Home Ice Bath
- Maintenance and Troubleshooting: Draining, Filling, and Beeping Errors
- Solving Common Electrical and Flow Issues
- Checklist: Weekly Maintenance for a Crystal Clear Plunge
- Frequently Asked Questions
Crystal Clear Recovery: Why an Ozone Generator for Cold Plunge Systems is the Ultimate Sanitizer
Maintaining a cold plunge isn’t just about the temperature; it’s about the biological safety of the water you are submerging your body into. When you sit in 40-degree water, your skin pores react, and any bacteria present in the water can become a major hygiene issue.
Traditional pool chemicals like chlorine or bromine are effective, but they come with a heavy chemical scent and can irritate the skin and eyes during a long soak. This is where a water ozone generator for cold plunge setups changes the game by using trivalent oxygen (O3) to oxidize organic matter on contact.
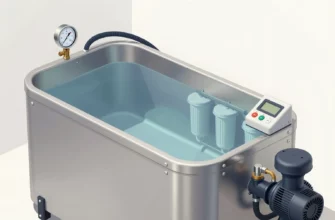
How a Water Ozone Generator Keeps Your Ice Bath Chemical-Free
An ozonator works by pulling oxygen from the air and hit it with a high-voltage discharge, creating ozone gas. When this gas is injected into your plumbing line via a venturi injector, it acts as a much more powerful oxidizer than chlorine. This process destroys skin oils, sweat, and waterborne pathogens instantly, leaving behind nothing but pure oxygen as a byproduct.
For those managing a chemical treatment for a 100 gal cold plunge pool, an ozonator significantly reduces the “organic load.” This means you won’t have to deal with that slimy film that often develops on the walls of plastic or stock tank tubs. Because the O3 molecule is unstable, it does its job and then dissipates, making it a perfectly safe, residue-free solution for daily plungers.
To maximize safety, you should always install a check valve between the ozonator and the injector to prevent water from backing up into the electronics. Additionally, running your ozonator on a dedicated timer—typically 30 minutes after each session—ensures the water remains sterile without over-saturating the surrounding air with O3 gas.
Comparison: Ozone vs. Traditional Chemicals for 100-Gallon Tubs
Choosing the right sanitation method depends on your budget and how much time you want to spend testing water strips. While chemicals are cheaper upfront, they require constant monitoring of pH and alkalinity levels to remain effective.
| Feature | Ozone Generator (O3) | Standard Chemicals (Chlorine/Bromine) |
|---|---|---|
| Maintenance Effort | Set and forget; automated cycles. | Weekly testing and manual dosing required. |
| Skin & Eye Comfort | Softens water; no irritation or smell. | Can cause dry skin, redness, and “pool smell.” |
| Long-term Cost | Higher initial cost ($200-$500); low ops. | Low initial cost; $150+/year in supplies. |
| Water Longevity | Water stays clear for 3-6 months. | Water usually needs changing every 4-8 weeks. |
Achieving the Perfect Chill: Ice Makers, Molds, and Water Coolers
The most common hurdle for any home recovery enthusiast is maintaining a consistent temperature between 39°F and 45°F. While the “purist” method involves dumping bags of ice into a tub, the logistics of hauling 60 pounds of ice every morning quickly becomes a deterrent to a daily habit.
If you are building on a budget, finding the best ice maker for cold plunge use usually means looking for a commercial-grade nugget or flake machine. However, for most DIY builds, the shift is moving toward automated water cooler for cold plunge systems, also known as water chillers, which provide 24/7 temperature control.
Choosing Between a Dedicated Chiller and High-Volume Ice Molds
For those who prefer the manual route, using an ice block mold for cold plunge sessions is far superior to buying bags of cubed ice. Large blocks have a much higher thermal mass, meaning they melt slower and drop the water temperature more effectively without diluting the tub as quickly. Silicone molds that produce 10lb blocks are the gold standard here, as they are easy to pop out and stack in a chest freezer.
On the other hand, if you value convenience, a 1/2 HP or 1 HP water chiller is the ultimate upgrade. These units function like a reverse heater, pulling water through a heat exchanger and pumping it back into the tub. To ensure your chiller doesn’t work overtime, you must invest in the best insulation for cold plunge setups, such as closed-cell spray foam or 2-inch thick rigid foam boards wrapped around the exterior of your vessel. Insulating the bottom of the tub is often the most overlooked step; preventing heat transfer from a hot garage floor can save you 15% on your monthly electricity bill.
Mastering Water Movement: Inline Pumps and Bubbler Systems
Stagnant water is the enemy of a high-quality cold plunge. Without circulation, the water develops “thermal layers,” where a thin sleeve of warm water forms around your body, insulating you from the cold and reducing the efficacy of the treatment.
An effective water circulation system for cold plunge setups solves two problems: it ensures the water is evenly chilled and it forces the water through your filtration and ozone stages. Choosing between an inline pump for cold plunge builds and a submersible pump is the first major technical decision you will face.
Setting Up an Inline Circulation System for Consistent Cooling
I generally recommend an inline pump over a submersible one for permanent installations. Inline pumps, like the Danner Mag-Drive series, sit outside the water, which prevents electrical components from being submerged and allows for easier maintenance. When plumbing your system, ensure the water flow plunger and cold inlet are positioned on opposite ends of the tub to create a “cross-flow” that eliminates dead zones where bacteria might congregate.
Adding a bubbler for cold plunge use—essentially an air stone or a venturi air injector—is a secret weapon for advanced users. The movement of the bubbles breaks the thermal boundary layer on your skin, making 40-degree water feel significantly colder and more intense. If you are using a submersible pump for cold plunge temporary setups, ensure it is a “utility pump” rated for continuous 24/7 run times, otherwise, the motor will burn out within months of heavy use.
Step-by-Step: Installing Your Water Circulation and Ozone Kit
Plumbing a professional-grade system requires precision to avoid leaks that could damage your home or garage. Follow these steps to integrate your pump and ozonator correctly.
- Drill and Install Bulkheads: Use a hole saw to create two openings in your tub—one low for the suction and one high for the return. Always apply a generous bead of marine-grade silicone to both sides of the bulkhead before tightening.
- Mount the Pump: Place your inline pump on a rubber vibration pad to reduce noise. Ensure the pump is situated below the water line so it remains naturally primed.
- Install the Venturi Injector: Place the ozone injector on the return line (after the pump and filter). The “suction” port of the venturi should point upward to prevent water from entering the ozone tube.
- Connect the Ozonator: Run a 1/4 inch Kynar (ozone-resistant) tube from the generator to the venturi. Install two check valves in series to provide a fail-safe against backflow.
- Seal the Joints: Use PVC cement for rigid pipes or high-quality hose clamps for flexible tubing. For extra security on threaded fittings, apply Flex Seal for cold plunge joints or liquid PTFE to ensure a watertight bond.
- Prime and Test: Fill the tub, open the valves, and check for leaks. Turn on the pump first, then the ozonator, ensuring you see tiny bubbles entering the tub through the return jet.
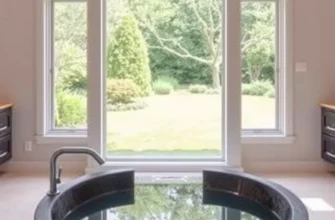
Durability and Tracking: Stainless Steel Tubs and Precision Timers
The vessel you choose dictates the longevity of your setup. While stock tanks are popular, a stainless steel cold plunge tub is the premium choice for those looking for a “forever” solution. Stainless steel is non-porous, meaning it won’t harbor bacteria in microscopic scratches like plastic or rubberized tubs do.
Furthermore, tracking your exposure is vital for safety. Using a high-quality water thermometer for cold plunge monitoring allows you to dial in the exact temperature needed for metabolic benefits vs. recovery benefits.
Why Material Choice Matters for Your Home Ice Bath
Stainless steel offers superior thermal conductivity, which allows a chiller to cool the water faster, though it also requires better external insulation to hold that temperature. If you are a beginner or a renter, a cold plunge-hyoga portable 110 volt plug and play unit is an excellent entry point. These inflatable but rigid tubs use drop-stitch technology (like paddleboards) to provide a firm structure that can be deflated and moved easily.
Regardless of the tub type, always use a digital timer to track your sessions. Exposure beyond 10 minutes at temperatures below 40 degrees can lead to hypothermia; 2 to 5 minutes is the clinical “sweet spot” for triggering the release of norepinephrine and cold-shock proteins.
Maintenance and Troubleshooting: Draining, Filling, and Beeping Errors
Owning a cold plunge is 90% enjoyment and 10% logistics. Eventually, you will need to perform a deep clean. Knowing how to drain plunge cold plunge systems efficiently is key—use a dedicated submersible sump pump to empty 100 gallons in under 10 minutes rather than relying on a slow-dripping garden hose gravity drain.
If you are using an all-in-one commercial unit, you might eventually encounter the dreaded edge cold plunge beeping error. This is almost always a safety feature triggered by a flow sensor.
Solving Common Electrical and Flow Issues
Beeping usually indicates a “Low Flow” (LF) or “High Limit” (HL) error. First, check your 20-micron sediment filter; if it’s brown or clogged, the pump can’t push enough water, causing the chiller to freeze internally. If the filter is clean, you likely have an airlock in your peristaltic pump cold plunge system. To fix this, slightly loosen the highest fitting in your plumbing while the pump is running to let the trapped air hiss out.
For those installing high-powered 1 HP chillers, check your home cold plunge pool electrical 30a requirements. Most standard garage outlets are 15A or 20A. A powerful chiller and pump combo can trip a breaker during the initial cooling phase, so installing a dedicated 30-amp GFCI-protected circuit is a smart move for safety and performance.
Checklist: Weekly Maintenance for a Crystal Clear Plunge
Consistency in maintenance prevents the “swamp water” scenario that ruins the experience. Follow this weekly routine to keep your system running at peak performance.
- Check the Filter: Remove the pleated filter and rinse off any hair or skin cells. Replace the filter cartridge every 3-4 weeks regardless of how clean it looks;
- Verify Ozone Production: Look for the “purple glow” in the ozone tube or check for the distinct fresh scent near the return jet to ensure the O3 generator is firing.
- Skim the Surface: Use a fine-mesh net to remove any floating debris that escaped the main filter.
- Wipe the Waterline: Use a microfiber cloth to wipe the “ring” at the top of the water level to prevent biofilm buildup.
- Test Water Levels: Evaporation can lower the water level, causing the pump to suck in air. Top off the tub to keep the return jet fully submerged.
- Sanitize the Cover: Wipe the underside of your insulated lid with a mild vinegar solution to prevent mold growth from condensation.
In my professional experience, an ozone generator is the most powerful tool in your arsenal, but it is not a magic wand. I always advise my clients that sanitation is a three-legged stool: filtration, oxidation, and circulation. If you have a high-end ozonator but a weak pump, the “dead zones” in the corners of your tub will still grow algae. Furthermore, ozone has a very short half-life. If you don’t shower before you plunge, the organic load from skin oils and deodorants can overwhelm a residential-grade ozonator. For the best results, pair your ozone system with a 20-micron sediment filter and commit to a 30-second pre-plunge rinse. This simple habit will extend your water life from weeks to months.
Frequently Asked Questions
Yes, most residential cold plunge ozonators produce low concentrations of O3 that are safely dissolved in the water. However, for maximum safety and to avoid breathing in any off-gassed ozone, set your generator to run on a timer for 30 minutes after you finish your session when the room is unoccupied.
How many gallons of water are used in a standard cold plunge pool?
Most dedicated home units and stock tanks hold between 60 and 100 gallons of water. This volume is ideal because it provides enough thermal mass to stay cold while remaining small enough for a 1/2 HP chiller to cool efficiently within a few hours.
Why is my cold plunge machine beeping and how do I fix it?
Beeping is almost always a Low Flow (LF) error. This occurs when the water isn’t moving fast enough to protect the chiller’s heat exchanger. To fix it, replace your filter cartridge immediately or check the pump intake for obstructions like hair or debris.
Can I use a submersible pump instead of an inline pump?
You can, but it’s not ideal for permanent setups. Submersible pumps are easier to “drop in,” but inline pumps allow for a cleaner external plumbing manifold where you can easily integrate ozone injectors and UV sterilizers without cluttering the tub.
Do I still need to change the water if I use an ozonator?
Yes. While an ozonator kills bacteria, it doesn’t remove Total Dissolved Solids (TDS) like salts and minerals from your sweat; You should perform a full drain and fill every 3 to 6 months to keep the water feeling “light” and fresh.
What is the best water thermometer for a cold plunge?
I recommend a digital floating thermometer with a wireless remote display. This allows you to check the water temperature from your kitchen or phone before you walk out to the garage, ensuring the water is at your target temp before you strip down.